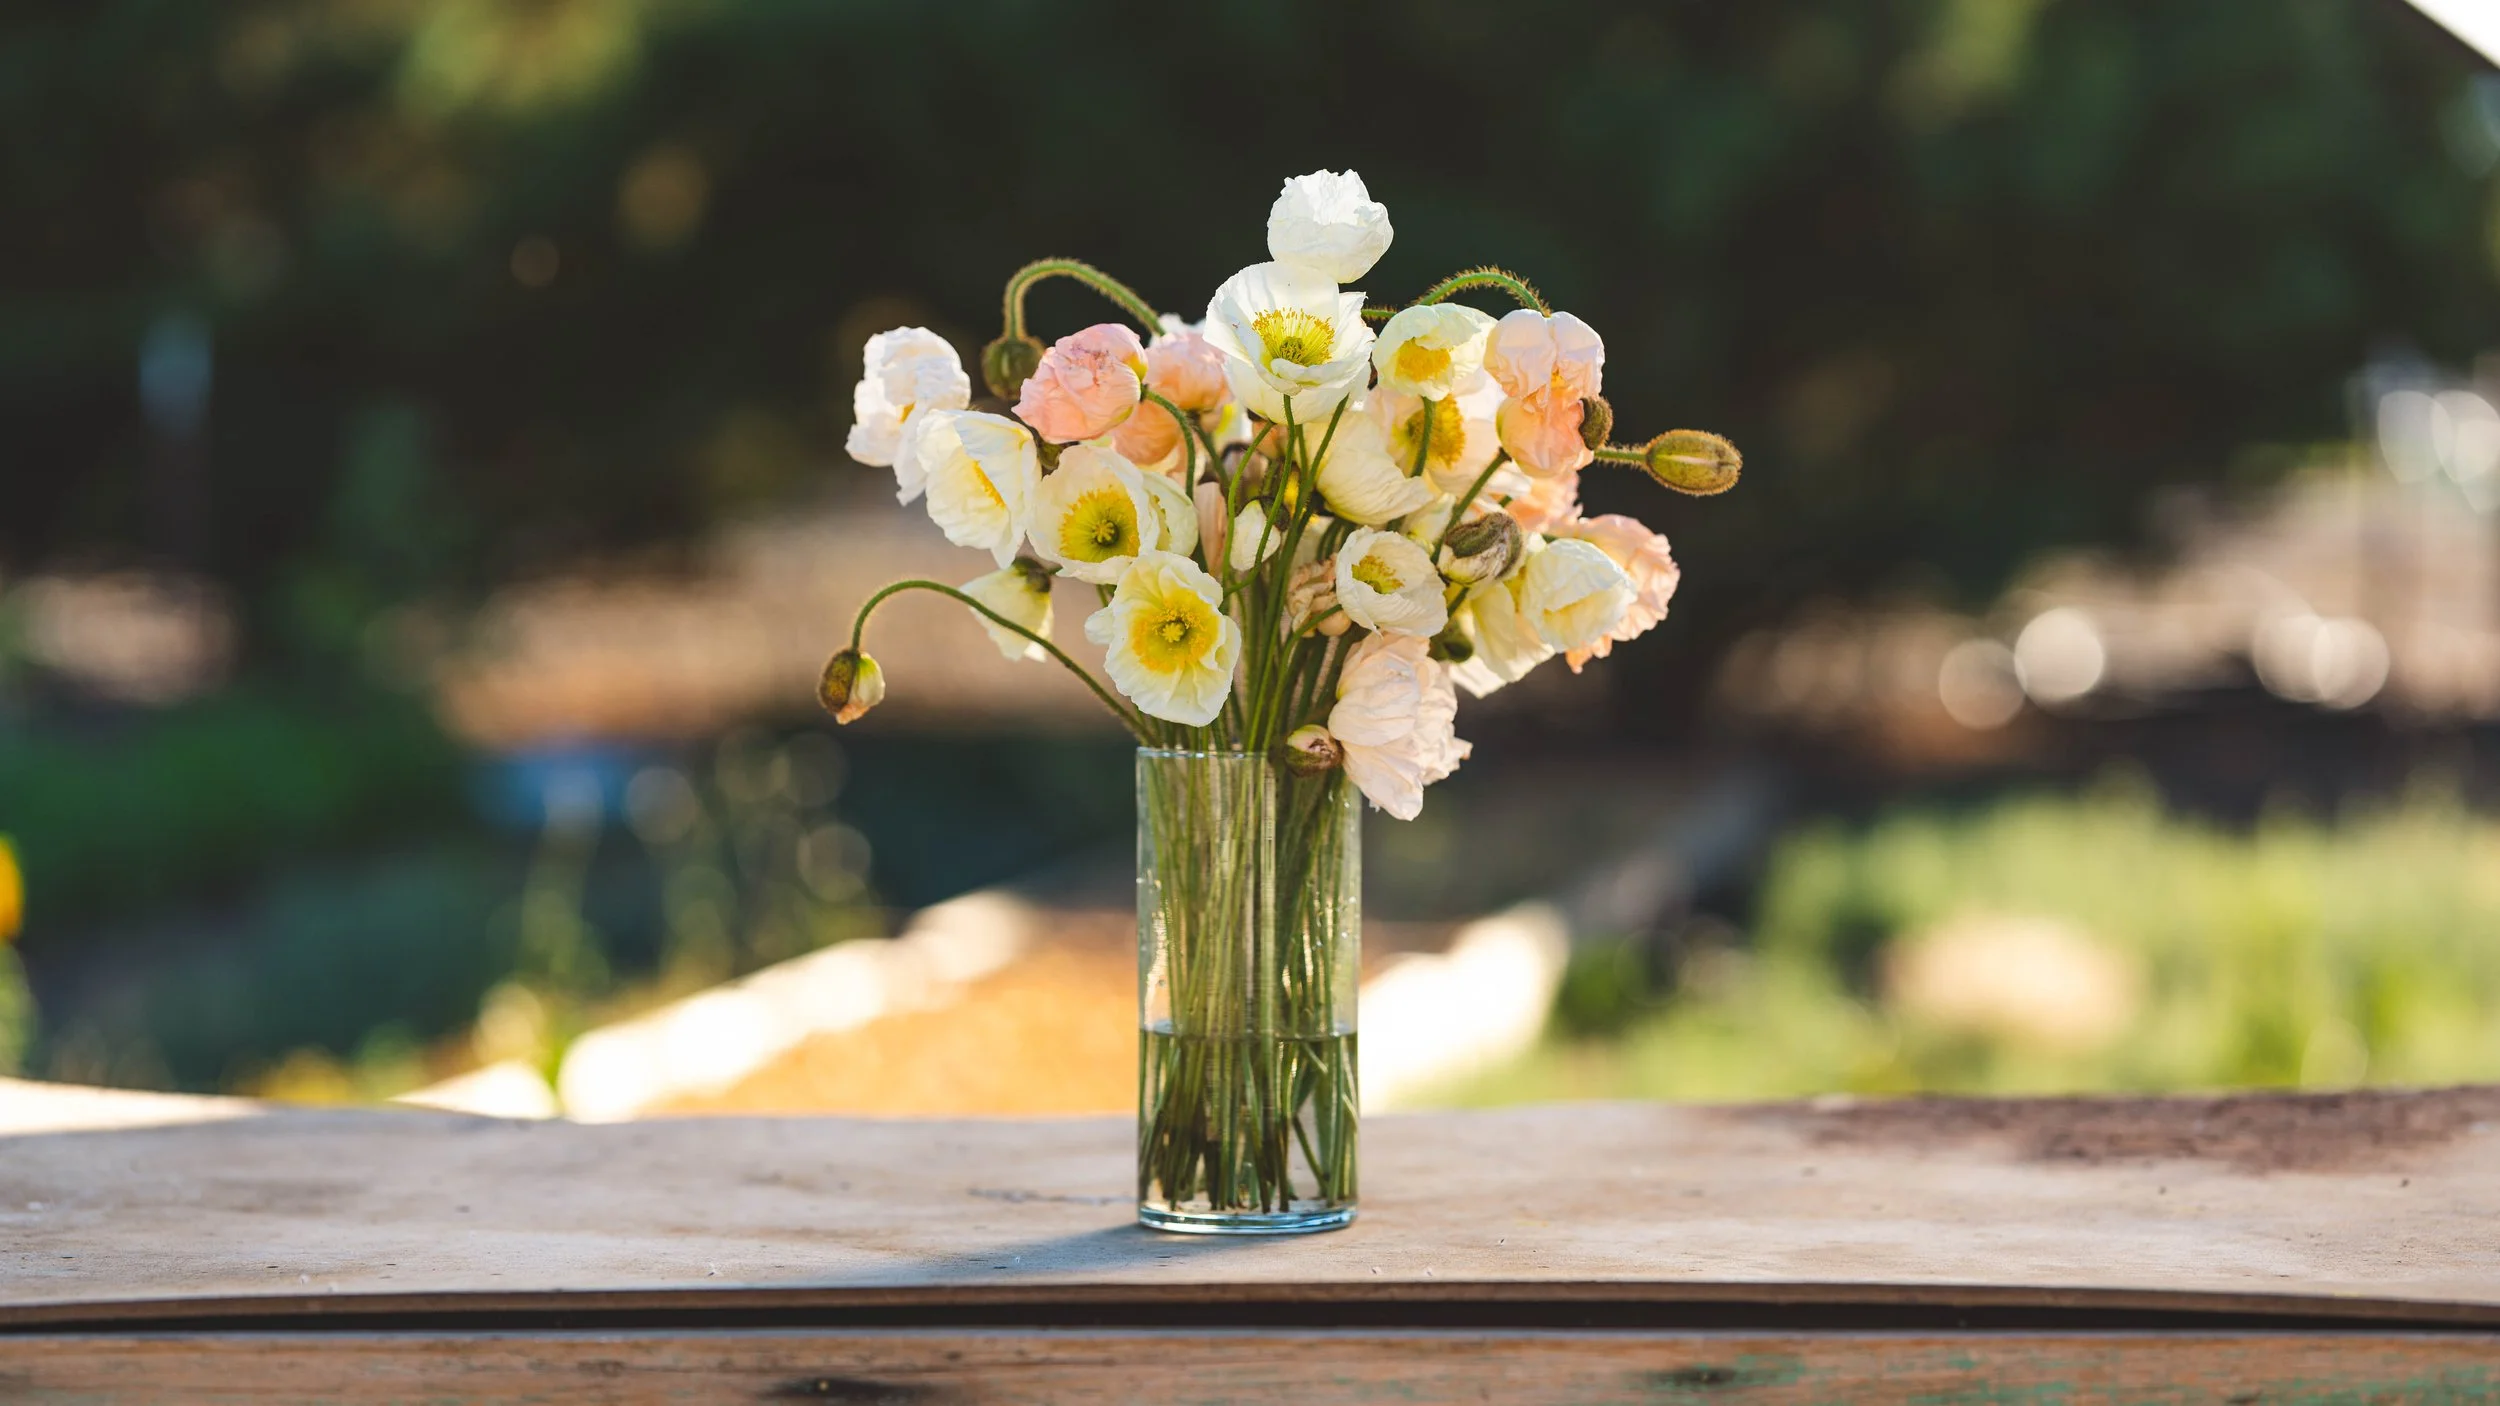
Iceland Poppies
I’ve always loved poppies. Some of my earliest memories are of going on walks with my Mom in our San Jose neighborhood with my chubby hands outstretched to grasp a cheerful orange flower growing in the cracks of cement. Before I could even feel the silkiness of the petals, my Mom took my hand and explained that is was the state flower and I was not allowed to pick it. My husband had a similar experience but with his towering older brother threatening to “call the police” on him if he picked the flower. Such an elusive flower to a child! So bright and tempting. Guess pretty much anyone that has visited or grown up in California has gotten a similar lesson as a child: don’t pick the California poppy.
Now living in Nevada and as an adult I laugh about this. The California poppy gives a lively flush of color but it spreads easily and grows in even the worst of soil. It’s pretty much a weed. Our children now get to partake in picking the flower in a sidewalk crack on our walks. Of course, they aren’t the best for picking. By the time we make it around the block, it has gone limp and sad. Still a treasure to a child, we put the sad wilted flower in a bud vase upon the dresser in their bedroom, where they can bask in all its droopy glory.

There are many varieties of poppies with unique purposes: from breadseed to medical uses (you know which one I’m referring to!). Unfortunately, many of the varieties flowers, though gorgeous, do not last more than a day or two- not that for great my bouquet subscribers! As a flower farm specializing in cut flowers, we are going to be focusing on one of my favorite varieties that makes a delightful cut flower with an exceptional vase life: papaver nidicaule, commonly known as the Iceland poppy.

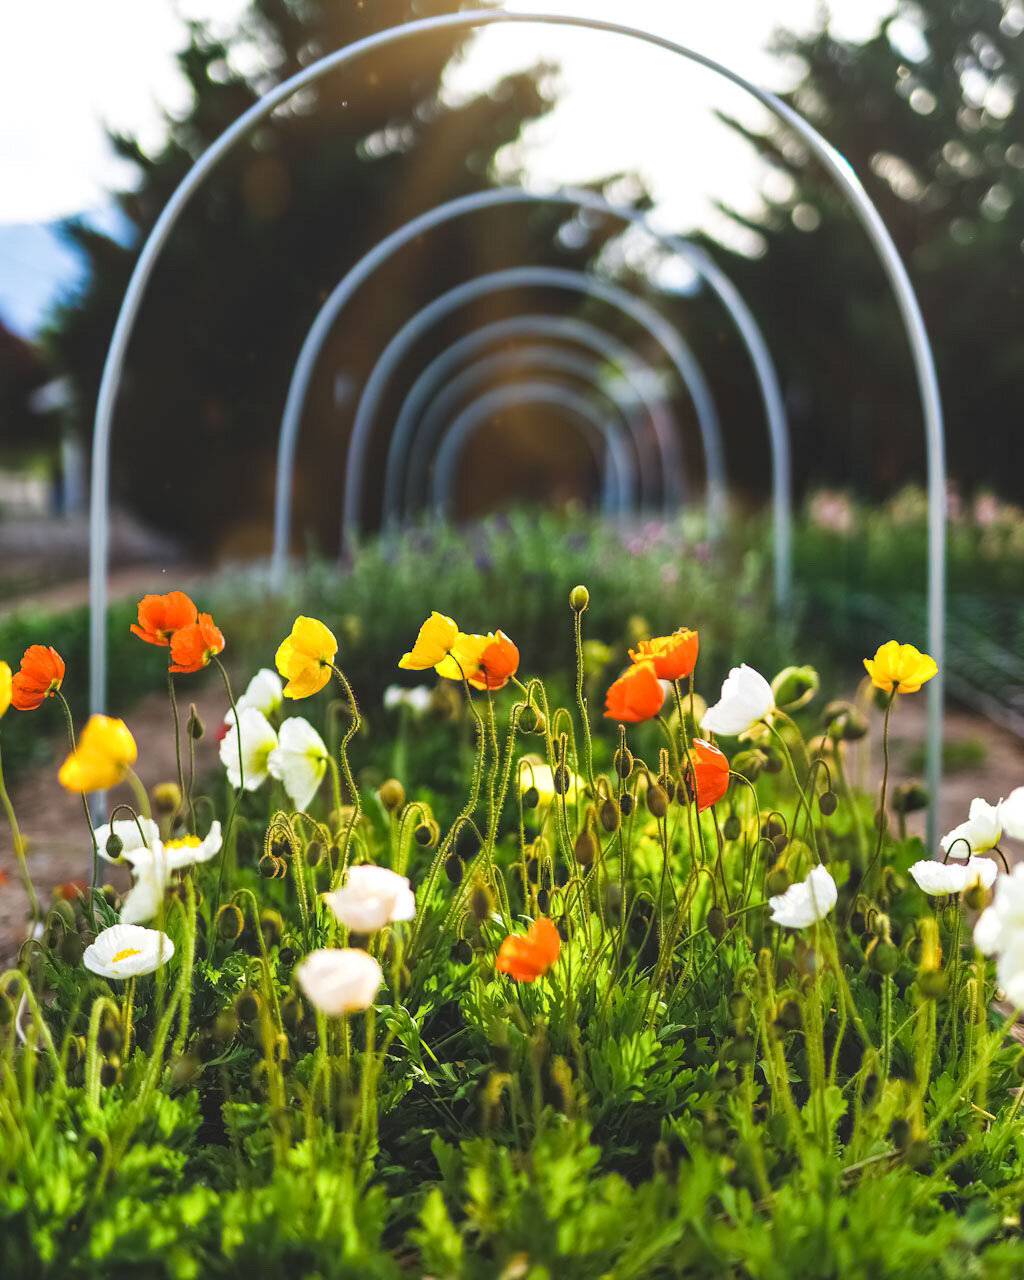
Iceland poppies come in an array of dazzling colors that remind me of an ice cream parlor. The whites look like buttercream frosting, the pink looks like bubblegum, the yellow and oranges look like pineapple swirl sherbert. The Iceland poppies come in after the tulips are done and while we are still awaiting the ranunculus and continue to great us until the hottest days of summer when cosmos take their place.
Iceland poppies add an element of enchantment to the garden with their delicate petals resembling ruffled tutus. It's as if numerous ballerinas are dancing out in the garden when in bloom! Not only are these flowers scrumptious they are also amazing flowers to have for beneficial pollinators. Even with harvesting, Iceland poppies are incredibly prolific and open so fast that I find many happy bees collecting pollen and nectar!
Ready to conquer growing these for your cut flower garden?! Hopefully because I’m about to tell you how to successfully grow them!

Growing Iceland Poppies
Let me just throw it out into the cyber world that growing these flowers from seed intimidated me. Numerous “dos” and “don’t dos” that they seemed overly needy and I would need to be some kind of wizard to pull off growing them. This is not true. Actually, when it comes to growing these from seed: less hovering is key. They want to grow and they really don’t need us standing over them every minute of the day with mister in hand spritzing. With that said, once you sow the seeds: give them time, give them space. They got this! You got this!
Get Growing!
I must admit, the first year I hacked them. I started them too late, planted too late, let them get root bound (which they really don’t like) whatever I could do wrong, by them I did. The one thing I did do right: I took notes which were able to guide me on all the mistakes to avoid, which now I can share with you. The following years I started the seeds in late fall/early winter. They love to grow slow and cold! This year, we are excited to be on our game enough for a fall planting, yay! We are in growing zone 6b, therefore we like to use our low tunnels. For the Iceland poppies, we found a frost cloth tunnel was more than enough for those late winter/early spring plantings. With fall planting, to ensure the tunnel better survives our snow, we will tuck them under a double low tunnel. Iceland poppies do best if protected from the harsh winter temperatures and tantrums of rain, snow and wind.
Iceland poppy seeds are itty bitty, though tiny don’t let them fool you, they have a high germination rate. Going crazy with an entire envelope’s worth on one tray is not necessary. Not only will you being wasting seeds, you will also waste time in needing to go through thinning (culling) to not overcrowd the baby plants. I had splurged a few bucks on a seeder, honestly, I should have taken those few dollar and bought a fancy coffee instead. I never use it. With practice, my once fumbling fingers can now handle the feel and steadiness required to sow these seeds, which does save me time. Using a bamboo skewer (or a sharp pencil!) is a great way to seed more accurately and can go pretty quickly when you get into a rhythm.
With a majority of my seed sowing I prefer to place two seeds per cell. I have started the poppies in different cell trays over the years and have found the sweet spot is to start them in 128 cell propagation trays and bump up to 72 cell propagation trays three to four weeks after germination. If you prefer soil blocking, the 3/4 inch blocks are perfect.
The key with starting these champs from seed is to not cover the seed, they will not germinate buried in potting soil. To keep the top moist, but not fully cover the seed, I like to: sow the seed on top, lightly mist them in place with a spray bottle of water, then sprinkle a dusting of vermiculite followed by another quick mist of water. Also, another game changer for these guys? A heating mat and dome lid. Set at seventy degrees Fahrenheit they germinate fast, like a handful of days fast. Once germinated, off goes the dome and into the unheated greenhouse they go. The poppies continue to grow happily in there for about eight to ten weeks before being snuggled into the garden bed.
If you don’t have a heating mat and dome lid set up, do not despair! I’ve snuck them in my unheated greenhouse and they’ve had great germination, not as quickly but if you’re not in a hurry this works as well. Some of the bigger suppliers also provide “primed” seeds which are great in getting quicker germination as well.
Not in the mood to fuss with starting seeds indoors? No worries, sow the seeds outdoors in fall or once soil can be worked in early spring. Just be sure not to cover the seeds! Once the days warm to their ideal temperature, they'll germinate and begin to grow but don't forget to water as needed. You will also have to go back and thin to their ideal spacing.
If you are like most of my family, you may not care to grow from seed at all. There are many places online to purchase plugs or at your local garden center. I find Iceland poppies easy to grow from seed, which is more cost effective for me. Being a small-scale farmer I have to pick and choose what splurges I will make but with that said, I understand growing from seed isn’t everyone’s cup of tea and that’s okay too.
Enjoying this content? Then be sure to connect with us over on Instagram and sign up for our Flower Farming Newsletter!
Now back to the blog!

Planting Iceland Poppies
Iceland poppies are machines in the garden. They don’t take up incredible amounts of space, we plant them 7x7 inches but they can be planted anywhere from 6-9 inches apart. Poppies by nature aren’t incredibly thirsty plants making them a nice addition to areas with limited water. Iceland poppies really are fuss-free once established. The one quirk they have: they don’t like their roots messed with too much, therefore, be gentle and don’t let them get root bound before planting out.
We have also found, these guys do best when planted on drips at transplant. Though poppies aren’t incredibly thirsty flowers, they love to have those long deep drinks rather than small sips. You will need to watch how much water your poppies need to not overwater as well. We are in an arid climate and have found we need to water than most other growing climates due to that. We have also found getting them under a tunnel right away to also be key in helping them to better overcome the transplant shock and to have a better crop.
For pests, we have found thrips, caterpillars and earwigs to be some of the foes we’ve had to battle. The thrips are the worst in that they puncture the stems, ruin the petals and overall make the poppies unusable. Treatment with spinosad and pyrethrums can help along with creating a welcoming environment for beneficial insects. The key is to start before it’s a problem and then keep up on it!
The biggest chore with poppies is staying up with the deadheading or harvesting. This is an important task to stay up on to ensure they keep rewarding you with blooms.
Iceland poppies don’t love freezing temperatures, they also don’t love hot temperatures. In our area, depending on the weather, we can have Iceland Poppies beginning in mid-May through Early July. Iceland poppies do best when temperatures stay in the seventies during the day. Once summer temperatures begin, we find the flowers get smaller and the plants begin to yellow. Having cooler evening temperatures can help increase the season of poppies, once evening temperatures get above 60F, they will stop producing.
Iceland Poppies as a Cut Flowers
Iceland poppies add a delicate flare to any design or bouquet. Poppies in general are often treasured but with many not making for great cut flowers, it makes these guys that more precious. We often get requests from our customers just for these guys! A little pop of sunshine while the spring skies are still hit and miss gloom.
Harvesting
Like most cut flowers, the poppy needs to be harvested before pollination. The best stage for harvesting poppies is once a bit of color is peeking from the crack, especially when looking to store them. Once the flowers are at this stage, if left in the garden it will blow open when the warmth of the day hits them. If you see poppies that have freshly “popped” open, I harvest them too and have gotten a surprisingly decent vase life, as long as you are going to be moving them quickly such as for event work. Poppies spring open fast: you will walk out into the garden and it will look like they had a party without their outer shells shot across the garden like confetti while the flowers are happily feeding bees. If you want the blooms for yourself, you must harvest them before this!
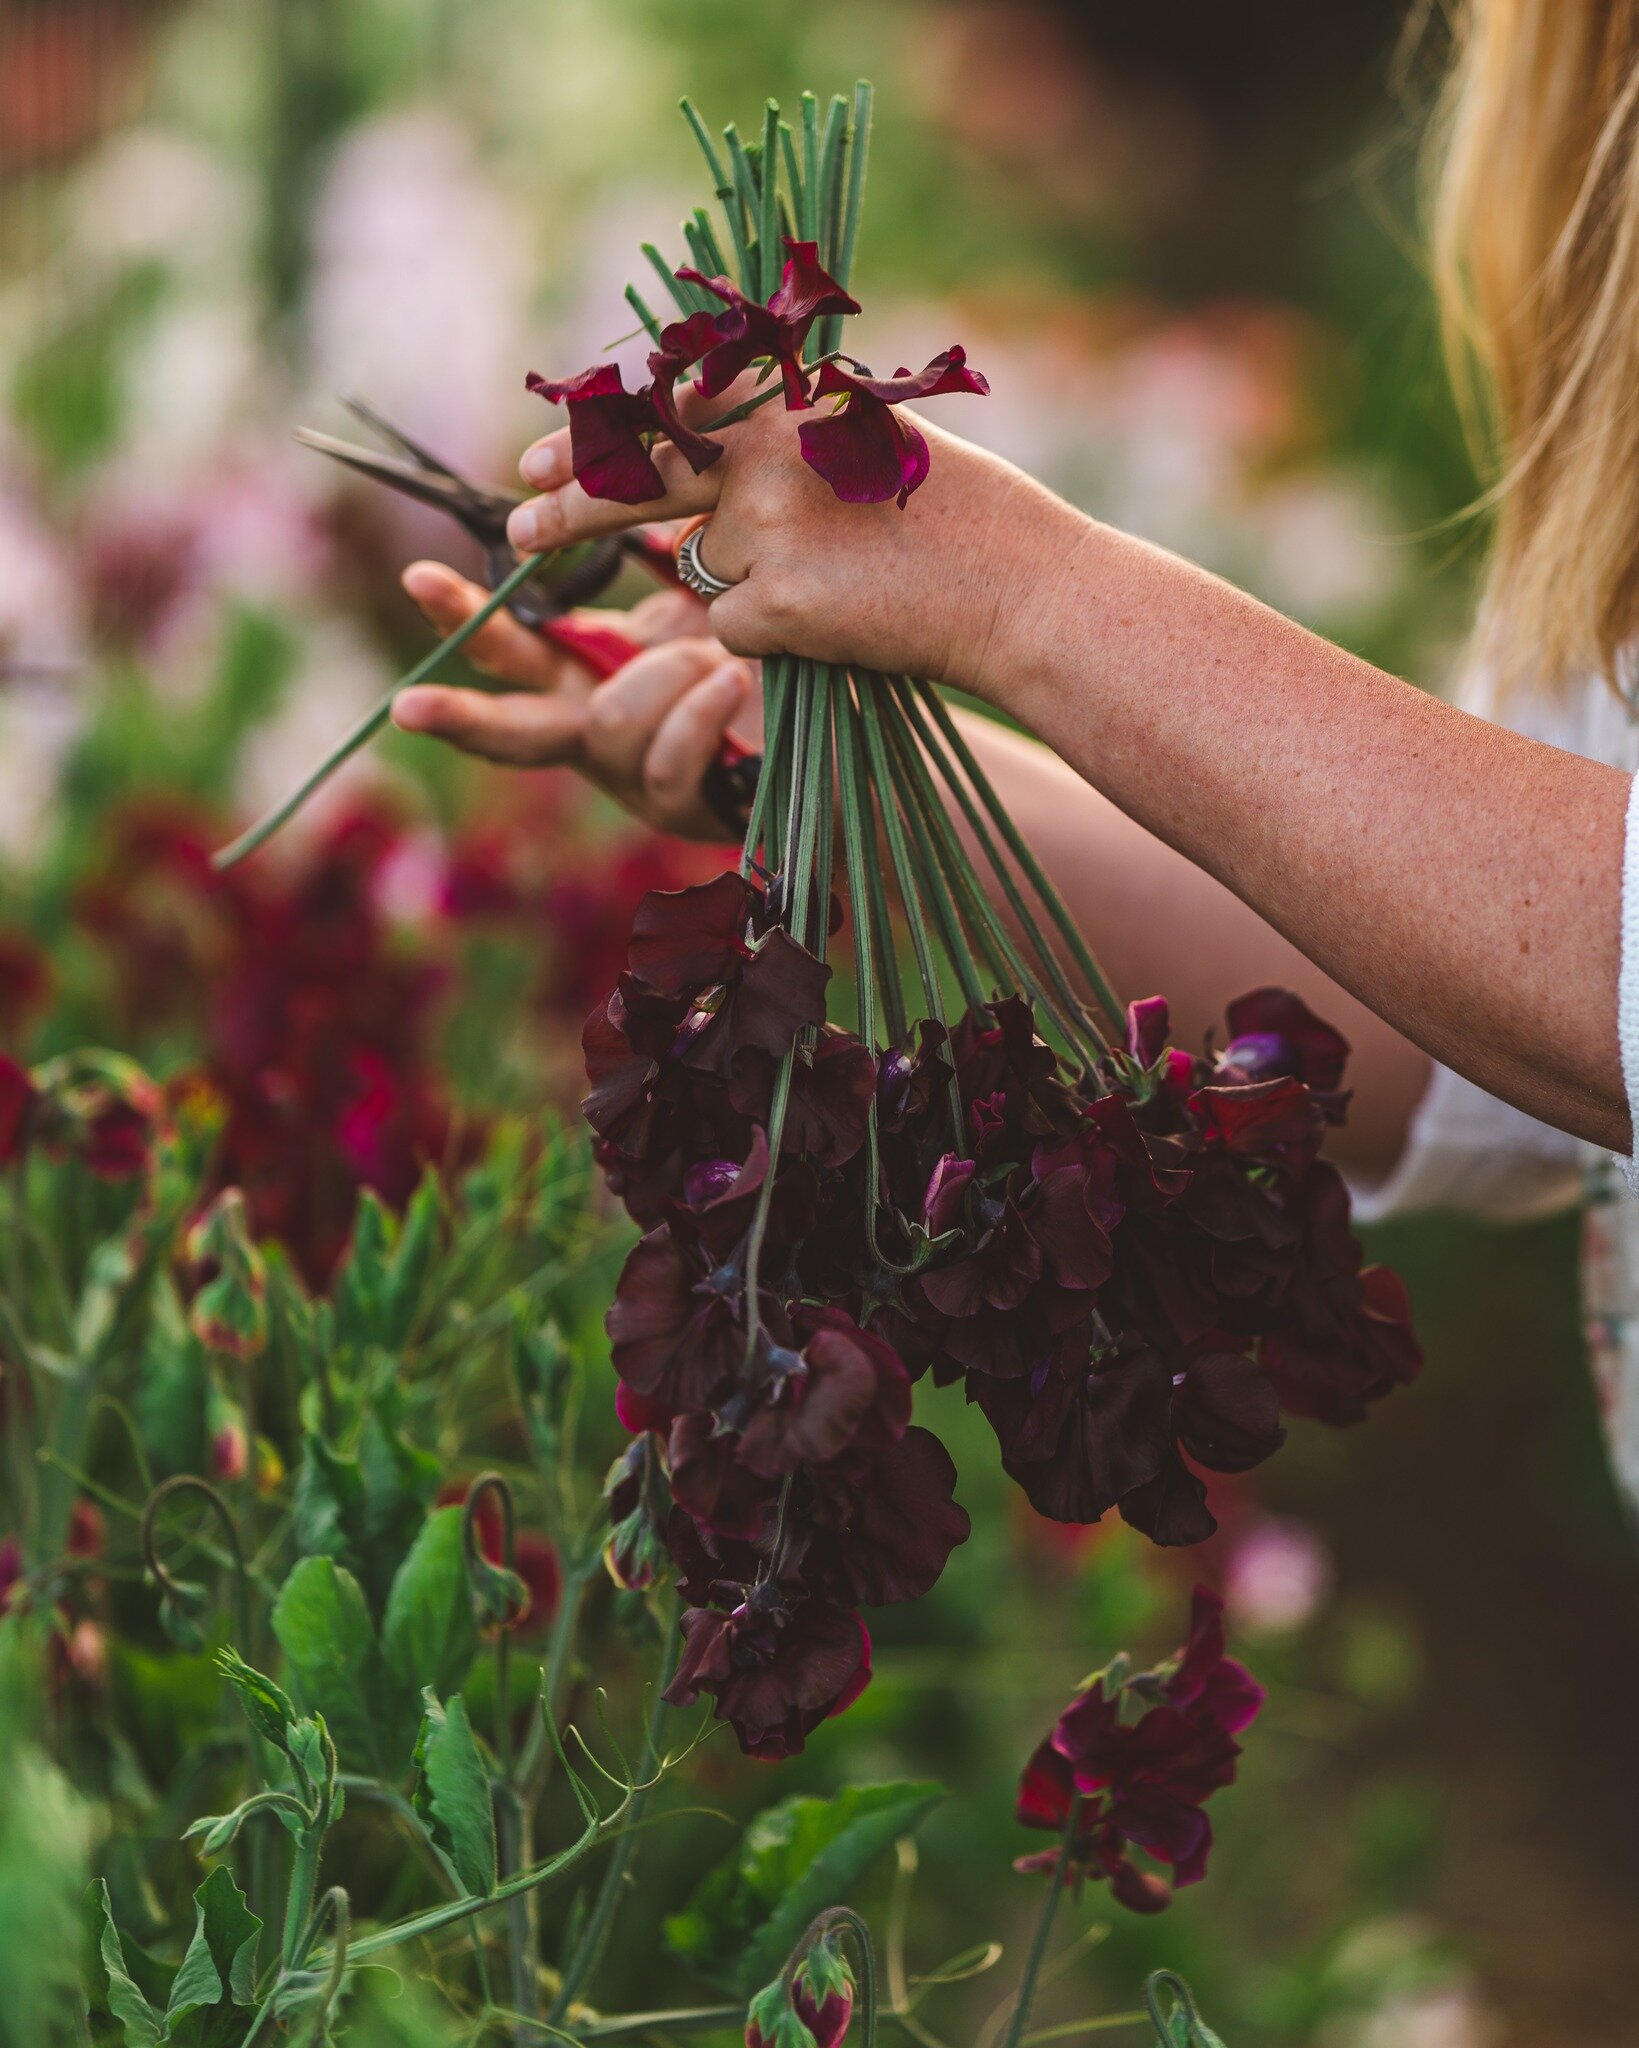
To keep up with these prolific bloomers, I harvest twice a day in the peak of their season. Always in the cool of the day, mornings and nights.
Post-Harvest
There are a few cut flowers that require interesting post harvesting techniques and Iceland poppies are one of the more controversial ones in the best methods to do so. Some flowers ooze sap and other goodies that cut down on the vase life of not only themselves but this can also affect the flowers sharing a vase with them, such as narcissi. In the case of the Iceland poppy they do ooze latex and I have found it to be more so once the summer heat hits. There are some post handling recommendations to tackle this such as searing the ends with either a blow torch or placing the ends in hot water. I had done this for a few years. I find searing helps when seasonal temperatures increase, in early spring I have also skipped the additional step and have gotten a nice vase life. Whether you decide to take that additional step or not do harvest the poppies first thing in the morning and place into a sanitized bucket with a CVBN tablet then straight into the cooler with the temperature set at about 38F. I leave them in there for a good twelve to twenty four hours before arranging. I have found that had a good week of vase life when using this method instead of a standard three to five day vase life. Using commercial flower food also helps!
Designing with Iceland Poppies
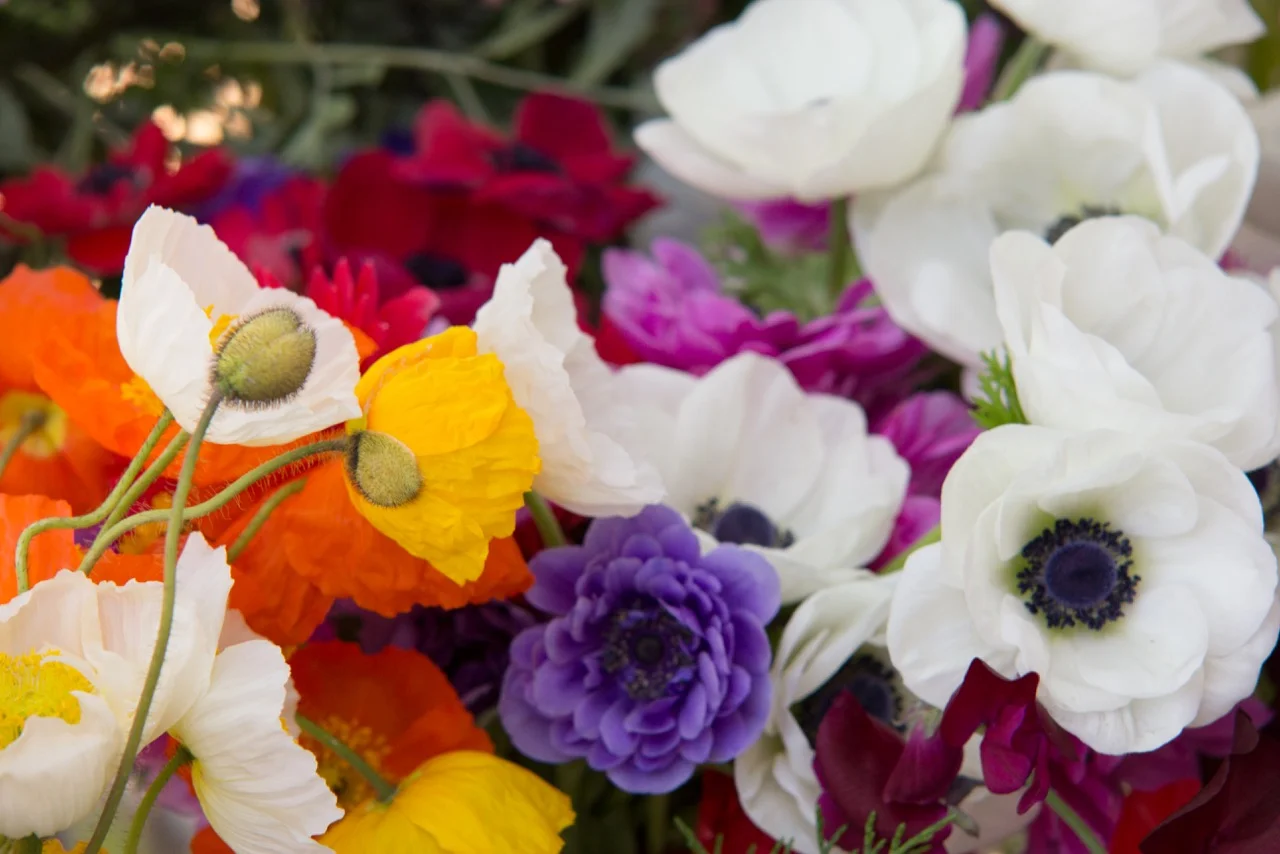
Iceland poppies bring such movement and airiness to bouquets and more elaborate designs. Customers won’t believe they are even real with their delicate tissue-like paper petals. The tried and true Champagne Bubble varieties are heavy producers and lend well for bringing lightness to a design as a disk component. We also love the Colibri variety. Colibri produce a little less stems but make up for it with bigger and drool-worthy flowers that can steal the show as a focal flower and are the ones we find brides swoon over the most. In our Tahoe area, the “wildflower” aesthetic is requested by literally every couple we work for. It makes sense, our mountains have hidden wildflower meadows tucked throughout, it is one of the reasons (outside of the Lake and skiing) that brings travelers to our area. It is common for couples to want to honor the natural beauty of the area. Iceland poppies with their ethereality seamlessly do just that.

Iceland poppies are incredibly cheerful flowers that can create quite the hub for pollinators but also as a cut flower grower they are something best sold in the local market making them a handful of unique specialty flowers for us flower farmers to offer.
Until next time, we are looking forward to helping you hand blooms soon!
Jessica & Graham
Additional resources to get you growing!
Here are the Amazon affiliate links to a couple of products that we find as game changers for us while growing Iceland poppies:


We want to help you hand blooms!
We have had such an abundance of love from our fellow flower farmers and dreamers! Each of you have great questions, therefore, we will be launching a flower-farming series of blog posts! As always, it won’t be so much of a how-to series (flower farming is not a one size fits all after all!) but more of a “how-we-do.” Find inspiration, tips or just a community that gets you! Sign up for our Flower Farming Newsletter to get our latest content!
Have a specific subject/topic/question you would like us to cover, feel free to email us and let us know!