How to Make Your Own Anemone & Ranunculus Corm Soaking/Compost Tea Brewing System
Disclaimer: This site contains affiliate links to products we wholeheartedly believe in. Your purchases through these links help us bring you more valuable flower-arming content. Thank you for being so supportive!
If you read our post on pre-soaking ranunculus and anemone corms seems like method two of pre-soaking peeked your interest! Or perhaps you stumbled upon watching Graham make this nifty contraption on our video and perhaps wanted a little more grit on the how-to make your own soaking system.

Now, we did not by any means invent this system. We’ve seen other growers use it, not only for soaking corms but to make compost tea. The systems we’ve seen were relatively fuss-free. These other systems were super easy. No lid needed first off. Just the pump and a good ol’ bucket... well... that’s too simple for Graham. He instantly envisioned having the whole system as one unit for easy transport, use, and storage. At first I rolled my eyes, my hubs has a knack for over complicating things when not necessary but this time, after using the end product I applaud him! Plus, it was a super quick project, meaning I didn’t have to wait on him to get my corms soaking (this is a big deal!).
*This system is not just for soaking precious corms but could also be used in concocting your own compost tea... I personally haven’t tackled that yet but if you decide, I would keep a separate system for the two uses.
Here’s a list of things needed to make your own soaking/compost tea system:

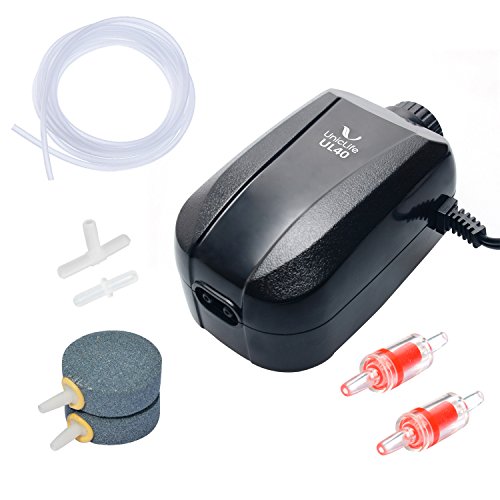
Aquarium pump kit, one with dual outlets. (link to the one we purchased provided at end of this post)
Sharpie
Five gallon bucket
A lid for the five gallon bucket
Drill
Standard drill bit
Spade (or as Graham called it a “paddle”) bit
Two to three 12 inch zip ties
Two 4 inch zip ties
Waterproof tape (we used electrical tape that we had on hand... not really waterproof but it worked)
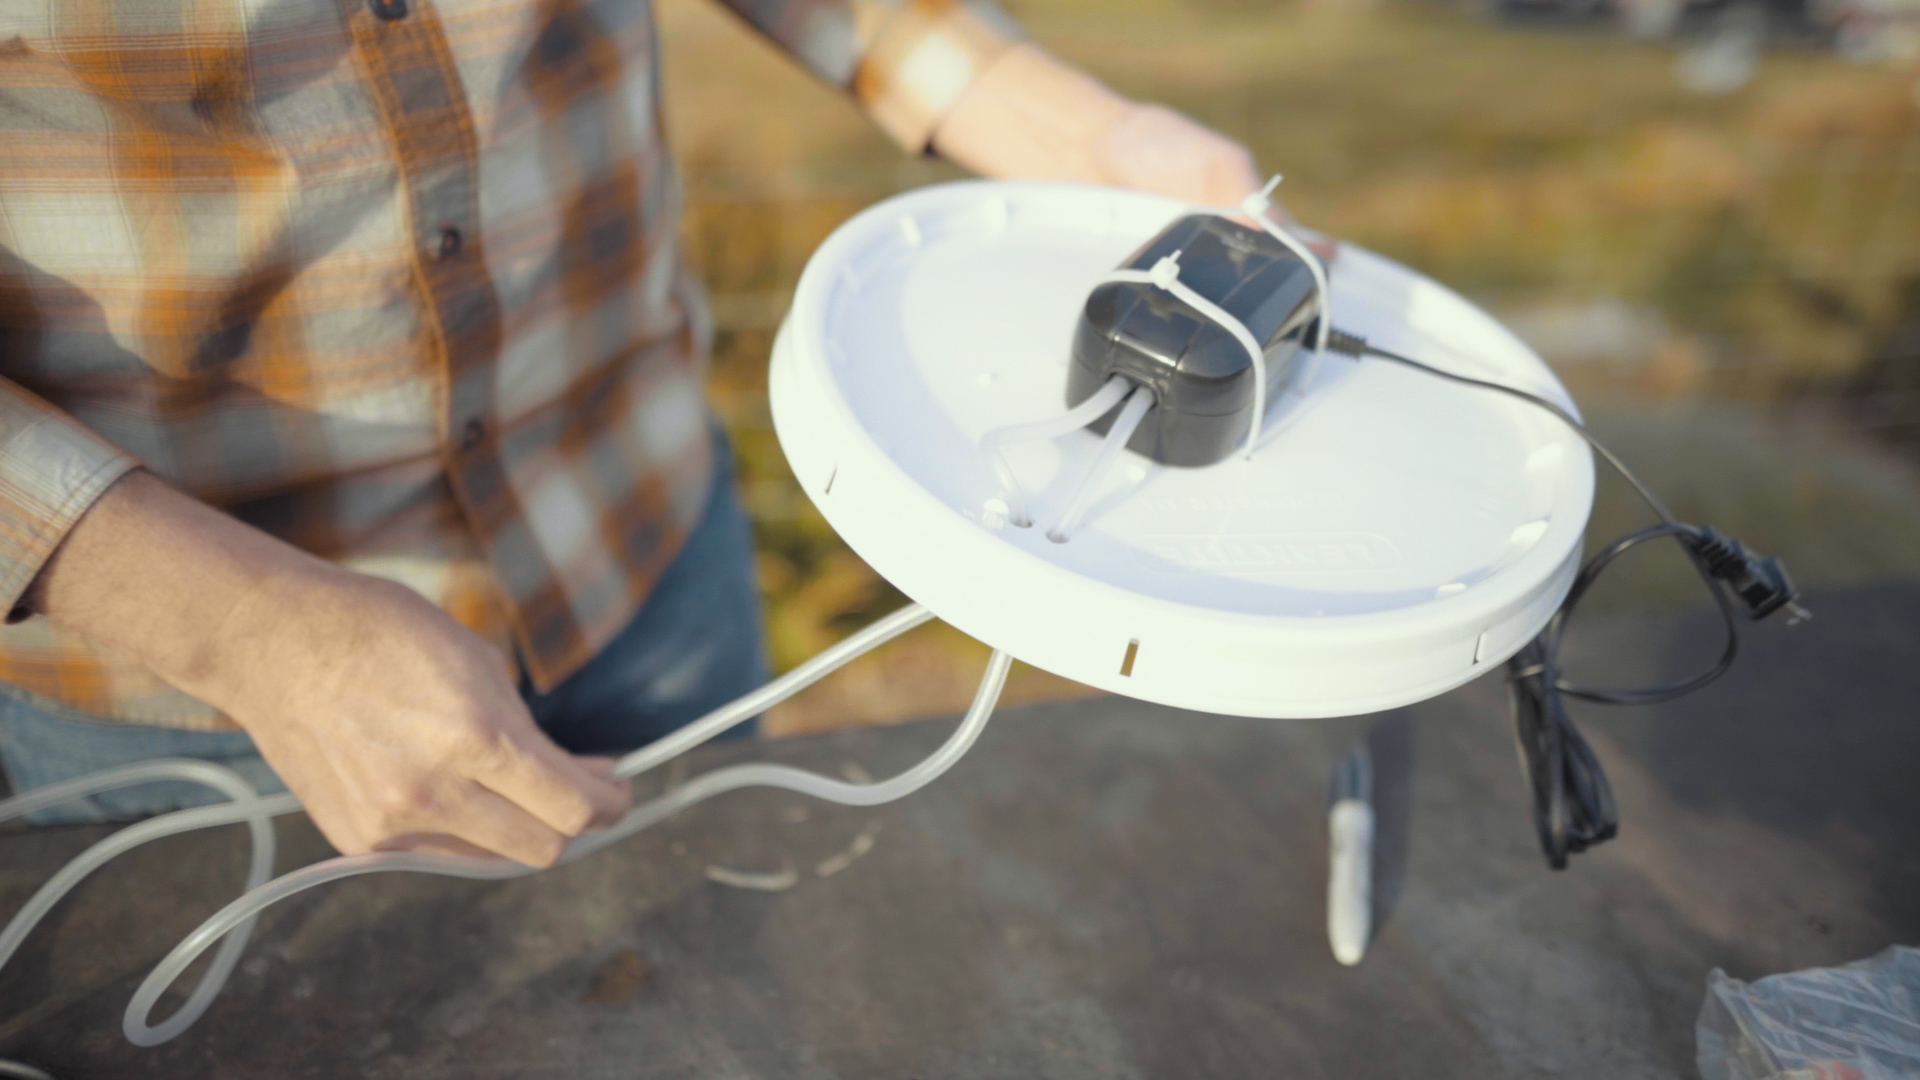
Make sure your bucket, lid and drill bits are clean and sanitized. We opted for an aquarium pump kit because it came with everything needed in one go (with a couple unnecessary accessories) without us having to hunt for additional tubing.
Method:
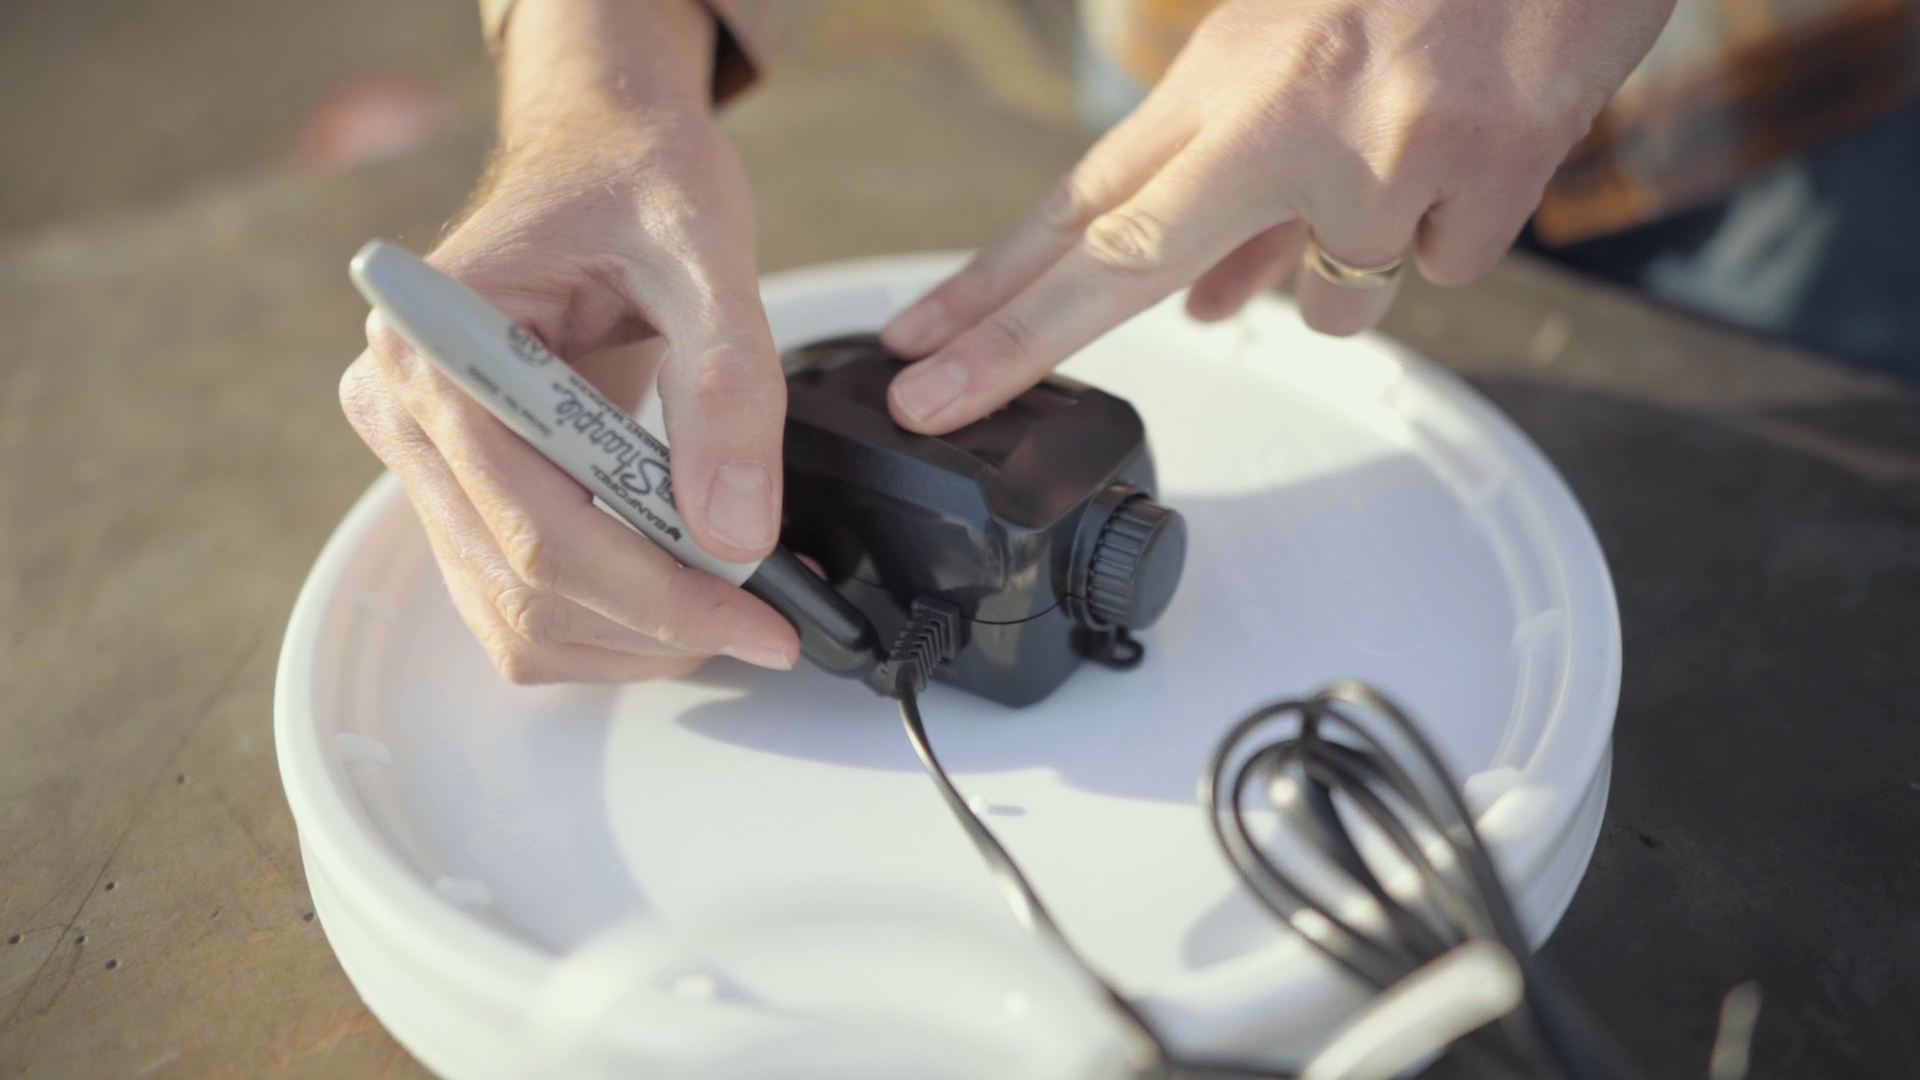
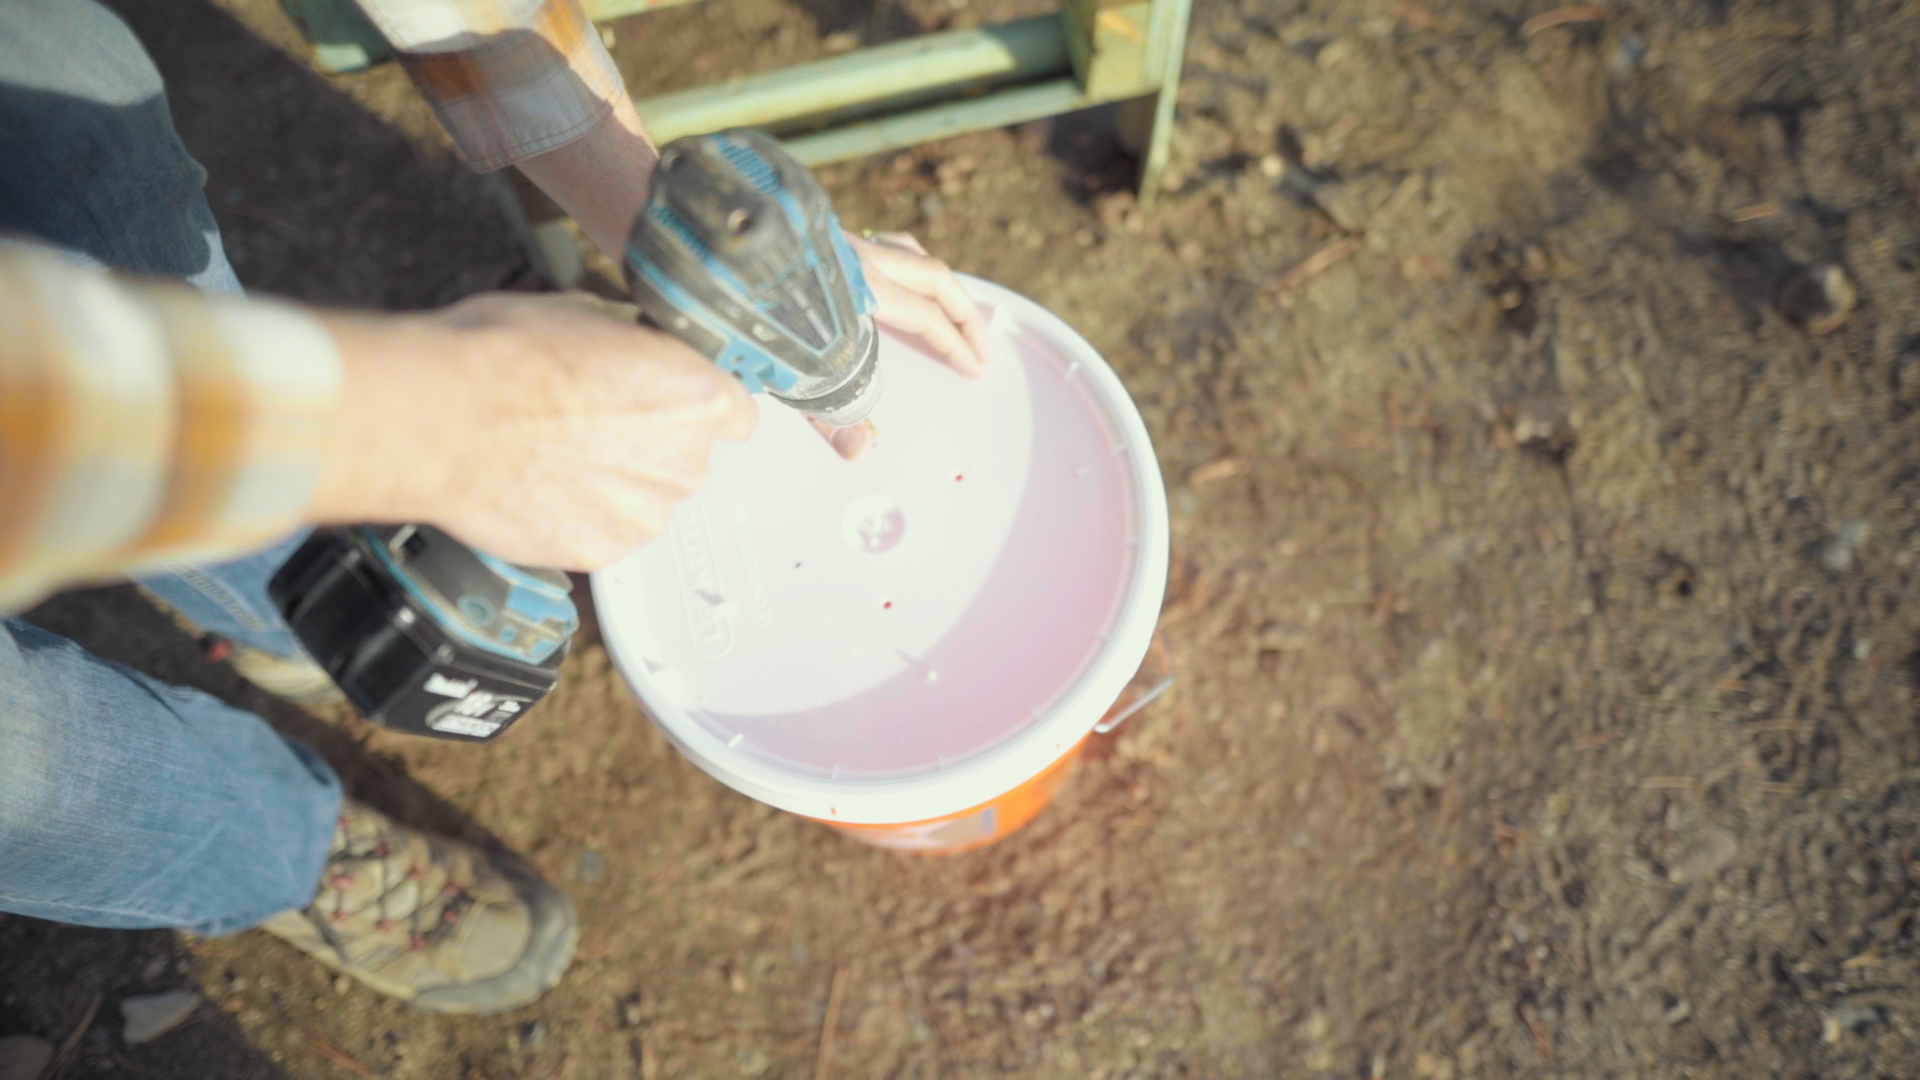
Step 1: Drill holes for the 12 inch zip ties.
These zip ties will hold the pump in place.
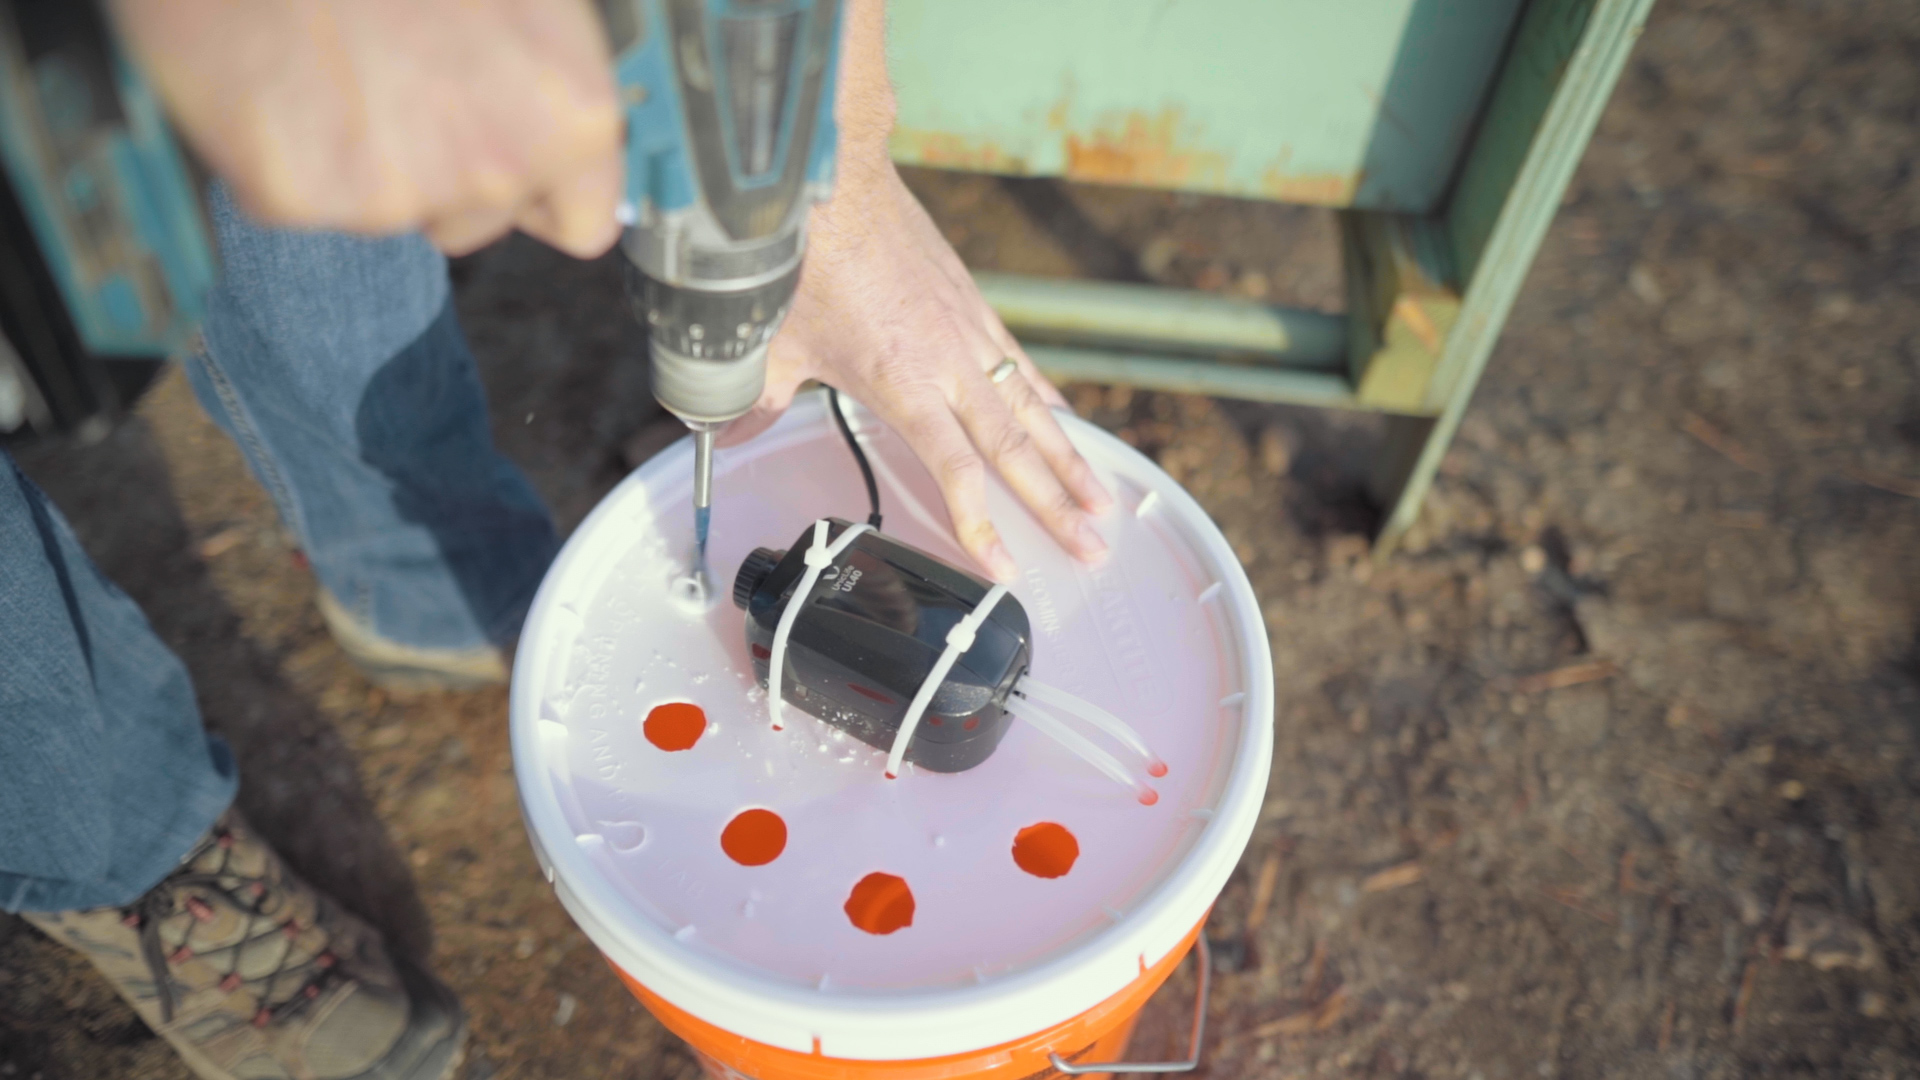
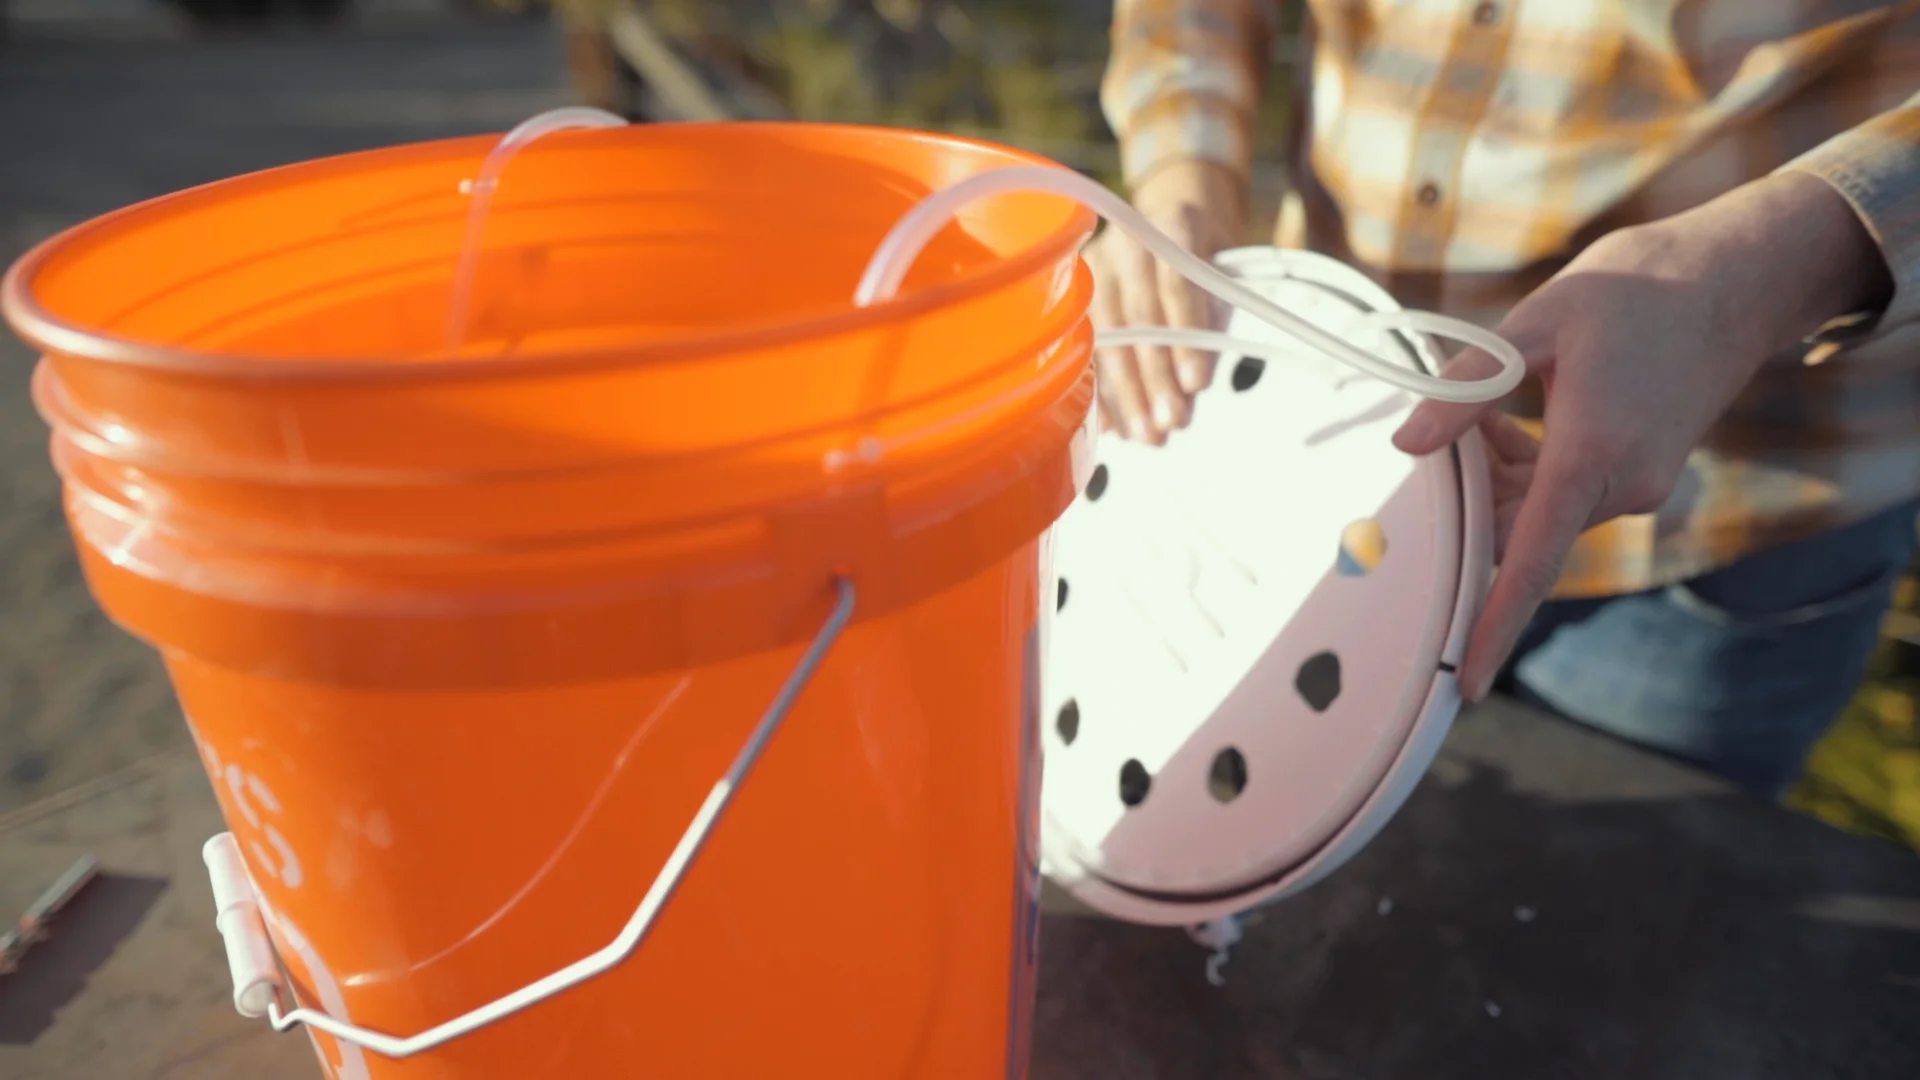
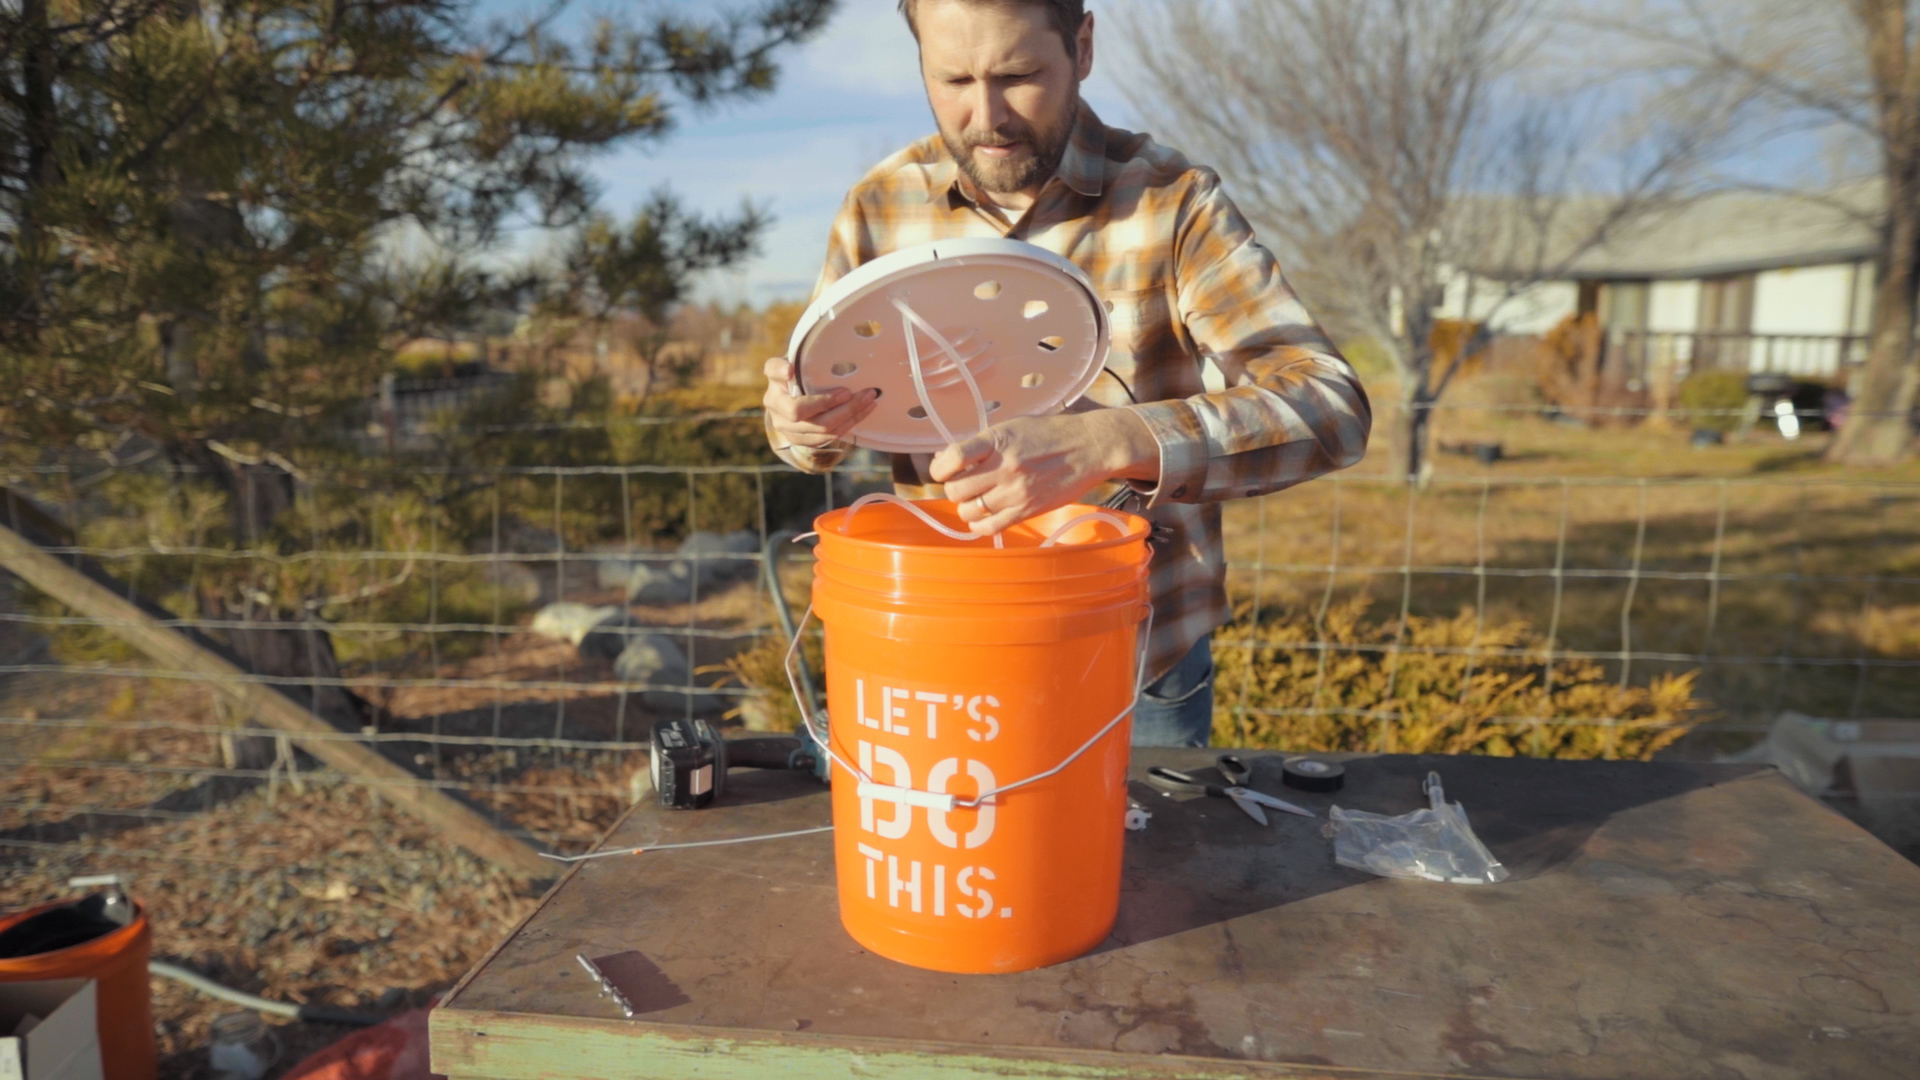
Take your aquarium pump and line in the center of your lid. With your sharpie, make the areas you want to drill holes with a standard drill bit, preferably four total, near each end of the pump. Aim for about 3/8 of an inch. We did end up drilling an extra set for one additional zip tie to hold the center of the pump, it made it more secure this way.
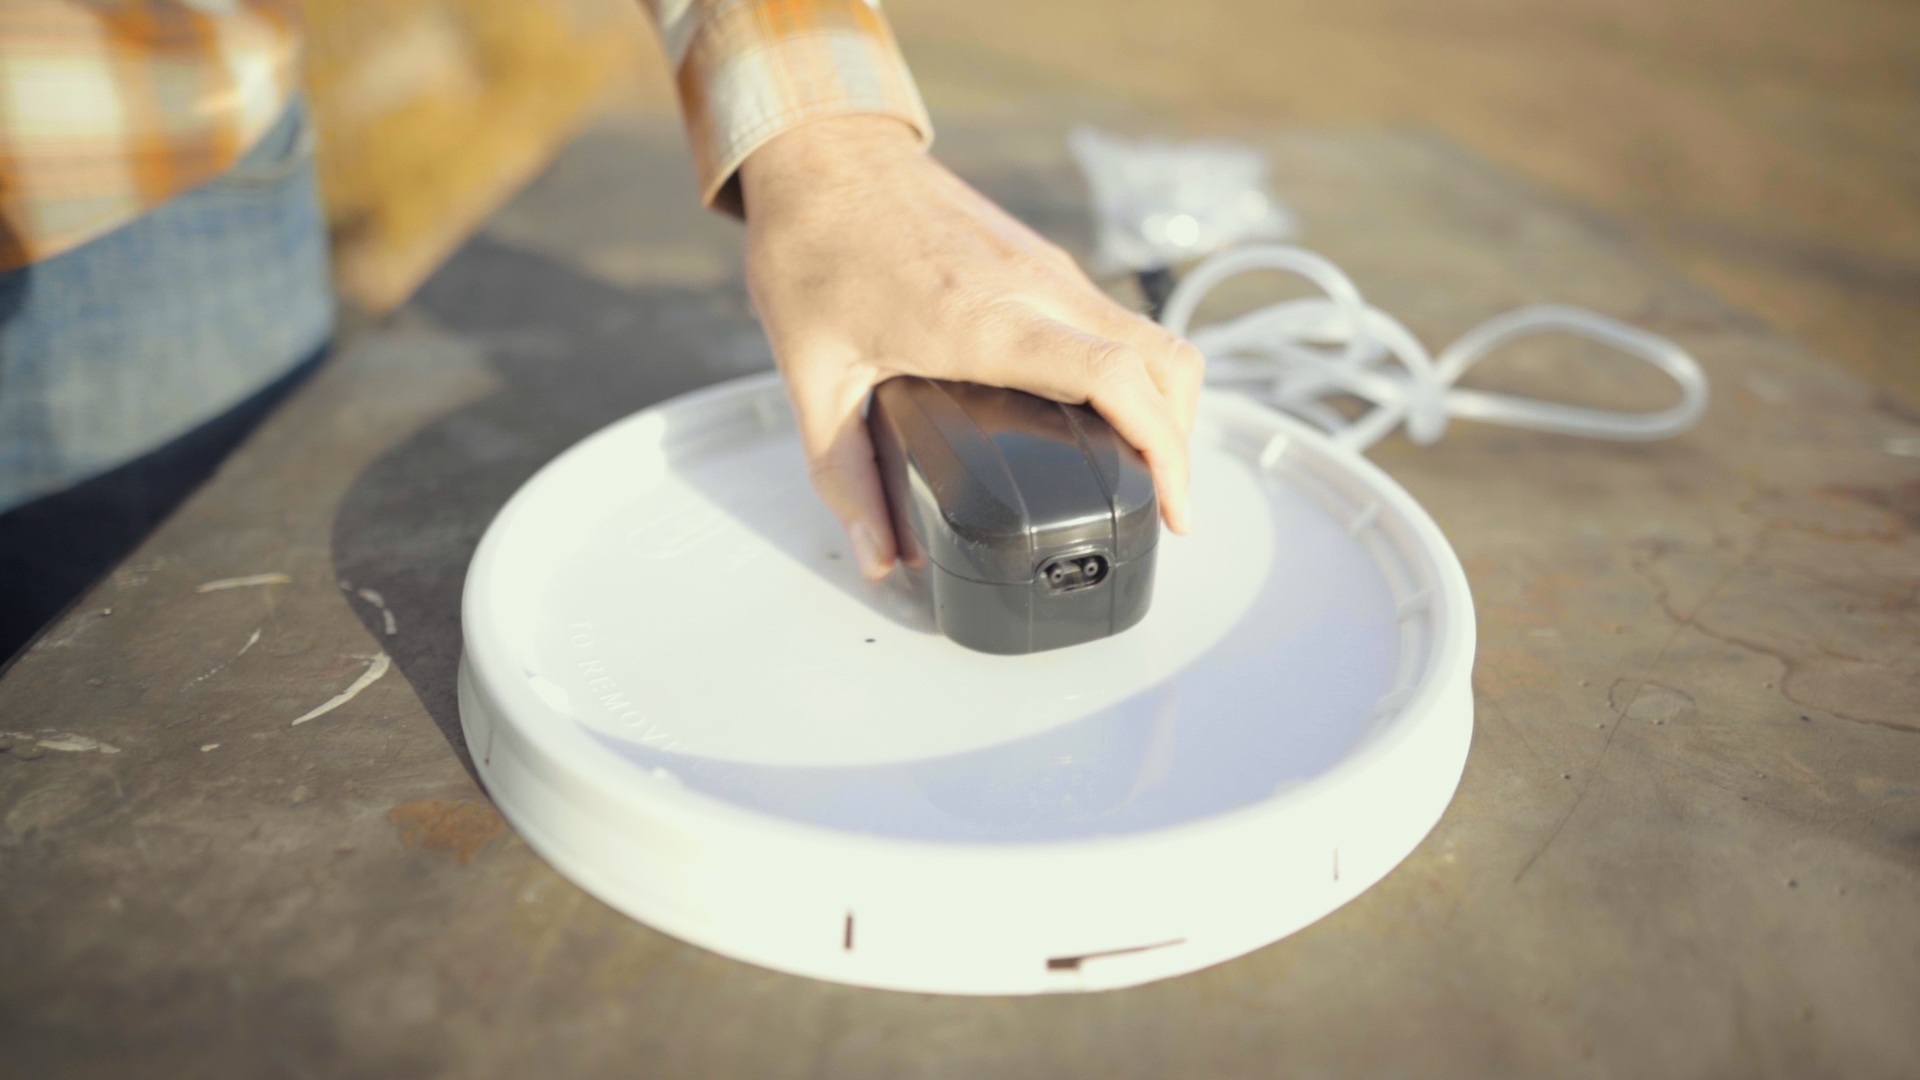
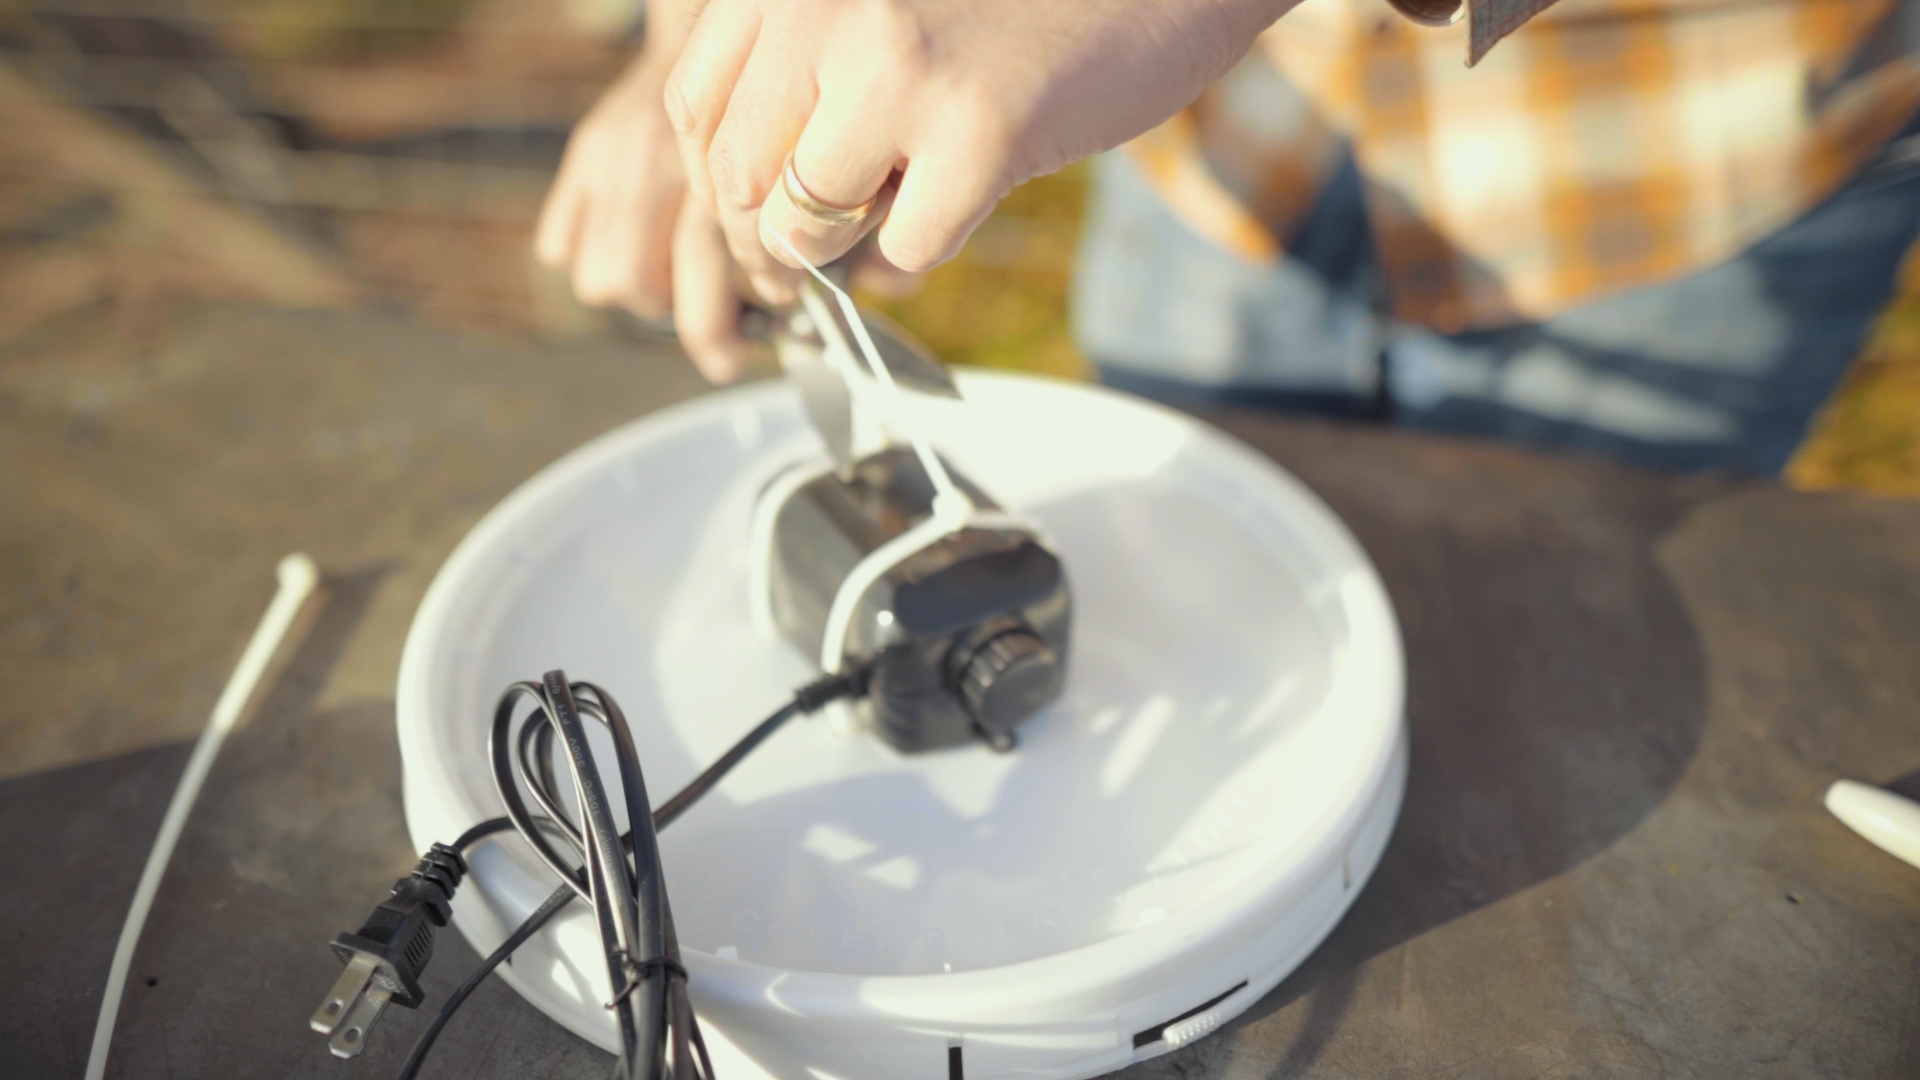
Step 2: Anchor the pump to the lid.
Feed the 12 inch zip ties through the holes, tighten them down on the pump to secure.
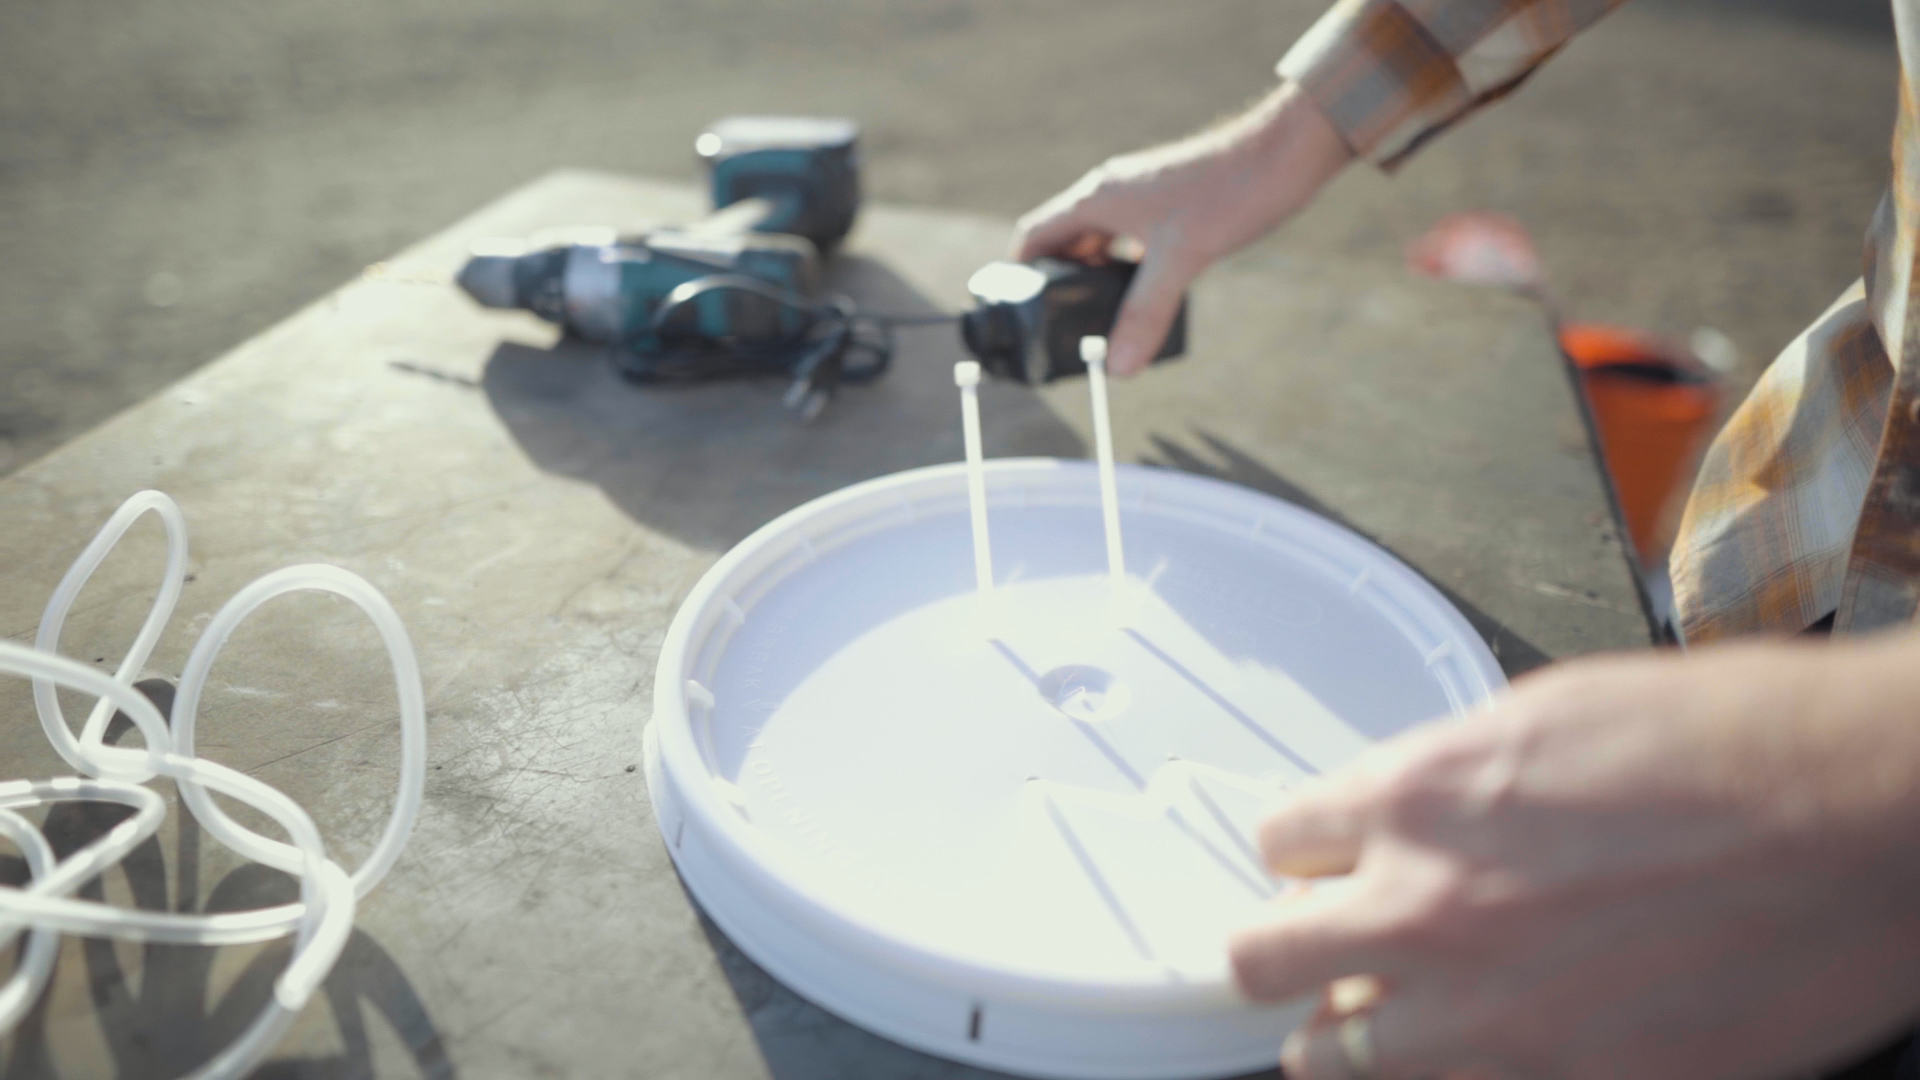

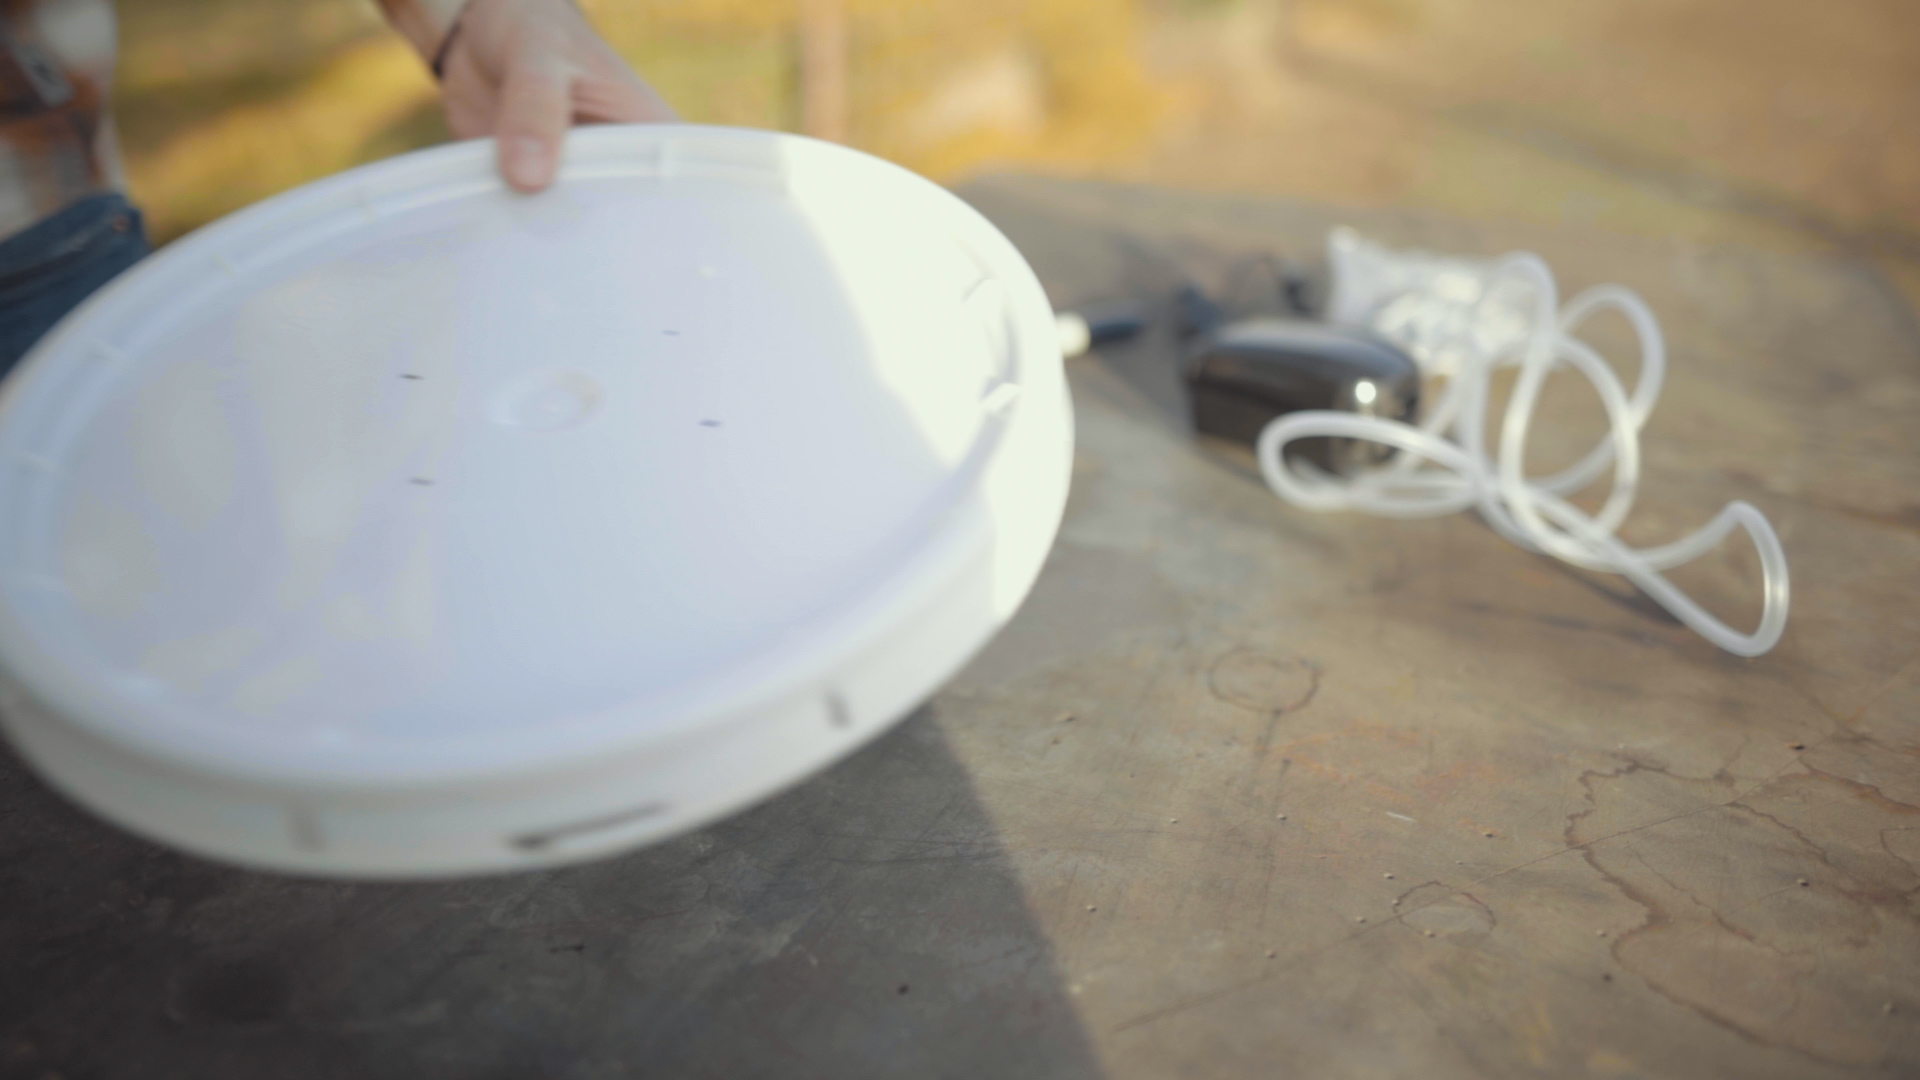
Step 3: Drill holes for tubing and feed tubing through lid.
Once the pump is anchored, grab the provided tubing and connect it to pump. Decide where you want to feed the tubing through, mark. Using a standard drill bit make a hole large enough to fit tubing through, about 1/4-3/8 inch in size.
Step 4: Drill large holes on lid.
Using the spade (paddle) bit, drill large holes around the pump and away from the tubing holes. This is going to allow air to escape out the top. Graham learned the hard way, opt for a spade bit without a screw, as he said in the video, it’s great for 2x4s but not so great for plastic!

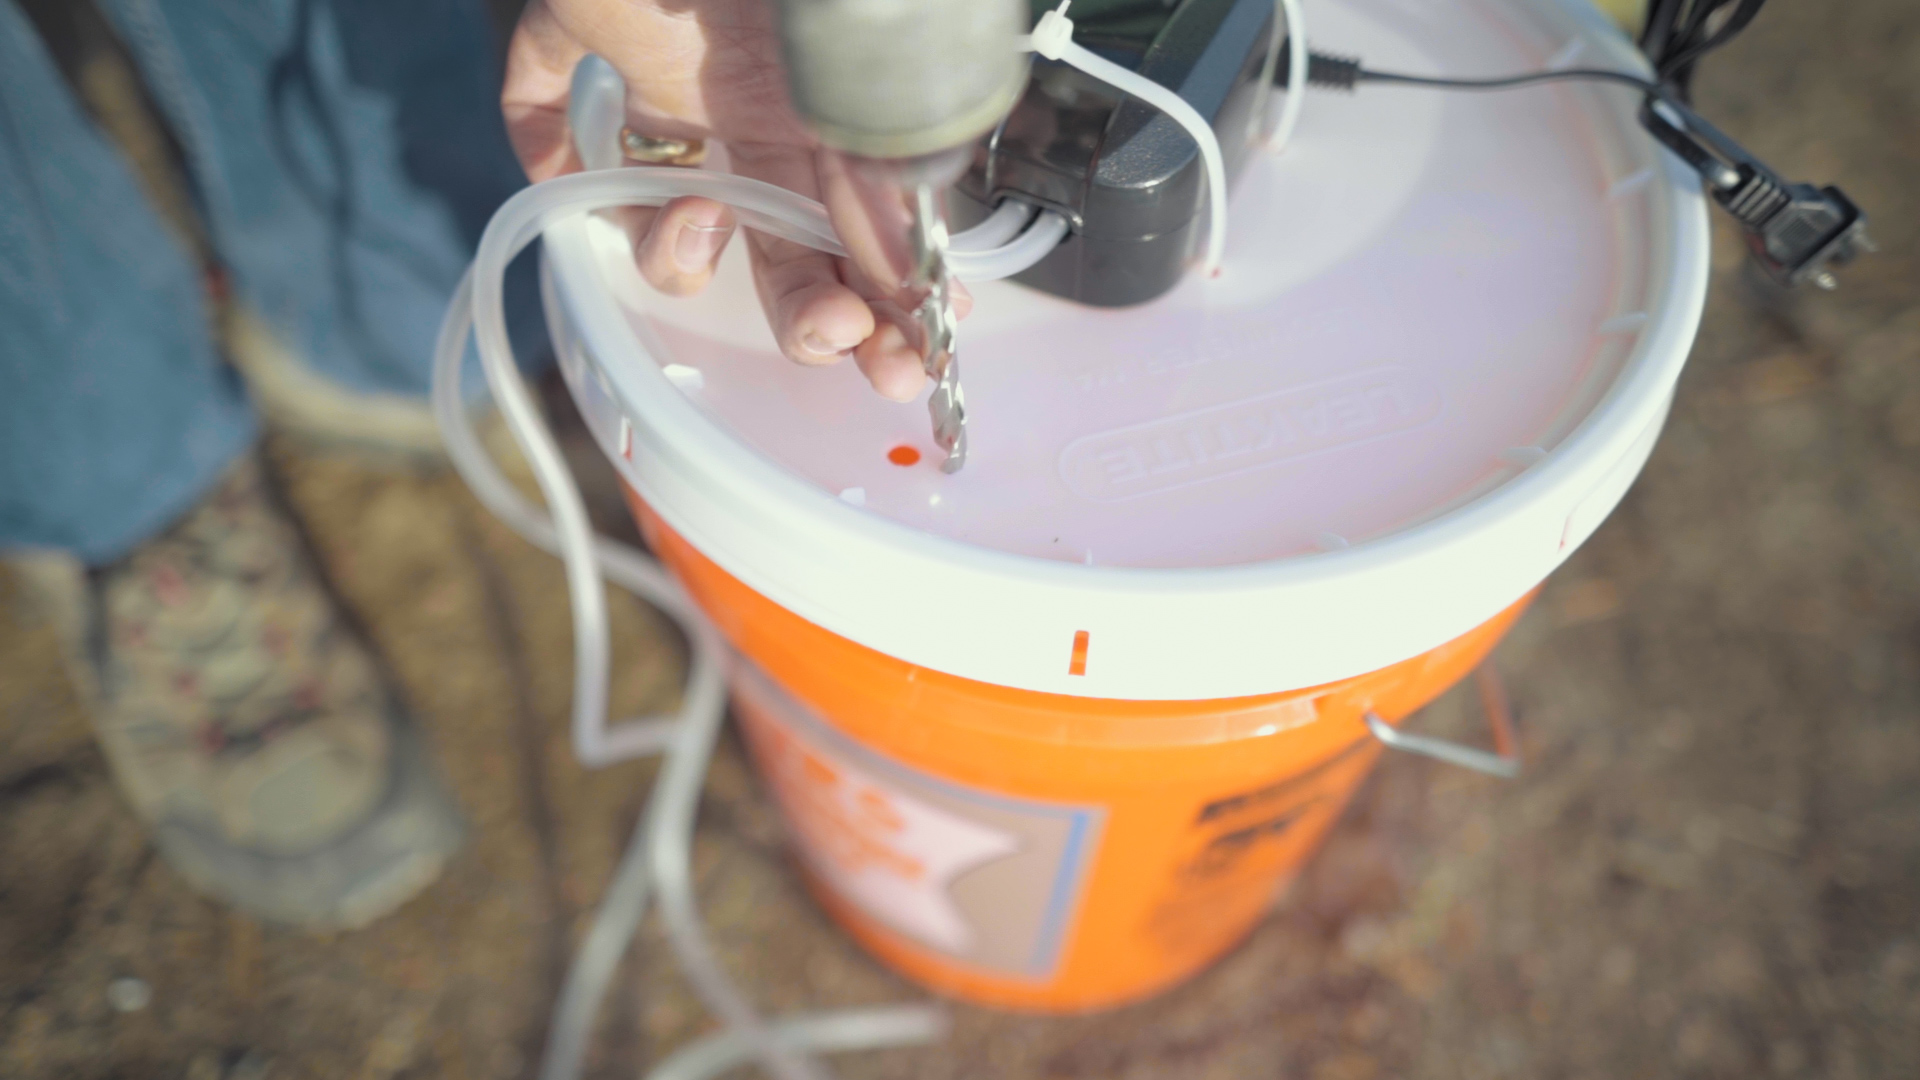
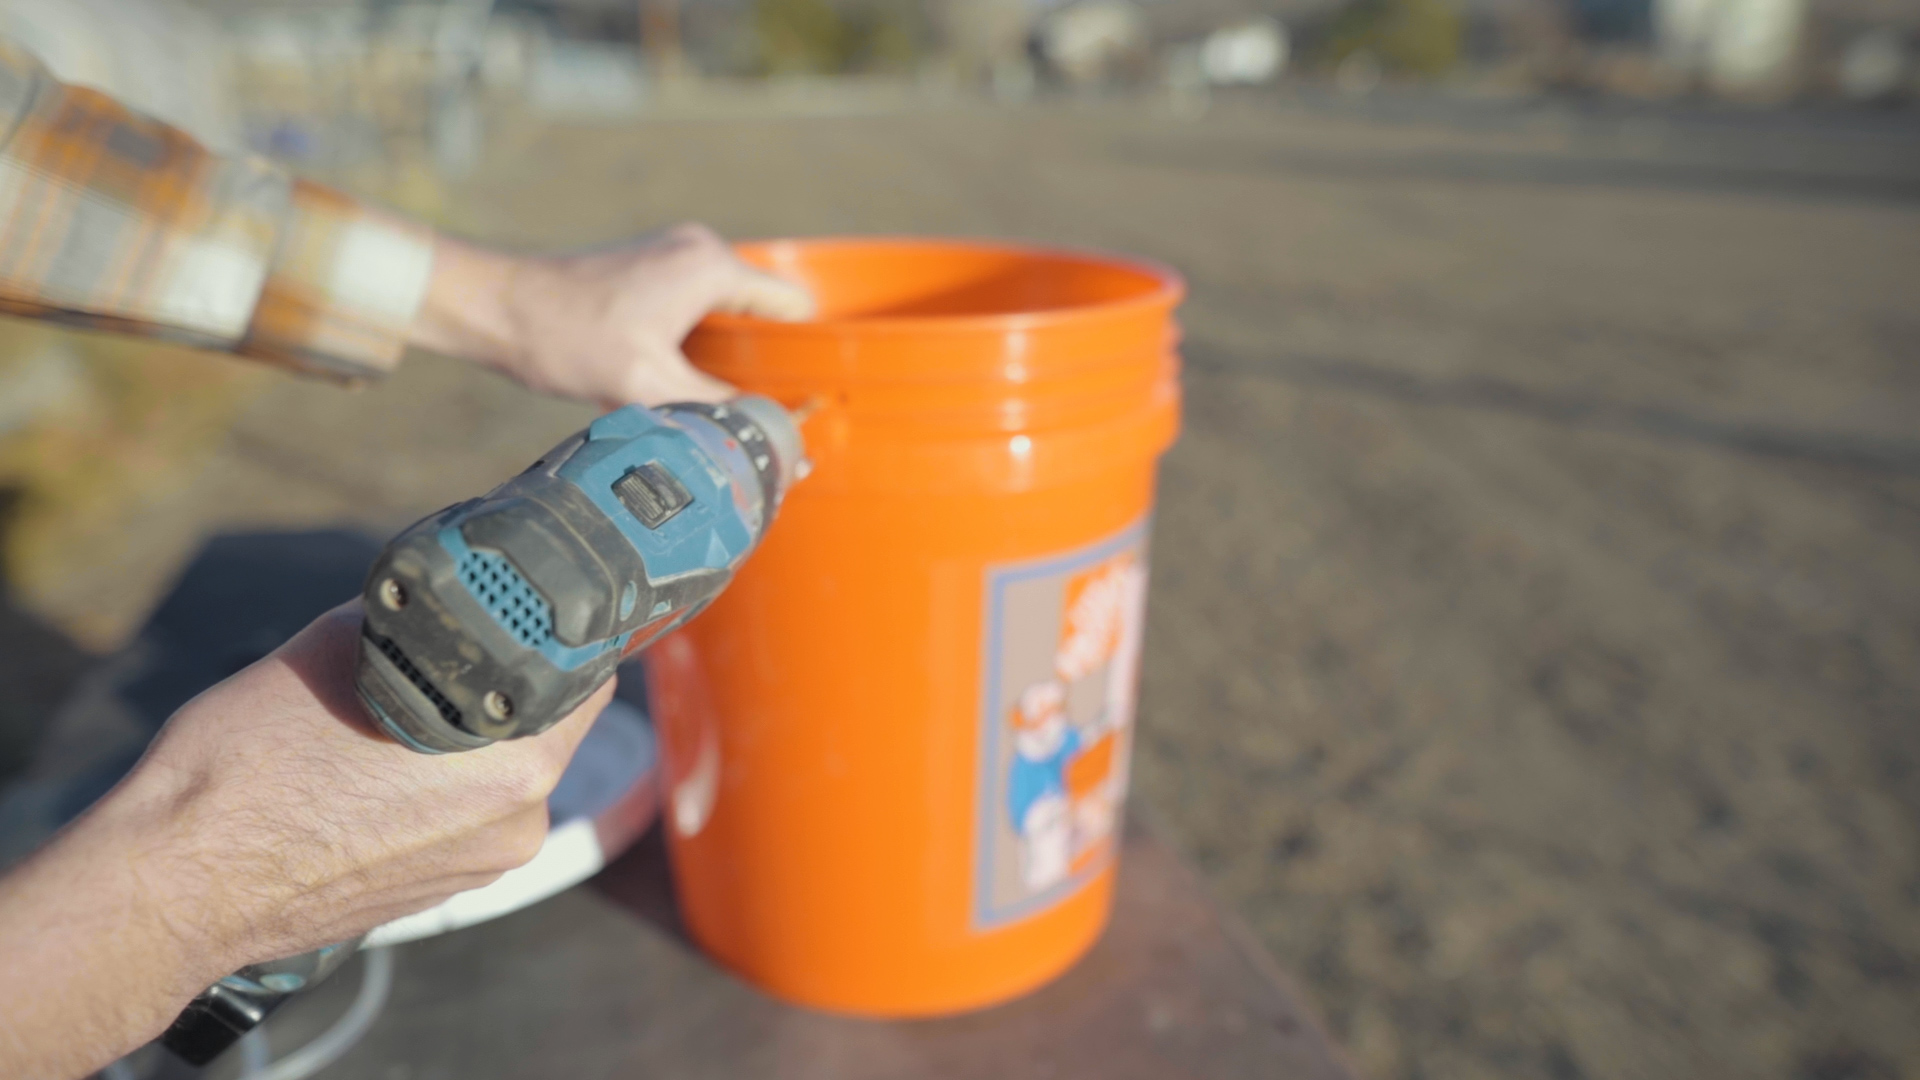
Step 5: Drill holes on side of bucket.
Using a standard drill bit, drill four holes (a set on either side of the bucket) large enough to feed the smaller zip ties through. This will be used to anchor the tubing to the inside of the bucket.

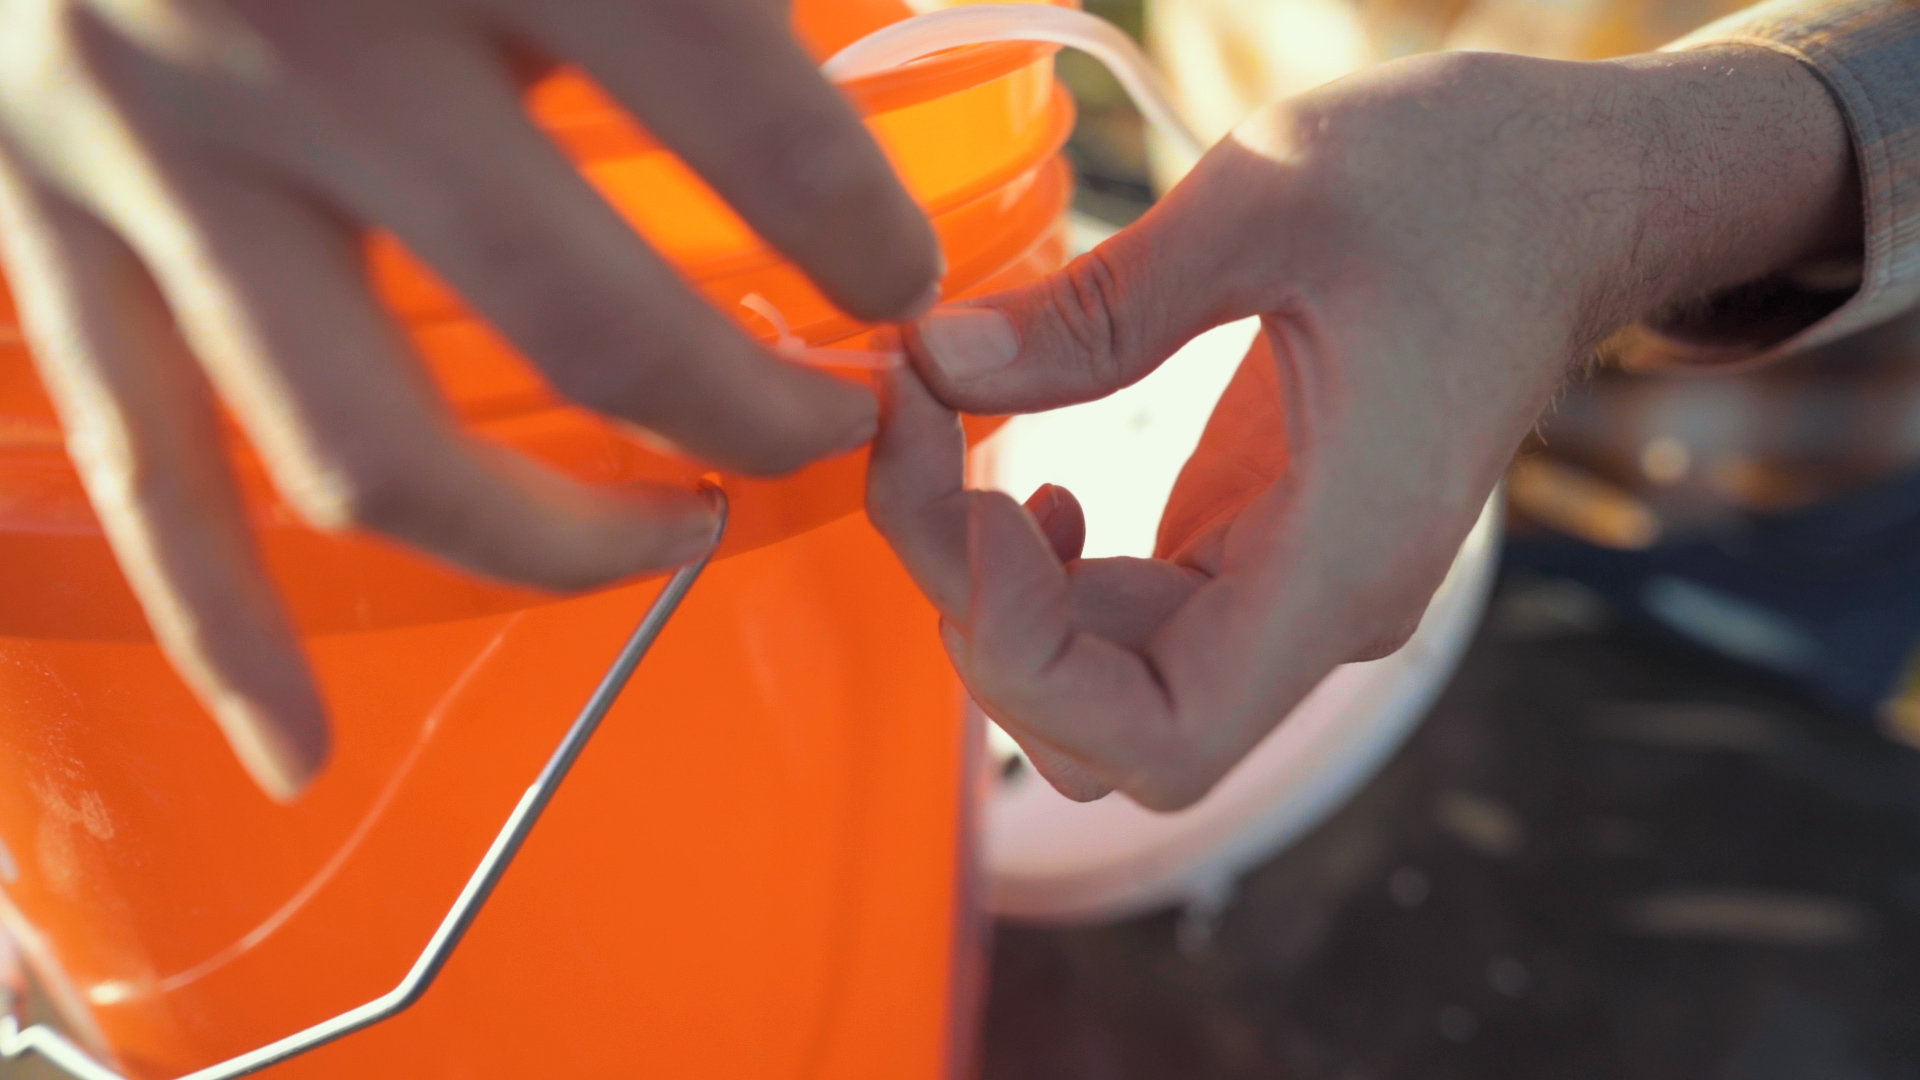
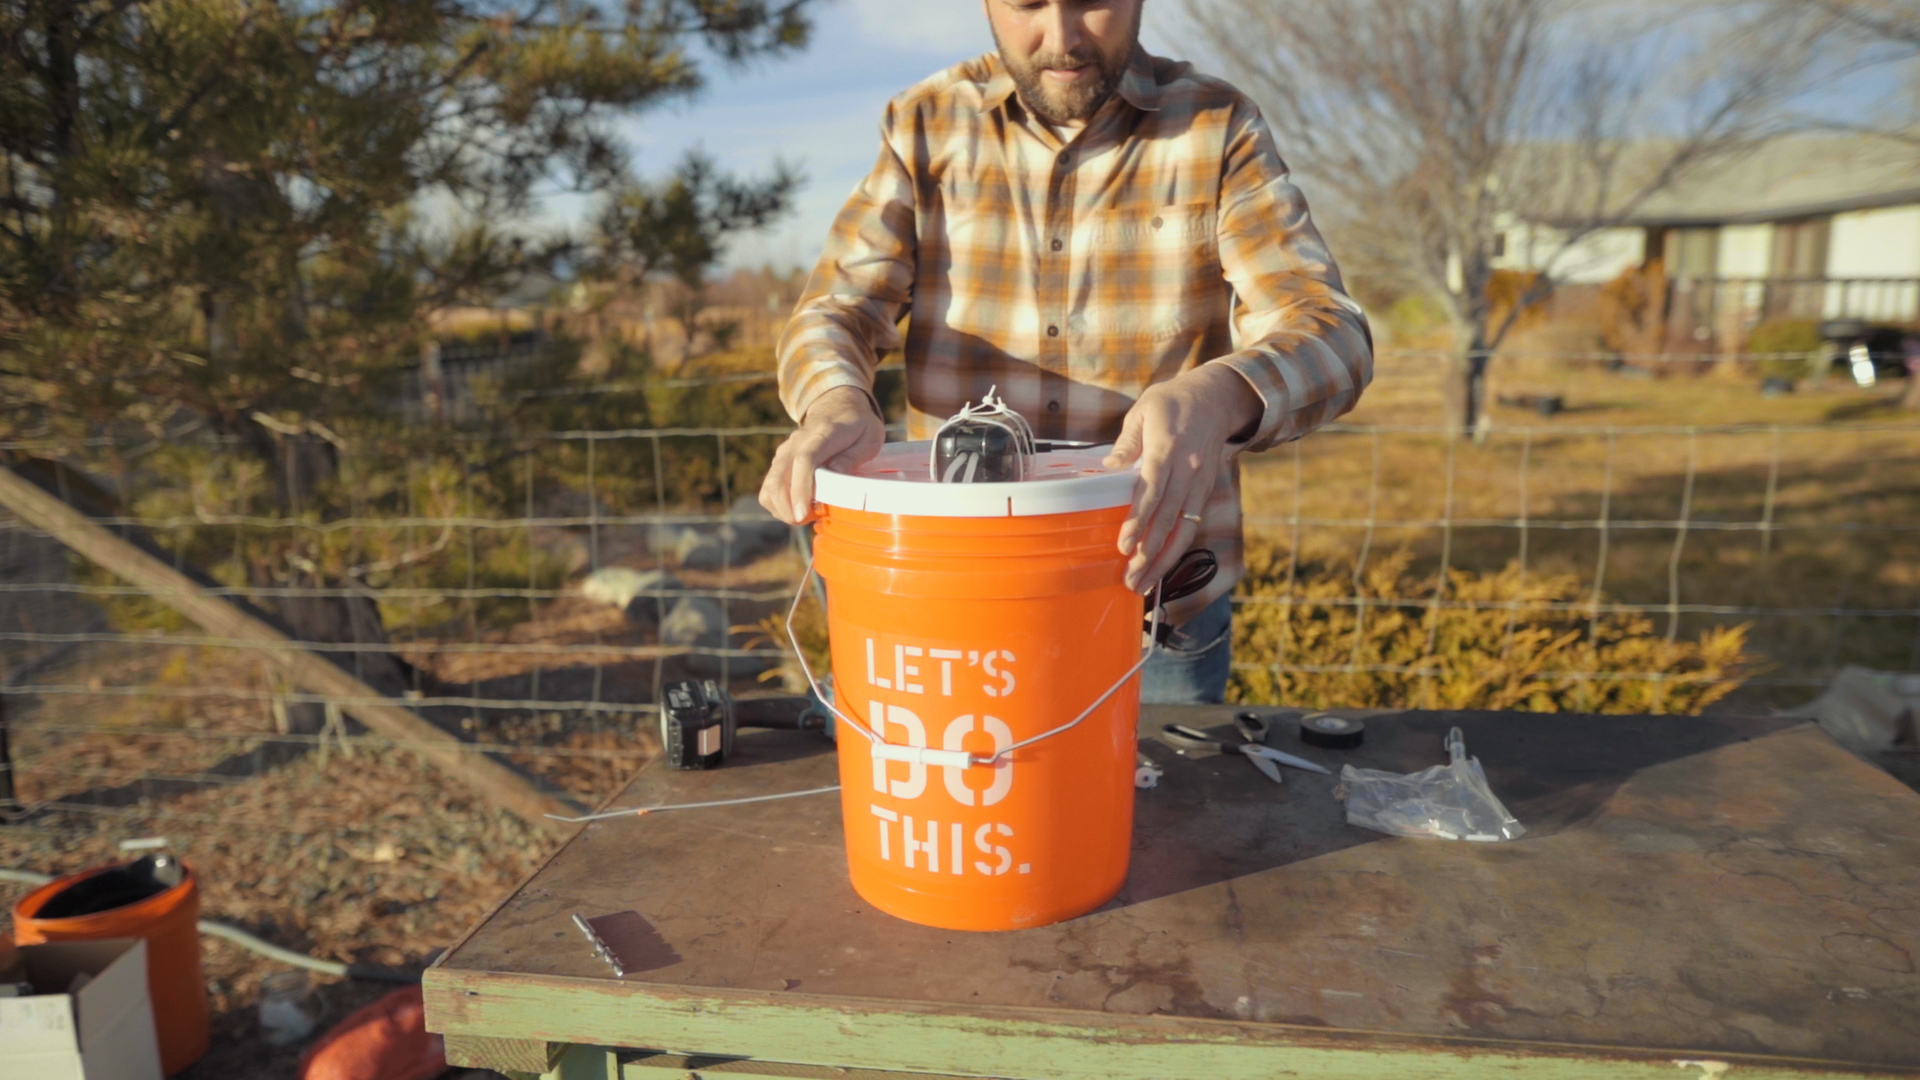
Step 6: tape down tubing on the inside of the bucket.
Secure the tubing to the sides of the bucket with waterproof tape (or be cool..er dumb like us and use electric tape) as needed. We found four pieces total sufficed, one mid way down the bucket and then at the bottom for each tube.
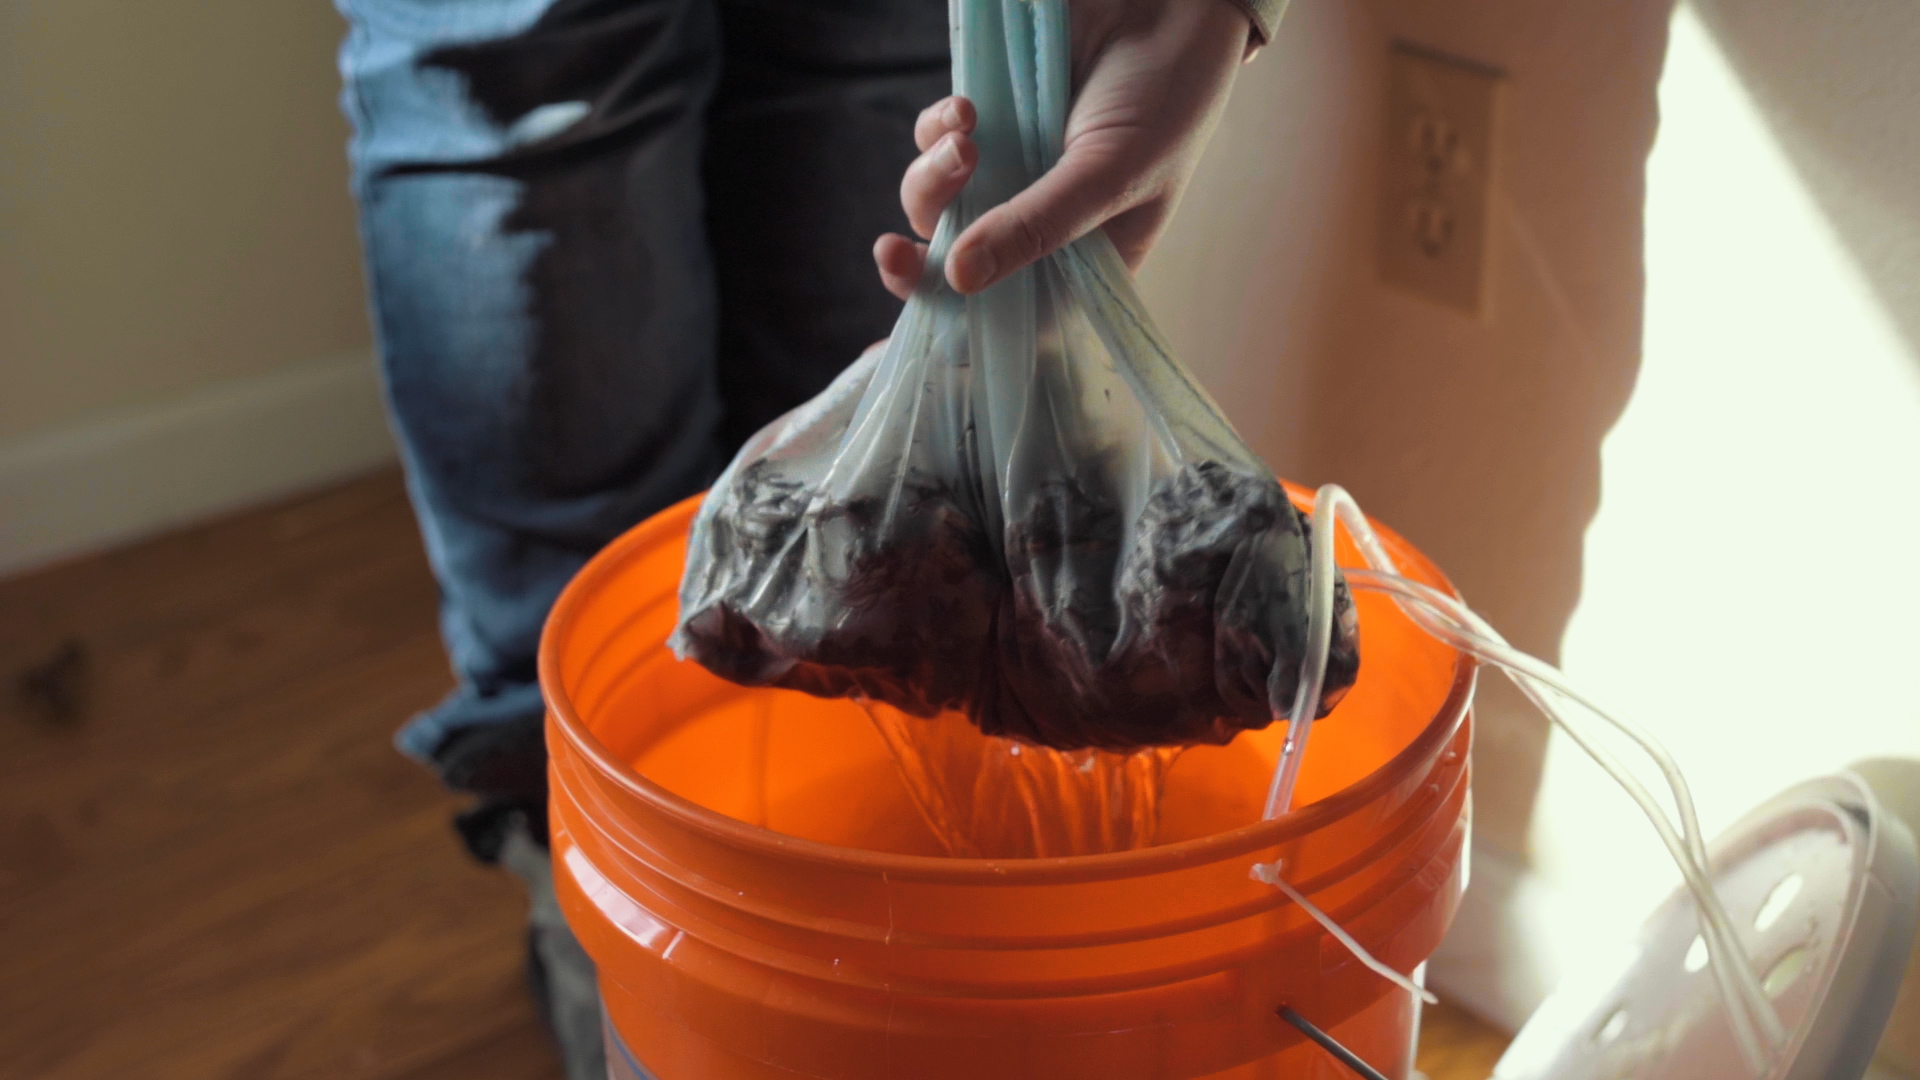
Step 7: Soak it up!
Fill the bucket with goodies, remember, you’ll need an outlet to run the pump!

Whether you are looking to stack the odds in your favor for a successful ranunculus and anemone crop or are wanting to concoct some yummy compost tea, hope this tutorial was more helpful then boring!
To see Graham and I in action on pre-soaking the corms and building this Soaking/compost tea making system be sure to check out our video on YouTube! If you like what you see, be sure to hit the like button, share with your friends and subscribe, your support means the world to our little endeavor!

We are looking forward to helping you hand blooms soon!
Jessica & Graham
Here are some affiliate amazon links to the aquarium pump we used making this contraption: