
How to Lay Out Your Cut Flower Field for Success
Deciding how to lay out your cut flower field is one of the most important steps to ensure a thriving and productive growing space. But it can also feel overwhelming—once you’ve started planting, changing the layout isn’t exactly easy.
So how do you set yourself up for success from the beginning?
In this post, we’ll walk through the key factors to consider when planning your layout, from sunlight and wind to row orientation, slopes, and bed dimensions. By the end, you’ll have the tools you need to create a layout that works with your property and microclimate—not against it.
Let’s start by exploring how to make the most of the space you have.

Harvesting zinnias in our cut flower field, with rows of blooms and low tunnels creating a productive and organized growing space.
Working with the Space You Have
Every property comes with its own unique features, shaped by its layout and microclimate. Whether your growing area is a backyard patch or several acres, the key is to assess what you’re working with and plan around it.
Step 1: Map Out Your Growing Area
Start by grabbing a notebook or sketchpad and jotting down the physical features of your property. This can include:
Structures: Houses, sheds, fences, driveways, or patios.
Natural Features: Trees, slopes, rocks, or water sources.
Sunlight: Areas that receive full sun, partial shade, or full shade during different parts of the day.
Wind Patterns: Common wind directions and areas that feel particularly exposed or protected.
Accessibility: Paths, gates, or any space that might need to remain open for access.
Step 2: Identify Opportunities and Challenges
Once you’ve mapped your space, look for areas that stand out.
Opportunities: A sunny corner for annuals, rich soil, or flat terrain for easy planting.
Challenges: Narrow walkways, shaded spots, or areas prone to flooding.
For example, at our first property, we only had 2/10 of an acre, with a house and fences limiting our space. But the front yard had great sunlight and soil, making it our main growing patch—despite occasional mishaps with a weed-whacking neighbor!
At our current property, we have a half-acre fenced area with full sun and minimal shade, which has been ideal. However, we still have to plan around trees and future projects like outbuildings.
Step 3: Plan Around What You Have
Instead of seeing constraints as obstacles, view them as opportunities to be creative. Ask yourself:
Where is the best light?
What areas drain well or poorly after rain?
Are there existing elements (like fences or trees) you can use to your advantage, such as for wind protection or trellising?
Even if your space is small or oddly shaped, working with its unique characteristics can make it both efficient and productive.
Once you’ve assessed your growing area, the next step is deciding how much of it to dedicate to production. Let’s explore that next.

A quiet winter view of our growing patch, with drip irrigation in place and rows prepared for the next season’s blooms.
How Much Land Should You Put into Production?
It’s tempting to turn every inch of your available space into a cut flower field, especially if you have a larger property. But for first-time growers, scaling too quickly can lead to overwhelm and burnout.
From experience, even starting with just 1,600 square feet of annuals can feel like a steep learning curve. When we moved to our current property, we had half an acre of potential growing space, but we gradually expanded over three seasons instead of planting it all at once.
For first-year flower farmers, I recommend starting with no more than a quarter acre of annual flowers. This approach allows you to learn the ropes while avoiding unnecessary stress.
Key Questions to Consider:
Before deciding how much space to dedicate to growing, ask yourself:
How many stems can you realistically sell? Consider your market demand and sales channels.
How much time do you have to tend to the field? Flowers are labor-intensive, requiring consistent care throughout the season.
How much help will you have? The more space you plant, the more hands you’ll need for tasks like planting, weeding, harvesting, and post-harvest care.
Remember: Quality Over Quantity
A well-planned, smaller field can produce just as much—if not more—than a larger field that is poorly managed. Flowers demand a high price because they are labor-intensive, and growing too much too quickly can turn your field into a money pit.
Once you’ve determined how much space to put into production, it’s time to dive into assessing the growing area itself.

Dreaming up the future of our flower field: a view of the new growing patch with our ever loyal pup right next to me.
Assessing Your Cut Flower Production Patch
Understanding your growing area is critical to long-term success. Soil quality, drainage, sunlight, and microclimates can all impact your flowers—and taking the time to assess these factors early can save you major headaches later.
When we moved to our current property, we had no choice but to dive right in. It was late August, and we’d already booked weddings and invested in spring bulbs. Unfortunately, we didn’t realize that part of our new patch turned into a lake during rainstorms. We learned the hard way when our tulips ended up underwater!
Today, the same area drains beautifully, but only after addressing the issue with time and effort. Had we taken more time to observe the property’s microclimates and terrain before planting, we could have avoided that challenge altogether.
Step 1: Map Your Space
If you’re not already familiar with the nuances of your patch, now’s the time to grab a notebook and pencil:
Sketch your space. Mark existing structures, trees, slopes, and water features.
Note how water drains after rain. Are there spots that stay soggy or areas prone to flooding?
Track sunlight at different times of day. Identify full-sun, part-sun, and shaded areas.
Step 2: Observe Microclimates
Microclimates—pockets with unique conditions like warmer temperatures or cooler airflow—can make a big difference. For instance, areas near buildings or fences may be warmer and drier, while shaded corners may stay damp longer.
By mapping and observing your space, you’ll better understand its unique challenges and opportunities.
Once you’ve assessed your patch, the next critical factor to consider is sunlight. Let’s dive into how row orientation plays a role.
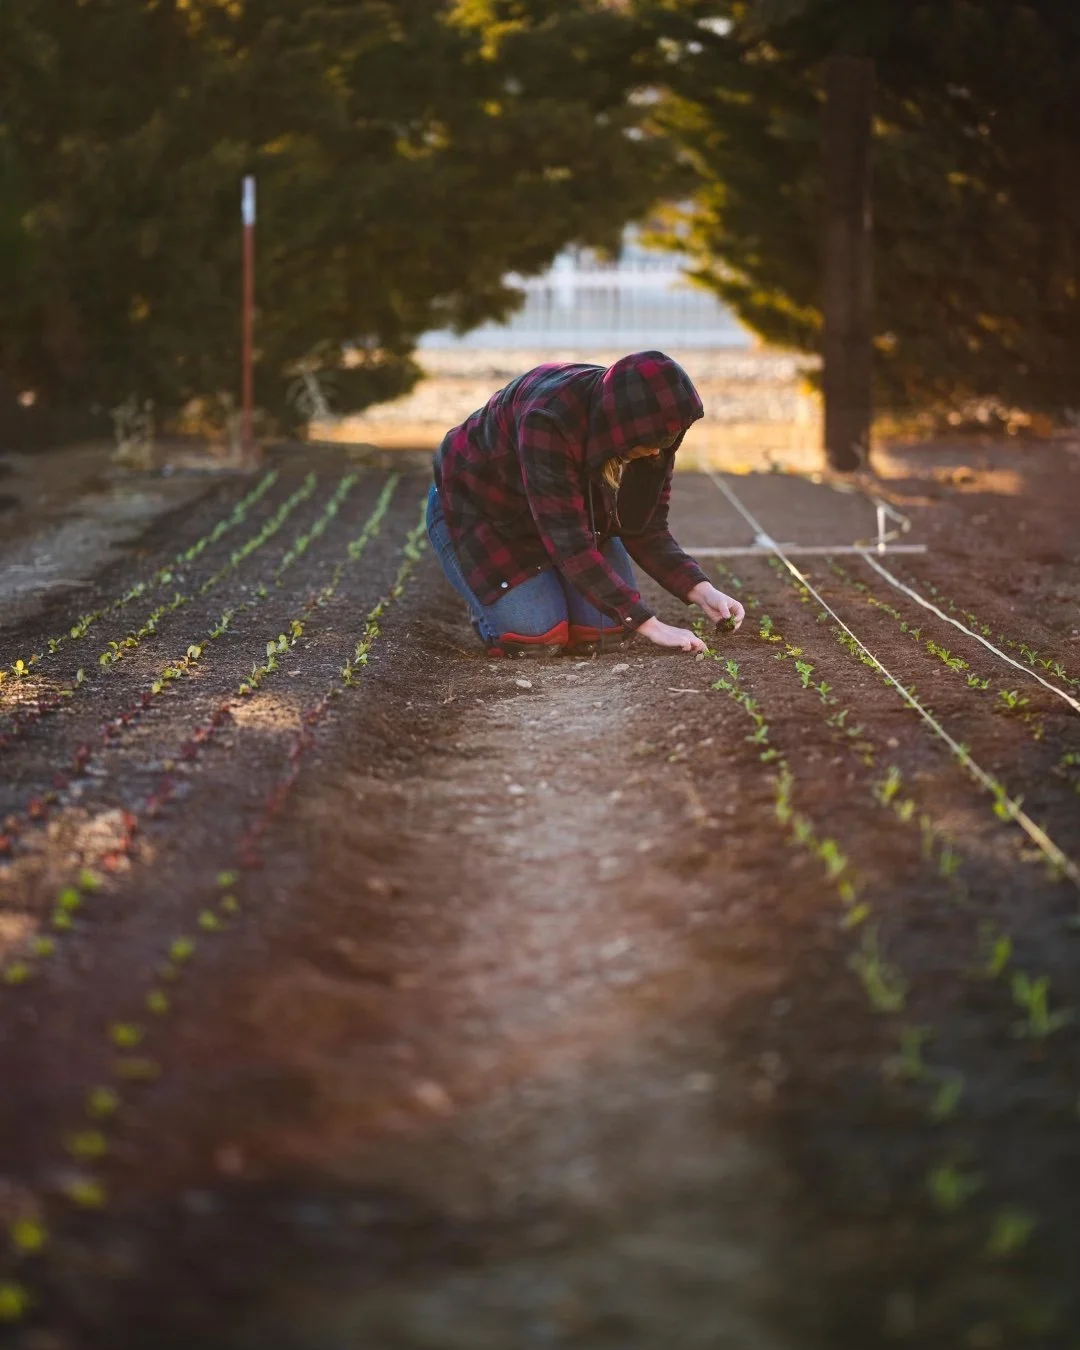
Planting spring transplants row by row, bundled up against the cool weather with the shadows of evergreen trees framing the field.
Row Orientation
Deciding how to orient your rows is one of the most important steps when planning your growing space. The right orientation ensures your crops get the sunlight they need, particularly for growers in northern regions where sunlight is more limited during certain times of the year.
Factors to Consider:
Sunlight Angle:
Observe how the sun moves across your property throughout the day and across seasons.
Pay special attention to shadows cast by buildings, trees, or fences, especially during the fall and winter when the sun is lower in the sky.
Latitude and Location:
Your distance from the equator affects the sun's angle. To find your latitude, search online for “latitude of [your city].”
For example, we are near the 39th parallel, which means shadows are long in late fall and early winter. While this doesn’t affect our crops much since most are dormant, it’s a key consideration for overwintering crops.
North-to-South vs. East-to-West Rows:
North-to-South Rows:
Ideal for regions further north of the equator.
Provides even sunlight exposure throughout the day, especially important in winter when sunlight is limited.
East-to-West Rows:
May work well for growers in regions closer to the equator or properties with specific constraints.
Can cause uneven sunlight distribution in winter due to long shadows, especially with low tunnels.
On our farm, we’ve oriented rows west to east, opting for shorter rows for easier harvesting. While this works well for us during peak growing months, our low tunnels can cast shadows on adjacent rows during winter. If we were further north, a north-to-south orientation would likely be better.
Pro Tip: Adjust for Your Property’s Unique Needs
Your row orientation may ultimately depend on constraints like existing infrastructure or terrain. Consider sunlight and seasons, and choose the layout that ensures your crops receive the light they need when they need it most.
With sunlight sorted, let’s move on to the next big consideration: wind.
Wind
Wind can be one of the most challenging factors for cut flower growers, particularly in open or exposed areas. On our farm, wind is a bigger issue than sunlight, especially during the winter and spring when we rely on season extension methods like low tunnels.
Observing Wind Patterns:
Every location has its wind quirks. Take the time to observe:
Prevailing Wind Directions: Which way does the wind typically blow, and does it vary seasonally?
Wind Strength: Is your property prone to strong gusts, or is it generally mild?
If you can’t track wind patterns for an entire season, ask your neighbors. Their insights can help you plan effectively.
Our Experience with Wind:
On our farm, the wind usually blows from south to north. This created problems when we had to orient our rows east to west due to property constraints. During the winter and spring, gusts regularly lifted our low tunnels, leading to plenty of sleepless nights and trips to fish tunnels out of trees.
While the wind is less of an issue in summer (when our temporary infrastructure is minimal), we’ve learned the hard way that row orientation can make a big difference. A north-to-south row layout would have exposed less surface area to the wind, reducing those issues.
Windproofing Your Field:
For windy locations, consider these tips:
Windbreaks: Plant hedgerows or install barriers to block strong winds.
Tie Down Infrastructure: Use sandbags, landscape staples, or even weighted pipes to secure low tunnels and other temporary structures.
Strategic Placement: Place vulnerable structures in areas naturally sheltered by buildings or trees.
If your property doesn’t experience strong winds or you’re not using season extension methods, you may not need to worry much about this. However, if you face regular high winds, prioritizing wind management will save you time, stress, and money in the long run.
Next, let’s talk about another natural factor to consider: slopes.
Slopes
Even a slight slope in your cut flower field can affect irrigation, soil quality, and overall productivity. While not all slopes are problematic, understanding how they impact your growing space is crucial.
Why Slopes Matter:
Drainage: Water naturally flows to the lowest point, which can lead to pooling, uneven irrigation, or flooding in sloped areas.
Soil Erosion: Slopes can cause soil to wash away during heavy rains or watering, depleting nutrients and leaving plants vulnerable.
Safety and Accessibility: Steeper slopes can make planting, harvesting, and maintenance more challenging—or even unsafe.
Our Experience with Slopes:
In our main growing area, there’s a slight slope of less than 1%. While small, it still caused irrigation water to flood the back of our rows, creating uneven watering. We solved this by installing low-pressure drains at the row ends, but better planning could have prevented the issue entirely.
What to Do About Slopes:
Mild Slopes (<2%): These can often be managed with minor adjustments, like careful irrigation planning or slightly altering row orientation to prevent pooling.
Significant Slopes (>2%):
Consider terrace farming to create level planting areas.
Select crops that are more tolerant of drainage variations or soil erosion.
Use soil retention methods, such as mulch, cover crops, or erosion mats.
For most properties, slopes shouldn’t be the primary factor when deciding row orientation—unless the incline is steep or causes significant drainage issues.
With slopes addressed, let’s turn to one final consideration: current and future infrastructure.
Current and Future Infrastructure
Your property’s infrastructure plays a key role in determining where and how you set up your cut flower field. While it might not always affect row orientation, it can significantly impact where you place your growing spaces.
Current Infrastructure to Consider:
Before breaking ground, take stock of what’s already on your property, including:
Visible Features: Buildings, fences, driveways, septic tanks, or wellheads.
Underground Utilities: Electrical wires, internet cables, and irrigation lines.
Pro Tip: Contact your local utility companies to have underground lines marked before you begin digging. This simple step can save you from costly mistakes!
Planning for the Future:
If you have plans to add new infrastructure, factor that into your field layout.
Future Buildings: Will you need to save space for sheds, outbuildings, or greenhouses?
Expansions: Are there areas you’ll want to reserve for additional rows or new growing projects in the future?
For example, while we could easily expand our current rows into unused parts of the property, we’ve held off because we plan to build a few outbuildings in that location. Similarly, some areas that seem ideal for growing are off-limits due to our septic tank and wellhead.
Keep Access in Mind:
Make sure any critical infrastructure on your property remains accessible. Leave enough space for maintenance or future upgrades, and avoid placing growing beds in areas that might block access to important features.
By considering both current and future infrastructure needs, you can set up your cut flower field in a way that’s efficient and avoids headaches later on.
With these factors in mind, it’s time to move on to the final step: deciding the dimensions of your growing rows and walkways.

Walking the pathways designed for easy harvesting, with snapdragons in full bloom and the thoughtful layout of rows making the work more efficient.
Deciding the Dimensions of Your Cut Flower Rows
The dimensions of your growing beds and walkways are a balancing act: maximizing planting space while keeping paths functional and accessible.
Finding the Right Balance:
At Sierra Flower Farm, we settled on 42-inch-wide beds with 18-inch-wide walkways. These dimensions allow for:
Easy Harvesting: The center of the bed is within comfortable reach, minimizing back strain.
Comfortable Paths: Narrower than most pathways but wide enough for walking and basic tasks like weeding.
Considerations for Bed and Path Dimensions:
Your Crop:
Larger plants like dahlias and cosmos need more space, even with trellising. Tight paths (e.g., 12 inches) work well for small vegetable crops but can feel cramped with flowers.
Your Equipment:
Will you need room for carts or mowers? Wider paths may be necessary if you use mechanized tools or allow public access for U-pick events.
Your Workflow:
Paths that are too narrow can slow down harvesting or maintenance, especially during peak growing months.
Industry Standards:
The market gardening industry has influenced the standard dimensions for small-scale cut flower farms:
Beds: 30 inches wide.
Paths: 18 inches wide.
These dimensions work well for planting, harvesting, and using common tools like low tunnels and hoop benders. If you’re just starting, sticking with these standards can simplify your setup and ensure compatibility with equipment.
When to Customize:
If you have unique needs—like hosting visitors or using custom tools—you can adjust your dimensions. For example, we’ve opted for 42-inch-wide beds with 18-inch walking paths to fit our workflow and make the most of our limited growing space. While narrower paths may not work for every farm, they allow us to maximize planting density while still keeping paths accessible.
Laying Out Your First Row
Getting your first row straight and aligned is crucial for maintaining an organized and efficient growing space. Crooked rows can lead to wasted space, uneven irrigation, and extra headaches during planting and harvesting.
One simple method to ensure your rows are perfectly straight is by using the 3-4-5 triangle method. This technique uses basic measurements to create a right angle, giving you a precise starting point.
How to Use the 3-4-5 Triangle Method:
Choose Your Starting Point: Mark one corner of your growing space where your first row will begin.
Measure the First Side (3 units): From your starting point, measure 3 feet (or any consistent unit of your choice) along one direction and mark the end.
Measure the Second Side (4 units): From the same starting point, measure 4 feet in a perpendicular direction and mark the end.
Check the Diagonal (5 units): Measure the diagonal line connecting the two ends. If it equals 5 feet, you’ve created a perfect right angle.
If the diagonal isn’t exactly 5 feet, adjust your measurements until it is. Once aligned, use the straight edge of your triangle as a guide to extend the first row in a straight line.
Pro Tip: Use Stakes and String
To keep your rows consistent, set up stakes at either end of your row and run string or twine between them. This provides a clear visual guide as you work.
For a step-by-step visual guide, watch the video below. Jump to the 9:52 mark for a demonstration of this method in action.
By starting with a precise first row, you set the foundation for a well-organized and productive cut flower field. We hope this guide helps you create a layout that works with your property’s unique traits and sets you up for a successful growing season!

We are looking forward to sharing more blooms with you soon.
Graham & Jessica