
How to Grow Dahlias: A Complete Guide for Gardeners and Farmers
Dahlias are a flower lover’s dream, offering a kaleidoscope of colors, shapes, and sizes that brighten any garden or bouquet. These versatile blooms have earned their place in our hearts—and our fields. From a small backyard patch with twenty plants to dedicating enough space for 2,000 dahlias on our farm, these flowers continue to captivate us with their charm and profitability.
In this guide, we’ll cover everything you need to grow and care for dahlias, from sourcing seeds, tubers, or cuttings to troubleshooting common challenges. With tips for planting, watering, harvesting, and even multiplying your stock, you’ll walk away ready to grow your own spectacular dahlia garden—maybe even with a touch of the “dahlia bug” yourself! Don't forget to check out our videos on lifting, storing, and dividing dahlia tubers at the end of this post.
Note: This post contains affiliate links. If you make a purchase through these links, I may earn a small commission at no additional cost to you. Thank you for supporting our farm!
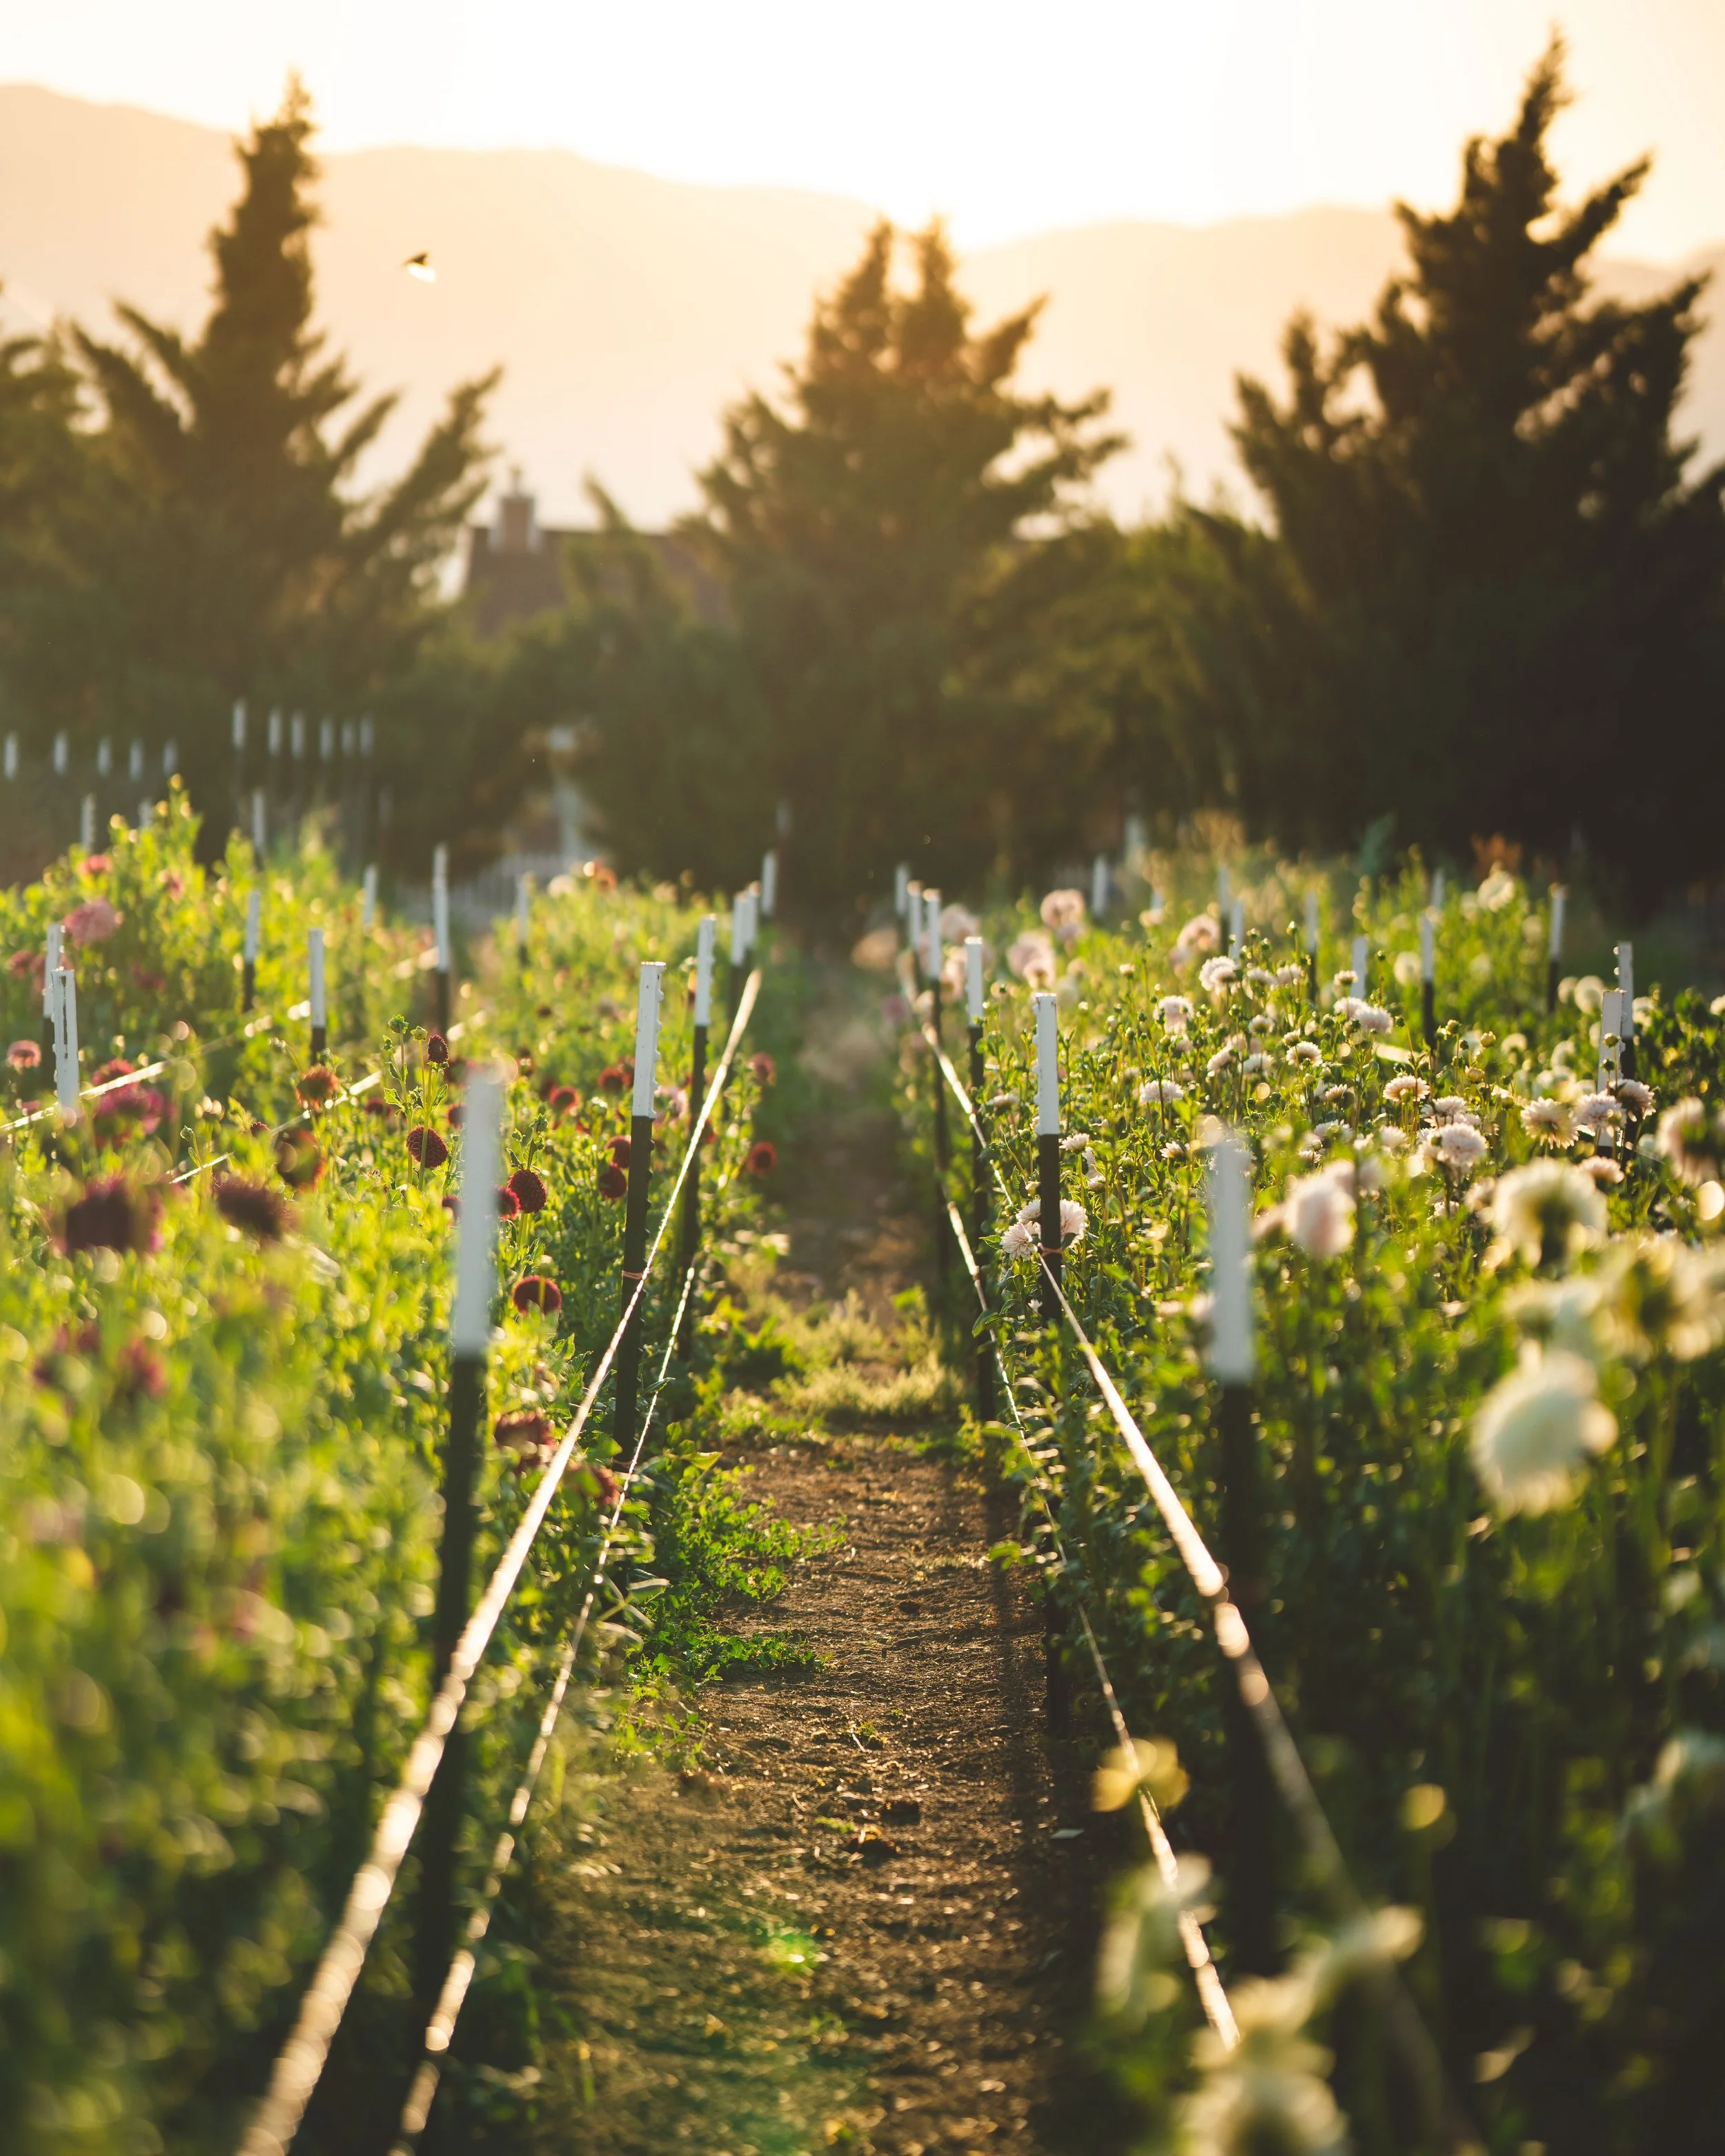
A serene view of our dahlia patch in full bloom, glowing under the golden hues of a summer sunset.
Should You Invest in Dahlia Seeds, Tubers, or Cuttings?
When starting your dahlia journey, choosing between seeds, tubers, or cuttings depends on your goals, budget, and timeline. Each method has its pros and cons, so let’s break it down:
Dahlia Seeds
Dahlia seeds are an affordable and fun way to experiment, especially for gardeners interested in breeding new varieties. While plants grown from seed won’t always match the parent plant, they’ll produce tubers in the first year—perfect for building your stock. However, tuber size and quantity can vary depending on the variety and the plant’s health, so it’s important to manage expectations.
Best For: Hobby gardeners and anyone curious about dahlia breeding.
Tips for Growing:
Start seeds indoors 4–6 weeks before your last frost date in a 50-cell tray or 2-inch soil blocks.
Use a heat mat to maintain soil temperatures of 70–75°F and a humidity dome to promote germination.
Dahlia seeds typically germinate in 5–10 days, though some may take up to 14 days depending on conditions like temperature, moisture, and seed vigor.
Avoid letting seedlings become root-bound by transplanting into larger containers if needed.
Pro Tip: My favorite trays for dahlia seed starting are here, and they make the process so much easier by accommodating quick-growing seedlings!
Looking to level up your seed-starting game? Check out our Seed Starting Supplies Blog for all our top recommendations and tools to get started!
Propagated Cuttings
Cuttings are a great way to multiply prized varieties quickly, especially those with poor tuber production. Each mother tuber can provide 5–7 cuttings, allowing you to increase stock without sacrificing blooms. Plants grown from cuttings will produce tubers in their first year, though tuber size and production can vary based on variety and environmental factors.
Best For: Expanding your collection of rare or expensive varieties.
How-To:
Wake Up Tubers: Pot up dahlia tubers and place them in a warm area above 55°F. Use a container with good airflow and drainage, and avoid overwatering.
Taking Cuttings: Once stems reach about 4 inches long, use sanitized clippers to cut or gently break off the stems near the eye. Cuttings taken early in the growth stage tend to root more easily.
Rooting Preparation: Dip the cuttings in rooting hormone (our favorite is linked below) and place them in a soil-less substrate like Pro-Mix HP, ideally an enriched substrate with mycorrhizae to promote root growth.
Humidity and Moisture: Cover cuttings with a dome lid to maintain humidity. Keep the soil moist but not soggy and mist the leaves 2–3 times daily.
Temperature: Maintain a soil temperature of 65–70°F using a heat mat if needed. Avoid direct sunlight during this stage to prevent overheating.
Roots should develop in about two weeks. You’ll know they’re rooted when you gently tug on the cutting, and it resists. Once rooted, remove the humidity dome and begin acclimating the plants to their growing environment.
Pro Tip: My go-to tools for propagation include a 4-cell insert, a flood tray, a dome lid, and Clonex rooting hormone—they make the entire process more efficient and successful!
Pro Tip: If purchasing cuttings, quarantine them to prevent the spread of diseases like tobacco mosaic virus or gall.
Dahlia Tubers
Tubers are the most reliable way to grow dahlias true to their variety, making them the go-to choice for cut flower growers. A single tuber can produce multiple blooms and new tubers during the growing season.
Best For: Farmers and florists seeking consistency in flower color, size, and form.
Where to Buy: Support small-scale growers or reputable sellers for higher quality and reduced risk of disease. Avoid big-box retailers if you're growing for production, as these tubers are often better suited for landscaping.
Pro Tip: Whether you’re growing from seeds, cuttings, or tubers, inspect your plants regularly for signs of disease or pests. Healthy starts make for healthier plants and better blooms.
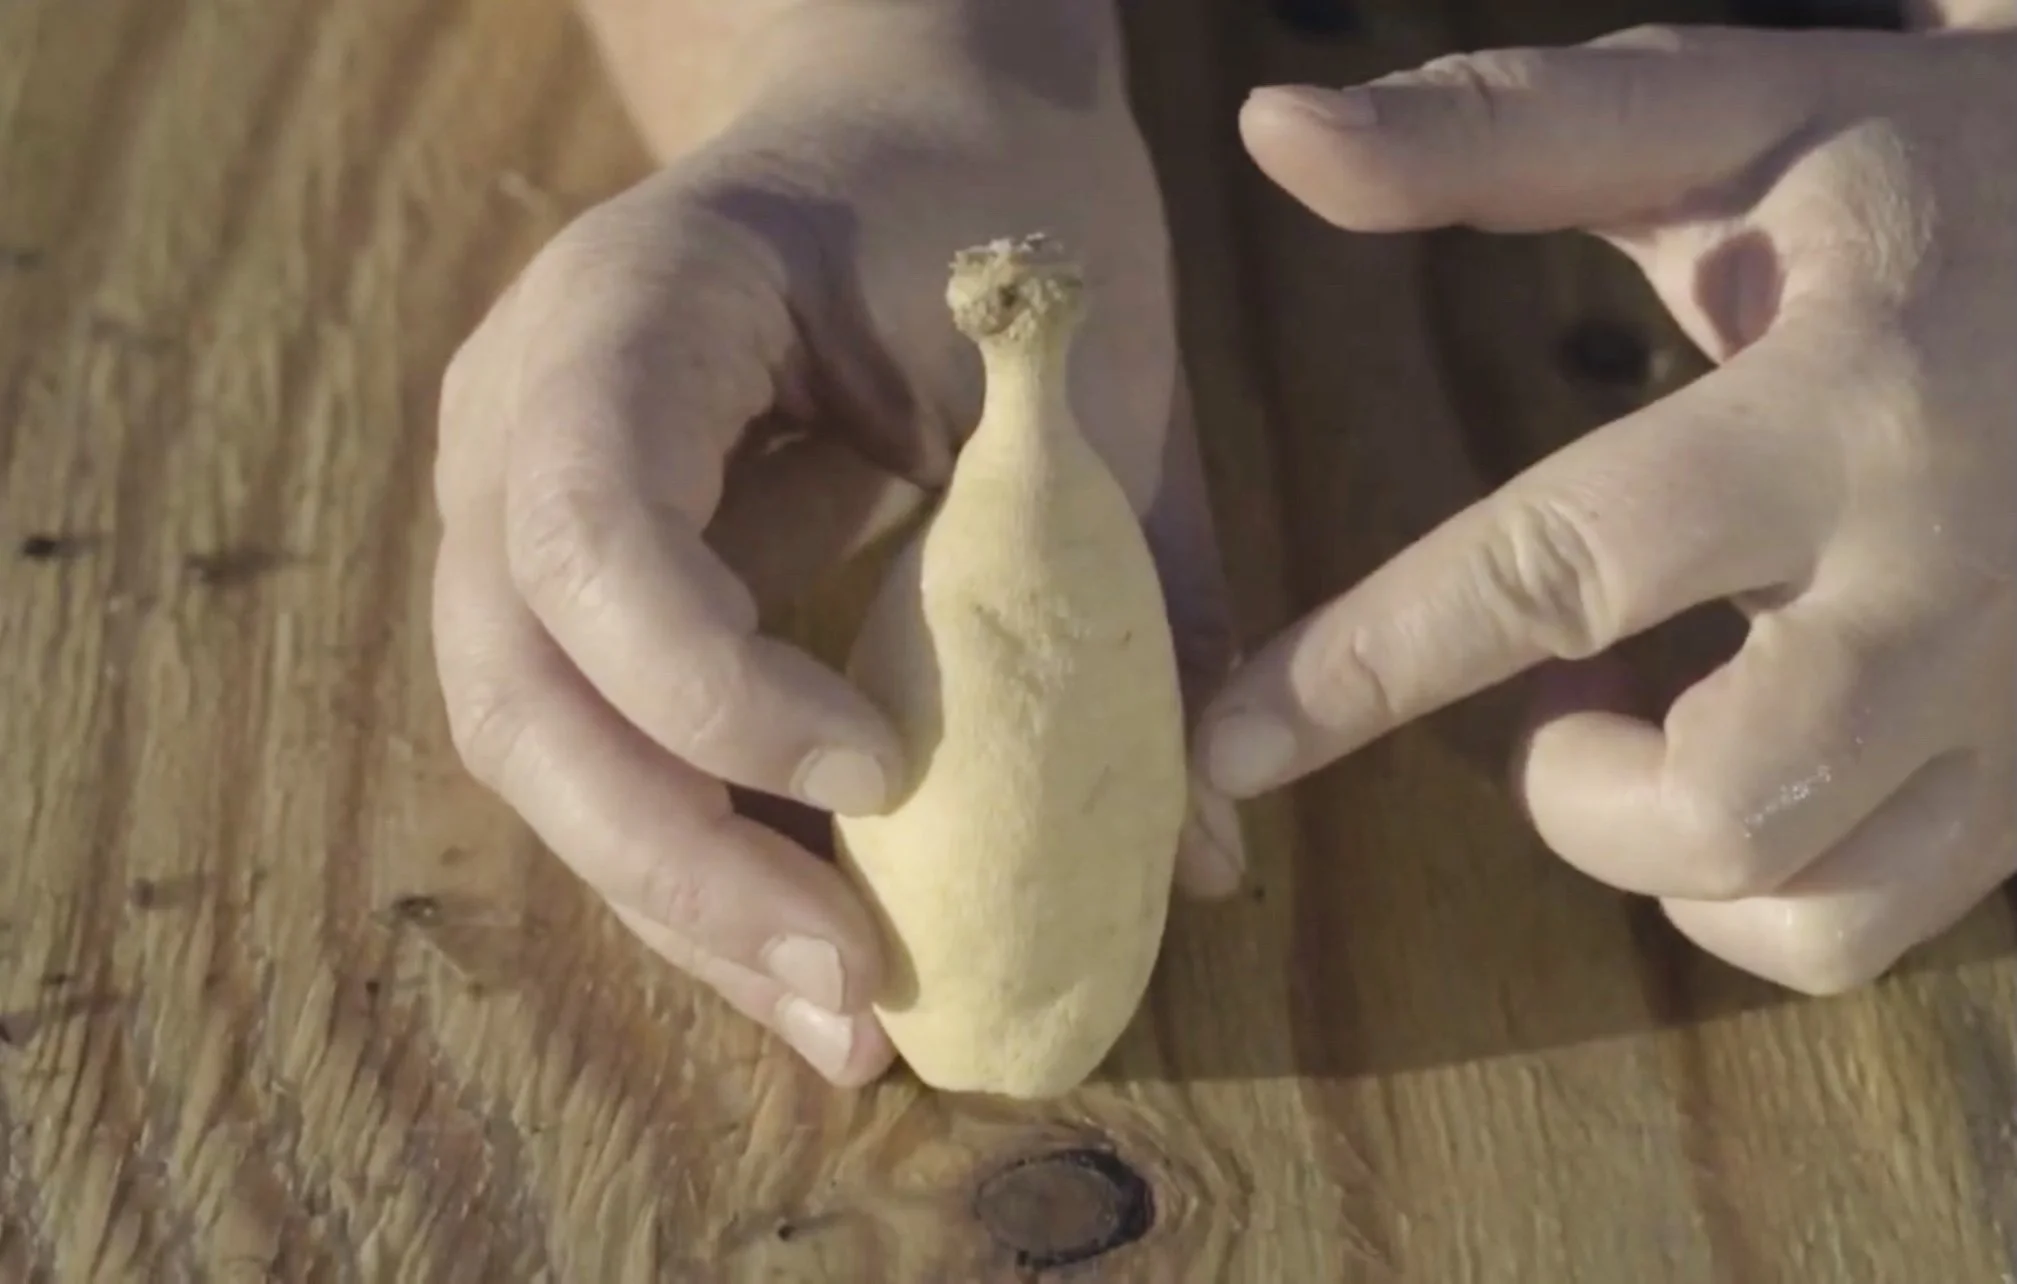
A healthy dahlia tuber with budding eyes—ready to begin its journey to a stunning bloom.
Inspecting and Preparing Dahlia Tubers
Dahlia tubers may look like scrawny yams, but they’re powerhouses of energy for your plants. Knowing how to inspect and prepare them is key to growing healthy, vibrant flowers. Here’s what to look for:
Dahlia Tubers 101: Anatomy Basics
Understanding the three main parts of a tuber helps you identify viable ones:
Crown: The top part of the tuber, where the plant’s “eye” will sprout. Without an eye, there will be no growth.
Neck: The connector between the crown and the body. A firm, intact neck is essential; a broken one reduces energy flow and may result in a weak or non-viable plant.
Body: The storage area that provides energy for growth. It should feel firm and plump, though slight shriveling is okay.
How to Identify Healthy Tubers
Look for Eyes: These are tiny growth points on the crown. Multiple eyes mean more potential stalks and flowers!
Check for Firmness: Soft, mushy, or overly shriveled tubers are unlikely to thrive.
Watch for Disease: Signs of issues include:
Gall: A cauliflower-like sprout from the crown, often caused by bacteria. Plants with gall rarely flower and should be discarded.
Rot: Black or slimy areas indicate the tuber is past saving.
Multiple Healthy Eyes vs. Gall: Multiple healthy eyes are a bonus. If unsure, a quick online search for visuals can help you differentiate.
Sanitation Is Key
Dahlia tubers are prone to spreading diseases if tools aren’t sanitized. Use a diluted bleach solution or hydrogen peroxide to clean tools between cuts. And remember: “When in doubt, throw it out" to avoid infecting healthy plants.
Waking Up Dahlia Tubers
To give your dahlias a strong start, “waking them up” before planting helps assess viability and encourages sprouting, especially if you’re planning your layout or want to avoid planting blind tubers.
Environment: Store tubers in a cool, dark location (ideally 50–55°F) with stable humidity, around 80–90%. This can often be achieved using a plastic storage box partially or fully closed, filled with a dry medium such as pine shavings, peat moss, or vermiculite. The goal is to prevent both excess moisture (which can lead to rot) and overly dry conditions (which can cause shriveling).
Avoid direct sunlight, which can cause tubers to overheat, dry out, or even die before planting. In some cases, tubers with viable eyes can be damaged or killed by excess heat, especially in enclosed containers placed near heat sources or windows.
Check periodically to ensure the tubers remain firm. If moisture builds up, vent the container slightly. If they begin to shrivel, either plant them out or move them into fresh dry peat moss to help re-stabilize conditions.
Timing: Depending on the tuber’s dormancy level and environment, sprouting can begin in as little as 7 days or take up to 30 days. Tubers stored in colder conditions often take longer to wake. Some varieties are naturally slower or more sensitive than others.
Checking for Eyes: Waking tubers before planting gives you a chance to check for eyes (growth points). Not all viable tubers show eyes immediately, so patience is key. However, if a tuber remains firm but shows no signs of growth after several weeks, it may be “blind” and should be discarded to save space and effort.
Dormancy Reintroduction: Tubers that start to sprout can revert to dormancy if re-exposed to cold (below 50°F). While this is a natural survival response, repeated cycles of waking and chilling may stress or weaken the tuber. Try to keep sprouted tubers in a stable environment until planting time.
Avoid Potting Up Unless Experienced: Some growers choose to pot up tubers indoors, but we do not recommend this unless you’re familiar with managing light, moisture, and airflow. Sudden environmental shifts can stress the tuber or lead to rot. For most growers, it’s best to let tubers wake gradually in a controlled space, then plant directly when the time is right.
Monitor Progress: Watch for swelling, firmness, and emerging eyes—these are signs your tubers are ready to plant. If sprouts grow tall before planting, you can gently pinch them back to encourage bushier growth once transplanted.
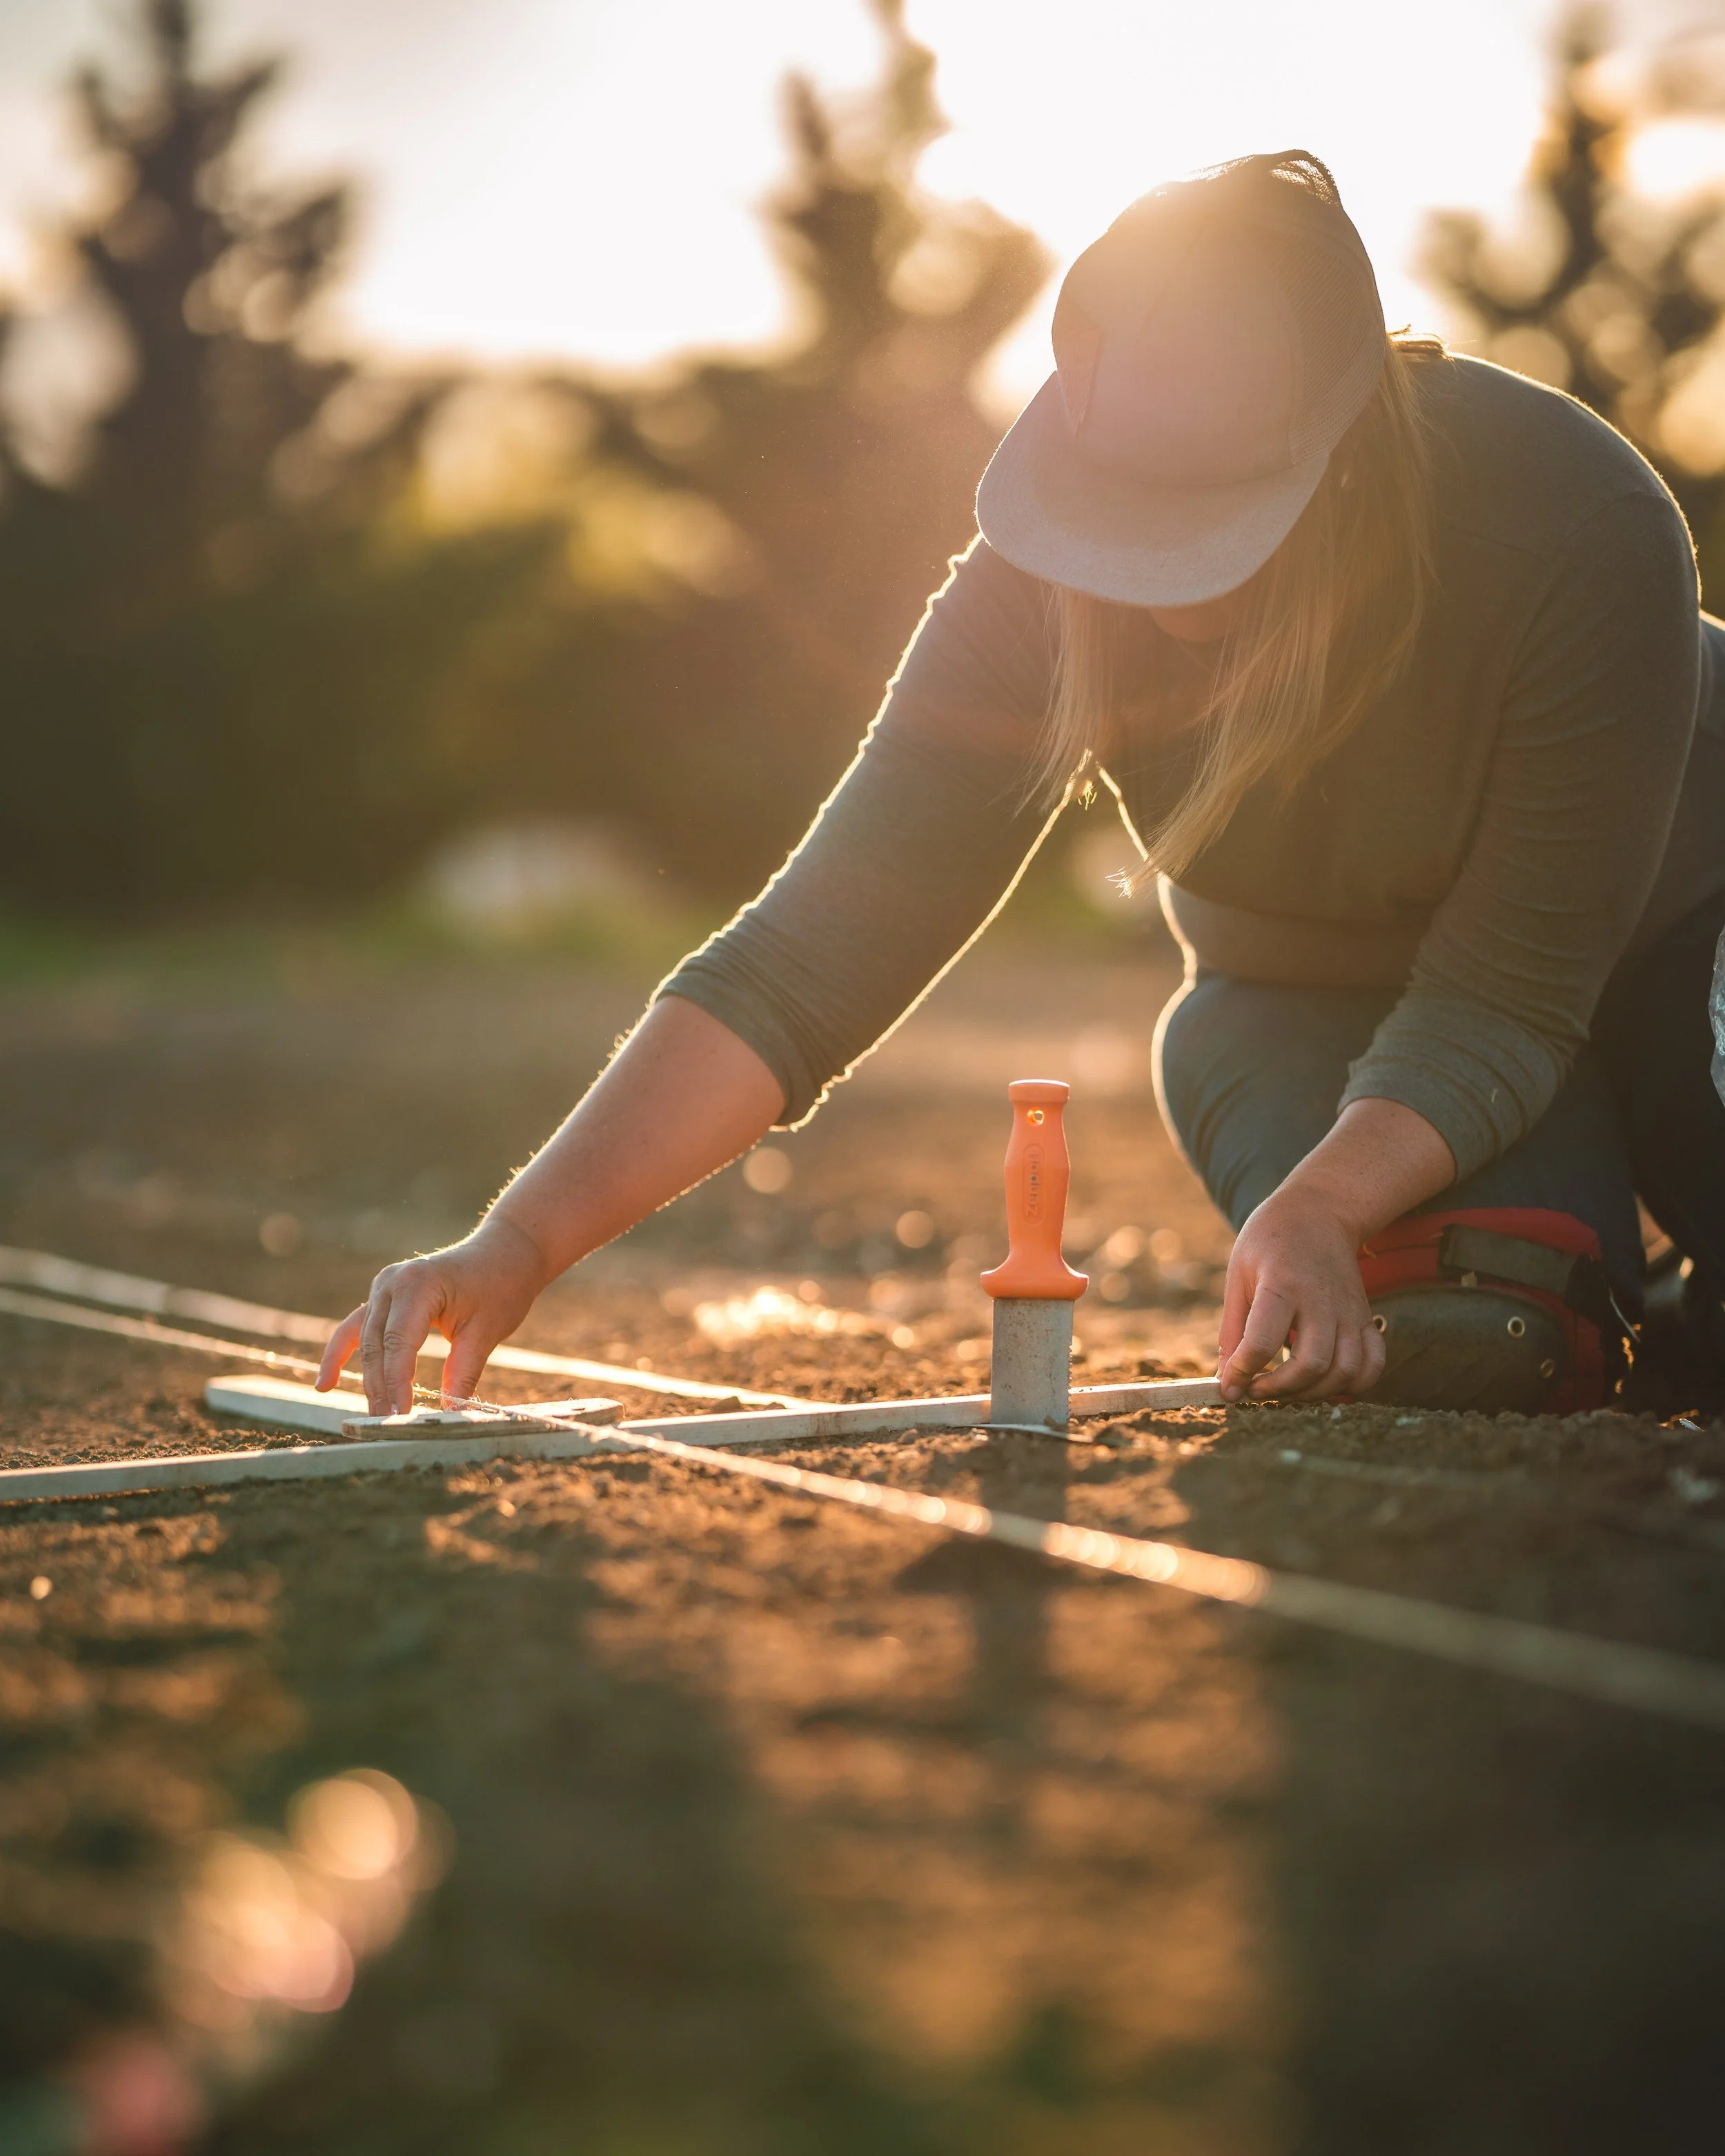
Preparing to plant dahlia tubers in the warm glow of sunset, with tools and tubers at the ready.
Planting Dahlias: Soil, Spacing, Watering, and Trellising
Once your dahlia tubers are ready, it’s time to plant them in their new home. Proper soil preparation, spacing, and watering are critical to ensure healthy plants and abundant blooms.
When to Plant Dahlias
Dahlias are heat-loving plants native to Mexico, so timing is key:
Soil Temperature for Tubers: Wait until the soil warms to at least 60–65°F before planting tubers. These are more tolerant of cooler nights since the tuber is underground.
Seedlings and Cuttings: While soil temperature is still crucial for healthy root development, these plants have exposed foliage that is more vulnerable to frost. Use frost cloth or tunnels to protect against unexpected temperature drops.
Pro Tip: For detailed tips on extending your growing season with frost protection, check out our Season Extension Guide.
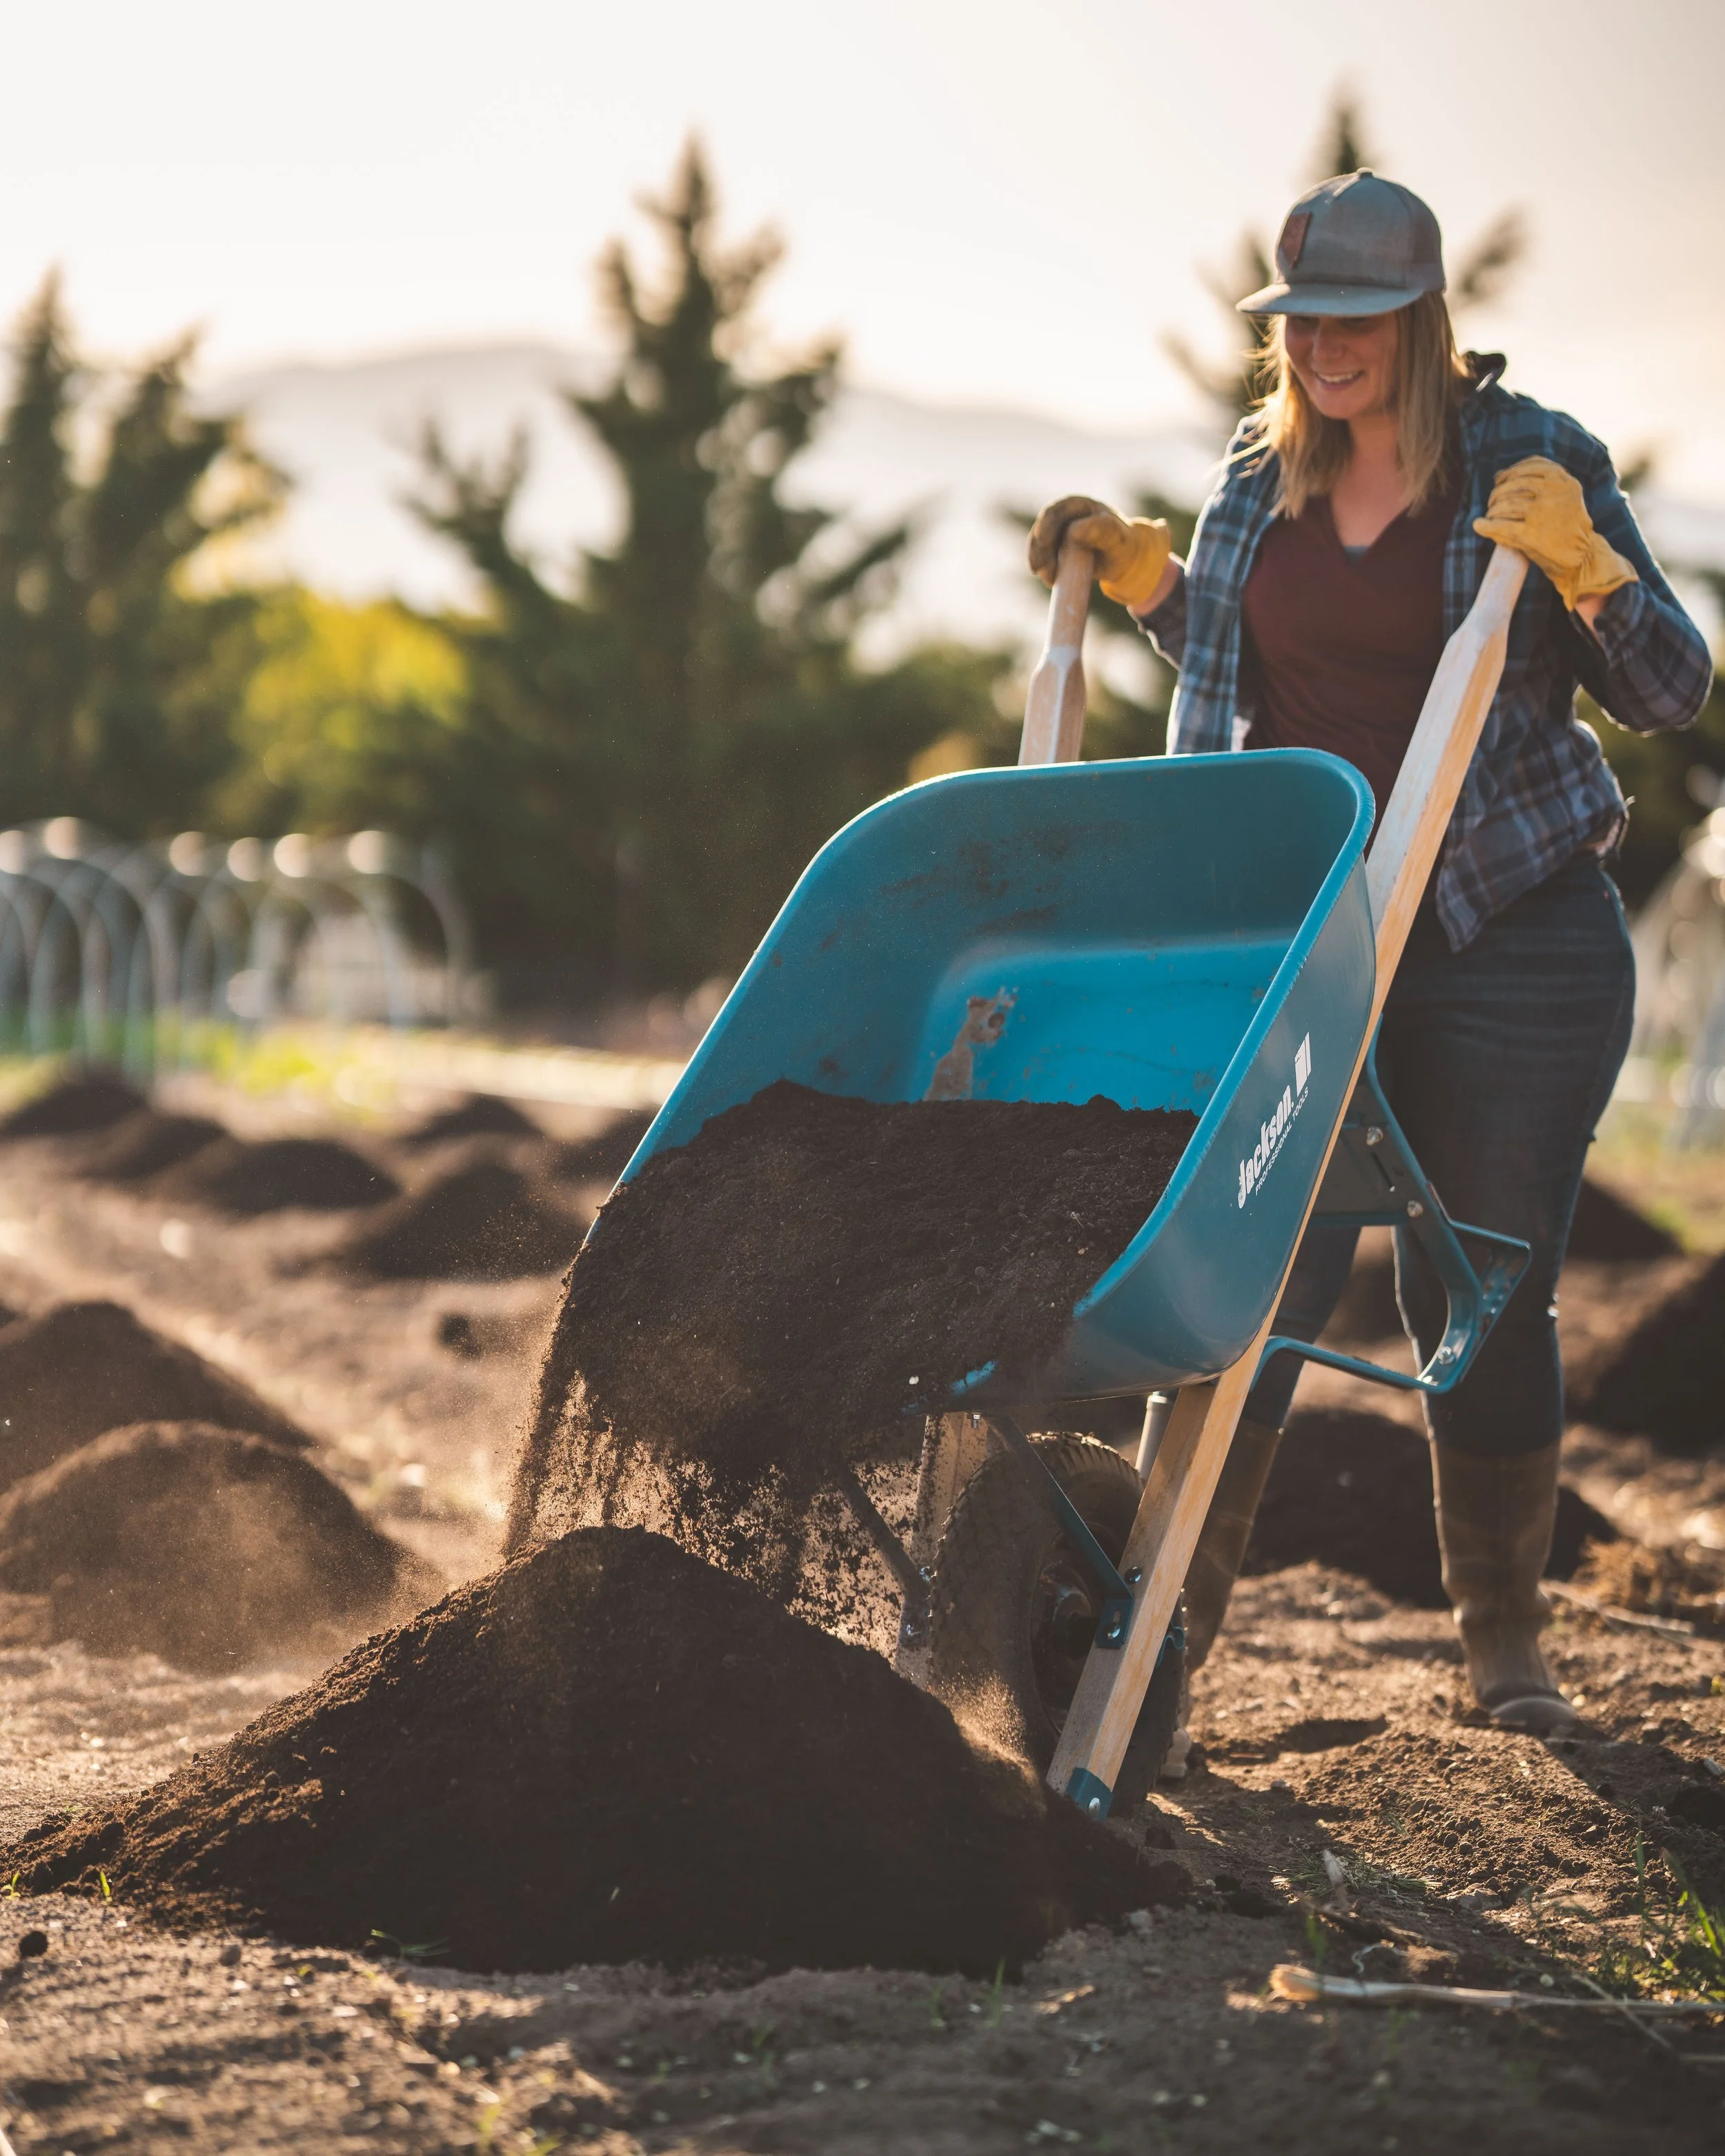
Enriching the soil with high-quality compost, laying the foundation for thriving dahlias.
Preparing the Soil
Healthy Soil Sets the Foundation for Thriving Plants
Creating the right soil environment is essential for healthy dahlias and abundant blooms. Here’s how to ensure your soil is ready:
Amendments: Dahlias love soil rich in organic matter, which improves moisture retention and provides a steady release of nutrients. Incorporate high-quality compost and a slow-release fertilizer to enrich the soil. While dahlias aren’t heavy feeders, over-fertilizing can lead to excessive leaf growth at the expense of blooms.
For Sandy Soils: If your soil is sandy, supplement with additional fertilizers or organic matter like aged manure to improve nutrient retention and soil structure.
Drainage: Well-draining soil is critical to prevent tuber rot, especially in wetter climates. In arid areas, gradually building up organic matter over time can enhance soil structure and help retain moisture without becoming waterlogged.
Testing: A soil test is a valuable tool for ensuring you’re providing the right nutrient balance. For dahlias, aim for soil with lower nitrogen levels to prevent excessive foliage growth, and higher phosphorus to support strong root systems and vibrant blooms..
Pro Tip: For a detailed step-by-step guide to transplanting seedlings, check out our Transplanting Seedlings Guide.
Spacing and Bed Setup
Efficient spacing is essential to promote airflow, reduce disease risks, and maximize your planting area. Here’s how we approach it and why you might adjust:
Our Row Setup: On our farm, we plant three rows of dahlias in beds that are 3.5 feet wide, with 15 inches between plants. This spacing lets us fit 240 plants in a 100-foot row while maintaining enough airflow in our arid climate. Closer spacing also helps conserve water and reduce weed pressure.
Industry Recommendations: In more humid climates, where disease pressure is higher, it’s common to space plants farther apart—up to 18–24 inches between plants. Wider spacing improves airflow and helps prevent fungal issues like powdery mildew or botrytis.
Considerations for Taller Varieties: Dinner-plate and other tall dahlias may need slightly more space or additional trellising to prevent plants from becoming top-heavy and overcrowded.
Find Your Balance: Consider your soil, climate, and disease pressure when deciding on spacing. For growers in humid regions, prioritizing airflow is key, even if it means planting fewer dahlias per row.
Pro Tip: For more ideas on optimizing your field layout, check out our Bed Prep and Layout Guide.

Sunset planting: placing dahlia tubers with care to set the stage for a summer full of blooms.
Planting Techniques
Proper planting ensures strong, healthy plants throughout the growing season. Here’s how to approach it, depending on what you’re planting:
For Single Tubers:
Depth: Dig a hole 1.5–2 times the depth of the tuber. Lay the tuber horizontally to reduce neck stress during growth.
Orientation: Position the tuber so the body is closer to your water source, as this is where roots develop.
For Full Clumps:
Depth: Plant with the crown (where the eyes are located) facing up, ensuring the entire clump is covered with soil. Larger clumps may require a slightly deeper hole.
Spacing: Allow for more room (about 18 inches) to accommodate the clump size and ensure good airflow.
For Cuttings and Seedlings:
Depth: Transplant seedlings or cuttings at the same soil depth as they were in the tray or pot. Ensure the root ball is completely covered for stability.
Orientation: Gently firm the soil around the roots, keeping the plant upright. Seedlings and cuttings benefit from being close to water sources, just like tubers.
Special Note for Dahlias: When transplanting dahlia seedlings, be gentle with the roots and plant them slightly deeper than they were in the tray or pot. This helps anchor the plant and promotes stem stability.
Labeling Dahlias: Staying Organized
Accurate labeling is essential to keep track of dahlia varieties throughout the growing season, especially when it comes to harvesting, propagating, or saving tubers.
Redundancy Is Key: Use multiple labeling methods to avoid losing track of varieties:
On the Tuber: Write directly on the dahlia tuber using a waterproof stamp or Sharpie marker to ensure identification remains intact through planting and growth.
In the Field: Add a wooden stake or plant tag near each plant, labeled with pencil or a no-fade Sharpie/garden marker. These withstand sun, water, and weather better than standard markers.
Backup Mapping: As a backup, create a row map noting the location of each variety. This is especially useful if field labels fade, break, or get lost during the season.
Digital Tracking: We also use our Crop Planning Template to keep detailed records of our dahlia layout, variety notes, and season-long updates. This system ensures everything stays organized, even as the season progresses.
Pro Tip: Check your labels periodically throughout the season to ensure they’re still legible and secure. Taking photos of your row map or field layout can add an extra layer of assurance.
Looking to streamline your crop planning process? Check out our Crop Planning Tools and Templates Blog for resources to help you stay organized and efficient!

Harvesting Castle Drive dahlias in the heart of our blooming patch.
Watering for Success
We’ve learned the hard way when it comes to watering dahlias correctly—but not necessarily in the way most dahlia enthusiasts might expect. Dahlia tubers are indeed susceptible to rot when first planted, especially before they’ve grown roots and become established. This vulnerability is why the common advice is often to avoid watering until you see shoots emerging from the soil. While this guidance has its merits, it doesn’t apply universally to all climates.
In all climates, dahlia tubers (as well as seedlings and cuttings) need moist, but not waterlogged, soil to thrive. However, in our arid environment, this means we must supplement watering to compensate for the lack of natural moisture in the soil. Maintaining consistent moisture during the early stages is critical to waking the tuber and encouraging healthy growth.
Don’t be afraid to water your dahlias—just keep your fingers on the pulse of your soil’s moisture levels. Here’s how we approach watering to ensure healthy plants:
Irrigation Setup: We use drip irrigation with 8-inch emitter spacing to deliver deep, even moisture directly to the roots. This method minimizes water waste and ensures the soil stays evenly hydrated.
Early Season Needs: When tubers are newly planted or seedlings and cuttings are establishing, we focus on maintaining consistently moist soil. Watering frequency depends on weather conditions, but it’s essential to avoid letting the soil dry out completely.
Adjusting for Growth and Temperature: As temperatures increase and plants become more established, we transition to watering for one hour daily. However, during cooler periods or stretches of milder weather, watering may only be needed every other day. Regularly check soil moisture to ensure it’s not too dry or overly saturated.
Tailoring to Your Climate: Depending on your soil type and humidity:
In humid climates: You may need less frequent watering to prevent over-saturation and root rot.
In sandy or fast-draining soils: Watering might need to be more frequent to compensate for rapid moisture loss.
Pro Tip: While some growers avoid weed cloth, we’ve found it invaluable in our arid climate. It suppresses weeds, retains soil moisture, and reduces watering frequency—making it a reliable tool for our dahlia beds.
By observing your plants and soil conditions, you can adjust watering to meet the unique needs of your environment and ensure your dahlias thrive.
Watching for Watering Issues
Getting watering right can be tricky, especially early in the season. Here's what to look for at different stages of growth:
At Planting: If you don’t see growth after planting, it could be due to lack of water, overwatering, or simply that the tubers need more time to sprout. Be patient, but check the soil moisture to ensure conditions are optimal.
Underwatering: For established plants, signs include slow growth, wilting, or shriveled leaves. These indicate the plant isn’t getting enough moisture.
Overwatering: Look for yellowing or blackened leaves, which can signal waterlogged soil or root rot.
With the right preparation, your dahlia patch will be on its way to producing stunning blooms. Up next, we’ll tackle trellising, bug battles, and keeping your plants stress-free!

Corral trellising provides essential support for blooming dahlia rows in our field.
Trellising Dahlias for Support
Dahlias, especially the larger dinner-plate varieties, can become top-heavy as they grow, making trellising an essential step to prevent damage and keep plants upright. Proper support also makes harvesting easier and reduces the risk of tubers being uprooted by wind or rain.
Our Favorite Method: Corral Trellising
We use the “corral” method with T-posts to support our dahlias. Here’s how it works:Place T-posts at intervals along the edges of your bed.
Wrap baling twine around the posts to form a supportive grid or corral.
Start the first layer of twine about 12–18 inches from the ground to support plants as they begin growing.
Add subsequent layers every 12–15 inches as plants grow taller. Most dahlias need two layers, but taller varieties or windy areas may require a third.
Alternative or Supplemental Support: Hortanova Trellising
Hortanova netting is another effective option for supporting dahlias and can be especially valuable in high-wind locations.Stretch the netting horizontally across the bed, secured by T-posts or stakes.
Plants grow through the netting, which helps keep them upright and reduces the need for additional layers of twine.
Using Hortanova in conjunction with the corral method offers extra stability for challenging conditions.
Why We Prefer T-Posts:
While bamboo stakes or wooden posts can work as alternatives, we lean toward T-posts for their durability, reusability, and design. The notches along the sides of T-posts make it easy to secure Hortanova netting or baling twine at various heights, ensuring a stable and adjustable support system. They also stand up well to weather and the weight of heavy plants, making them a reliable investment for year-after-year use.When to Install Trellising:
Install trellising shortly after planting to have support ready as soon as the plants begin growing. Waiting too long can make it harder to manage sprawling plants and could risk breakage during windy weather.
Pinching Dahlias for Better Blooms
Pinching dahlias encourages branching, resulting in more flowers with longer, sturdier stems—perfect for cutting gardens and arrangements.
When to Pinch: Once the plant reaches about 12 inches tall and has developed 4–5 sets of true leaves. Pinching too early or too late may reduce the plant’s vigor or delay blooming unnecessarily.
How to Pinch:
Locate the main stem and find the highest set of mature leaves.
Using sharp, sanitized clippers or your fingers, remove the growing tip just above this set of leaves.
This encourages lateral growth, leading to more blooms and healthier plants.
Beginner Tip: Pinching may feel counterintuitive, but removing the growing tip allows the plant to redirect its energy into branching rather than a single dominant bloom. Trust the process—it’s worth it!
Pro Tip: Don’t let your pinched cuttings go to waste! Use sharp, sanitized clippers to turn those trimmings into new plants through propagation. It’s an easy way to multiply your dahlia stock!

Café au Lait dahlias, with their creamy pink hues, bring elegance to any garden or arrangement.
Managing Pests and Diseases in Dahlias
Dahlias are a favorite not just for gardeners but for pests and diseases as well. Here’s how to identify and address common issues:
Common Pests
Preventing pests is always easier than managing a full-blown infestation. Timing, environmental factors, and a balanced approach to control are key to keeping your dahlias healthy.
Thrips
Thrips are tiny, sap-sucking insects that can damage foliage and flowers.
Signs of Infestation: Look for silvery streaks, deformed flowers, or leaves with tiny black spots.
Management: Encourage natural predators like lady beetles and lacewings. For control, we use a mix of cooking oil (or cold-pressed neem oil) and castile soap as a spray, which suffocates thrips while being gentle on plants. Spinosad is another effective option for heavier infestations.
Earwigs
Earwigs love nibbling on tender new growth, especially early in the season.
Control Tips:
Start traps early in the season by burying shallow containers filled with a mixture of soy sauce and oil so they sit flush with the soil surface.
Use OMRI-certified insecticides like Sluggo Plus as needed.
Regularly monitor traps and replenish the bait to keep earwigs in check.
Preventative Measures: Spraying with a combination of oil and castile soap can help reduce early populations.
Leafhoppers
Leafhoppers can stress plants and spread diseases like aster yellows.
Control Tips:
Maintain weed-free beds to reduce their breeding areas.
Use pyganic or spinosad as knockdown sprays when infestations are high.
Encourage natural predators like lacewings and minute pirate bugs to help keep populations down.
Other Pests
Dahlias can also attract slugs, snails, aphids, and Japanese beetles.
Solutions:
Handpick visible pests and drop them into soapy water.
Use slug traps or slug-specific products like Sluggo Plus.
Apply Pyganic or Spinosad for broader-spectrum pest control.
Vacuuming: For Japanese beetles and other larger pests, using a handheld vacuum can be an effective and eco-friendly way to remove them from plants. Empty the vacuum into a bucket of soapy water to dispose of the pests.
Timing and Environmental Factors
Start Early: Set traps and sprays early in the season to prevent pest populations from establishing.
Watch the Weather: Pests like earwigs may be more active during damp conditions, while dry weather can bring increased pressure from leafhoppers and aphids. Adjust your approach accordingly.
Beneficial Insects and IPM Practices
Encourage Natural Predators: Beneficial insects like lacewings, ladybugs, and parasitic wasps are incredibly efficient at managing pest populations when they’re allowed to thrive. Be mindful of overusing pesticides, as this can deter beneficials and disrupt the natural balance.
Diverse Crops: Growing a variety of crops throughout the season naturally attracts beneficials, reducing the need for intervention.
Indian Runner Ducks: Incorporating Indian runner ducks into your pest management system can be a fun and effective way to control slugs and other ground-dwelling pests. Protect your plants and flowers with barriers to keep them safe.
Integrated Pest Management (IPM) and Rotation
Rotating crops can help break pest and disease cycles while improving soil health. For more on how to implement rotations effectively, check out our Advanced Crop Planning Blog.

Harvesting Rose Toscano dahlias, ensuring the freshest blooms for designs and bouquets.
Harvesting Dahlias
Proper harvesting ensures you get the longest vase life and the best blooms from your dahlias. Here’s what we’ve learned works best:
Days to Maturity
Dahlias typically take about 90 days from planting to bloom, but this can vary by variety:
Early Bloomers: Varieties like Arabian Night and Wizard of Oz often flower by mid-July when planted in late April or early May.
Mid-Season Bloomers: Ball and informal decorative varieties such as Cornel and Silver Years typically start blooming by late July to early August.
Late-Season Stars: Dinner-plate varieties like Café au Lait, Shiloh Noelle, and Rip City shine in late August through the first frost.
When to Harvest
Timing is everything to maximize vase life and flower quality:
Ideal Stage: Harvest dahlias when they’re about three-quarters open, before the back petals become papery, wilt, or brown. These signs often indicate the flower is past its prime and won’t last as long in the vase.
Undeveloped Buds: Avoid cutting blooms that are too tight—they may not open fully after cutting.
Cool, Dry Times: Harvest early in the morning or late in the evening during dry weather to minimize stress on flowers and plants while reducing the risk of fungal issues.
Harvesting Technique
Cutting dahlias correctly encourages continued blooming:
Tools: Use sharp, sanitized clippers to make clean cuts, reducing the chance of stem or plant damage and minimizing the risk of spreading diseases between plants.
Stem Length: Cut stems as long as possible (about the length of your forearm) to maximize usability in arrangements.
Basal Leaves: Always cut back to the nearest set of strong basal leaves to promote regrowth.
Hydration: Place stems immediately into a bucket of clean, cool water with a CVBN tablet or floral preservative.

Collecting Linda’s Baby dahlias for conditioning. While vintage sap buckets add charm for display and photos, we use simple florist buckets for conditioning to ensure cleanliness and maximize space in the cooler.
Post-Harvest Tips
Handle blooms carefully to ensure they stay fresh:
Conditioning: Place stems in a dark, cool area to hydrate for a minimum of a few hours or overnight.
Optional Searing: Some growers sear the stem ends in boiling water for a few seconds to extend vase life, though we’ve found this isn’t always necessary.
Storage: Store hydrated stems in a cooler or refrigerator until ready for use. Keep dahlias away from ethylene-producing fruits, as these shorten vase life.
Handling Fragile or Imperfect Blooms
Fragile Varieties: Dinner-plate dahlias need extra care to avoid petal bruising during handling. Use hands to gently support the bloom if stems are particularly heavy.
Imperfect Blooms: Smaller or damaged blooms can still be enjoyed at home, composted, or used as fillers in casual arrangements.
Vase Life
Best Performers: Ball, pom, and decorative dahlias last around five days with proper care.
Event Flowers: Dinner-plate varieties have a shorter vase life of 1–3 days, making them ideal for special occasions or immediate enjoyment.
An early fall floral masterpiece featuring dahlias and other seasonal blooms, framed by a stunning outdoor backdrop at sunset.
Using Dahlias in Designs
Dahlias are the ultimate show-stopper in floral arrangements, bringing versatility, texture, and vibrant color to any design. They’re one of the few flowers consistently requested by name, making them a valuable addition to any grower’s portfolio—especially for wedding farmer-florists and local markets.
Wedding Florals:
Dinner-plate dahlias are perfect as focal flowers in bridal bouquets, large centerpieces, and arbors, where their dramatic size makes an unforgettable statement.
Ball and pom varieties are excellent for boutonnieres, corsages, and smaller arrangements due to their long-lasting vase life and compact form.
Everyday Arrangements:
Ball and decorative dahlias shine in casual table arrangements or farmer’s market bouquets, offering a blend of charm and durability.
Use multiple forms in one design to create dimension and interest.
Why Dahlias Give You an Edge:
Few flowers are requested by name as often as dahlias, making them a standout for wedding farmer-florists. Their range of forms, sizes, and colors ensures they fit seamlessly into almost any aesthetic, from rustic to sophisticated.
For flower farmers, dahlias provide an edge in local markets, as their perfect blooms and short vase life favor local over imported supply—bringing unparalleled quality and freshness to customers.
Pro Tip: Combine dahlias with complementary blooms like zinnias, snapdragons, or scented geraniums, and consider their vase life when designing for different occasions.
Personal Note: I always find that dahlia season makes designing a breeze. Their versatility and variety mean I can rely on them to elevate any arrangement effortlessly—whether it’s for a bride’s big day or a simple market bouquet.
Curious about expanding your flower farming business into weddings? Check out our blog on Why Become a WeddingFarmer-Florist to learn about the benefits and opportunities this rewarding niche can offer!

A charming trio of vintage sap buckets filled with Rose Toscano, Linda’s Baby, and Rock Run Ashley dahlias. Whether you’re a flower farmer drawn to their market appeal or a home gardener captivated by their beauty, dahlias prove to be a worthy and rewarding crop.
Embrace the Beauty of Dahlias
Dahlias may take some effort, but their beauty and versatility make them a favorite for home gardeners, farmers, and florists alike. Whether you’re growing for the joy of watching these blooms flourish, for your next wedding arrangement, or as a profitable crop, dahlias deliver unmatched impact.
From planting and trellising to harvesting and designing, we hope this guide inspires you to embrace these incredible flowers in your own garden or floral work. Dahlias truly are a joy to grow and share!
Happy growing and designing—may your dahlia patch thrive!

We are looking forward to sharing more blooms with you soon.
Jessica & Graham
Ready to Dive Into More About Dahlia Care?
Check out our videos below on lifting, storing and dividing dahlia tuber clumps!