Seed Starting for the Flower Farmer
Disclaimer: This site contains affiliate links. Your purchases through these links help us bring you more valuable flower farming content. Thank you for your support!
I don’t know what I would do with my life during the winter months if I didn’t have seed sowing to look forward to! The dark, bleak days of winter leave lots of room for dreaming for the season to come and seed starting is the beginning of making those dreams a reality.
This post is going to throw a lot at you. I apologize in advance. Seed starting can get pretty complicated, even more than everything I’m going to tackle in this post! For the sake of not overwhelming you and making you go crossed eyed, I am going to try to keep to the basics. As always, I recommend working within your means, your set up and taking notes (which is something I will definitely say again!). Just know that the flowers want to grow, so we have that in our favor!
When to order seeds and why you should be seed starting
Though the seed catalogs are just beginning to pour through the mailbox come December/January… the seeds ordered from those, I must admit, are impulse purchases. Majority of the seeds we will be sowing for the upcoming season had already been planned, ordered and tucked nicely in their storage boxes by the time November rolls around. We are planning and ordering our seeds once pumpkin spice lattes are back in action. Waiting until the winter days, we risk not being able to attain certain varieties or not having them in time to sow them on schedule especially when it comes to our hardier crops. Ordering in the winter works for hobbyists and certain crops is okay but as a professional flower grower you are doing yourself a disservice if you are waiting that long. Late summer and early fall is when majority of your seed orders should be placed; winter is when you should be refining you plans and purchasing varieties to fill gaps or for trial, but the bulk of the ordering should be done before that. Now, this part is going to require getting fancy with some spreadsheets but that is going to be a topic for another day.
Seed starting can seem intimidating but truly, it is one of the most rewarding processes. In the business of flower farming, starting your own plants from seed is the most practical and economical choice for a majority of plant varieties. There are a handful of varieties that may be more beneficial to order from plugs, I am looking at you lisianthus! They take so long to get growing or require too much of a special set up, taking up precious space in the propagation house. Even still, there are other plants that will not grow true from seed or produce sterile seeds and therefore are best started from cuttings, tubers or corms. However, for the most part, if you are going to flower farm you need to be comfortable starting plants from seed.
I am going to go through the basics to get you started. Overall, you will need to think like a seed. Learning more about each variety’s specific needs will allow you to better start those varieties from seed. When does the seed typically germinate? (hint you may find some volunteers in the field to help figure this out!). Where does the plant naturally grow? When does the plant typically bloom? What temperature does it thrive in? Does the variety prefer to be direct sown or started as a transplant?
Seed catalogs and envelopes typically have all this great information. I also have some book recommendations at the bottom of this post to better help you, since some seed companies send the seeds without growing information (such as Geoseed). The best habit to get into is to take notes. Notes of when you sowed the seeds, where you decided to propagate, the conditions, germination date, transplant date, bloom date, etc. Begin to build your own data. This will allow you to see errors or success that you can happily repeat thanks to note taking.
To Direct Sow, to Soil Block or to Start in Trays?
Such a tricky question! “The directions say it should be direct sown, This one says as a transplant. I can’t direct sow or I can’t start indoors.” Not only are you having to navigate action of seed starting but this is where learning about the different varieties comes in as well. The truth is: you will most likely be doing a combination of both transplants and direct sowing (even for the same variety of flower such as zinnias!).
This answer is really going to found in your own means when it’s time to seed start. Certain varieties give the healthiest plants and best blooms if you can direct sow the seed. These are plants that typically have a long taproot and just don’t appreciate it being touched. There are also certain varieties that germinate and grow so fast that spending time and materials starting them in trays isn’t necessary or profitable to do. For example, sunflowers are best direct sown. They grow quick and prefer not to be transplanted.
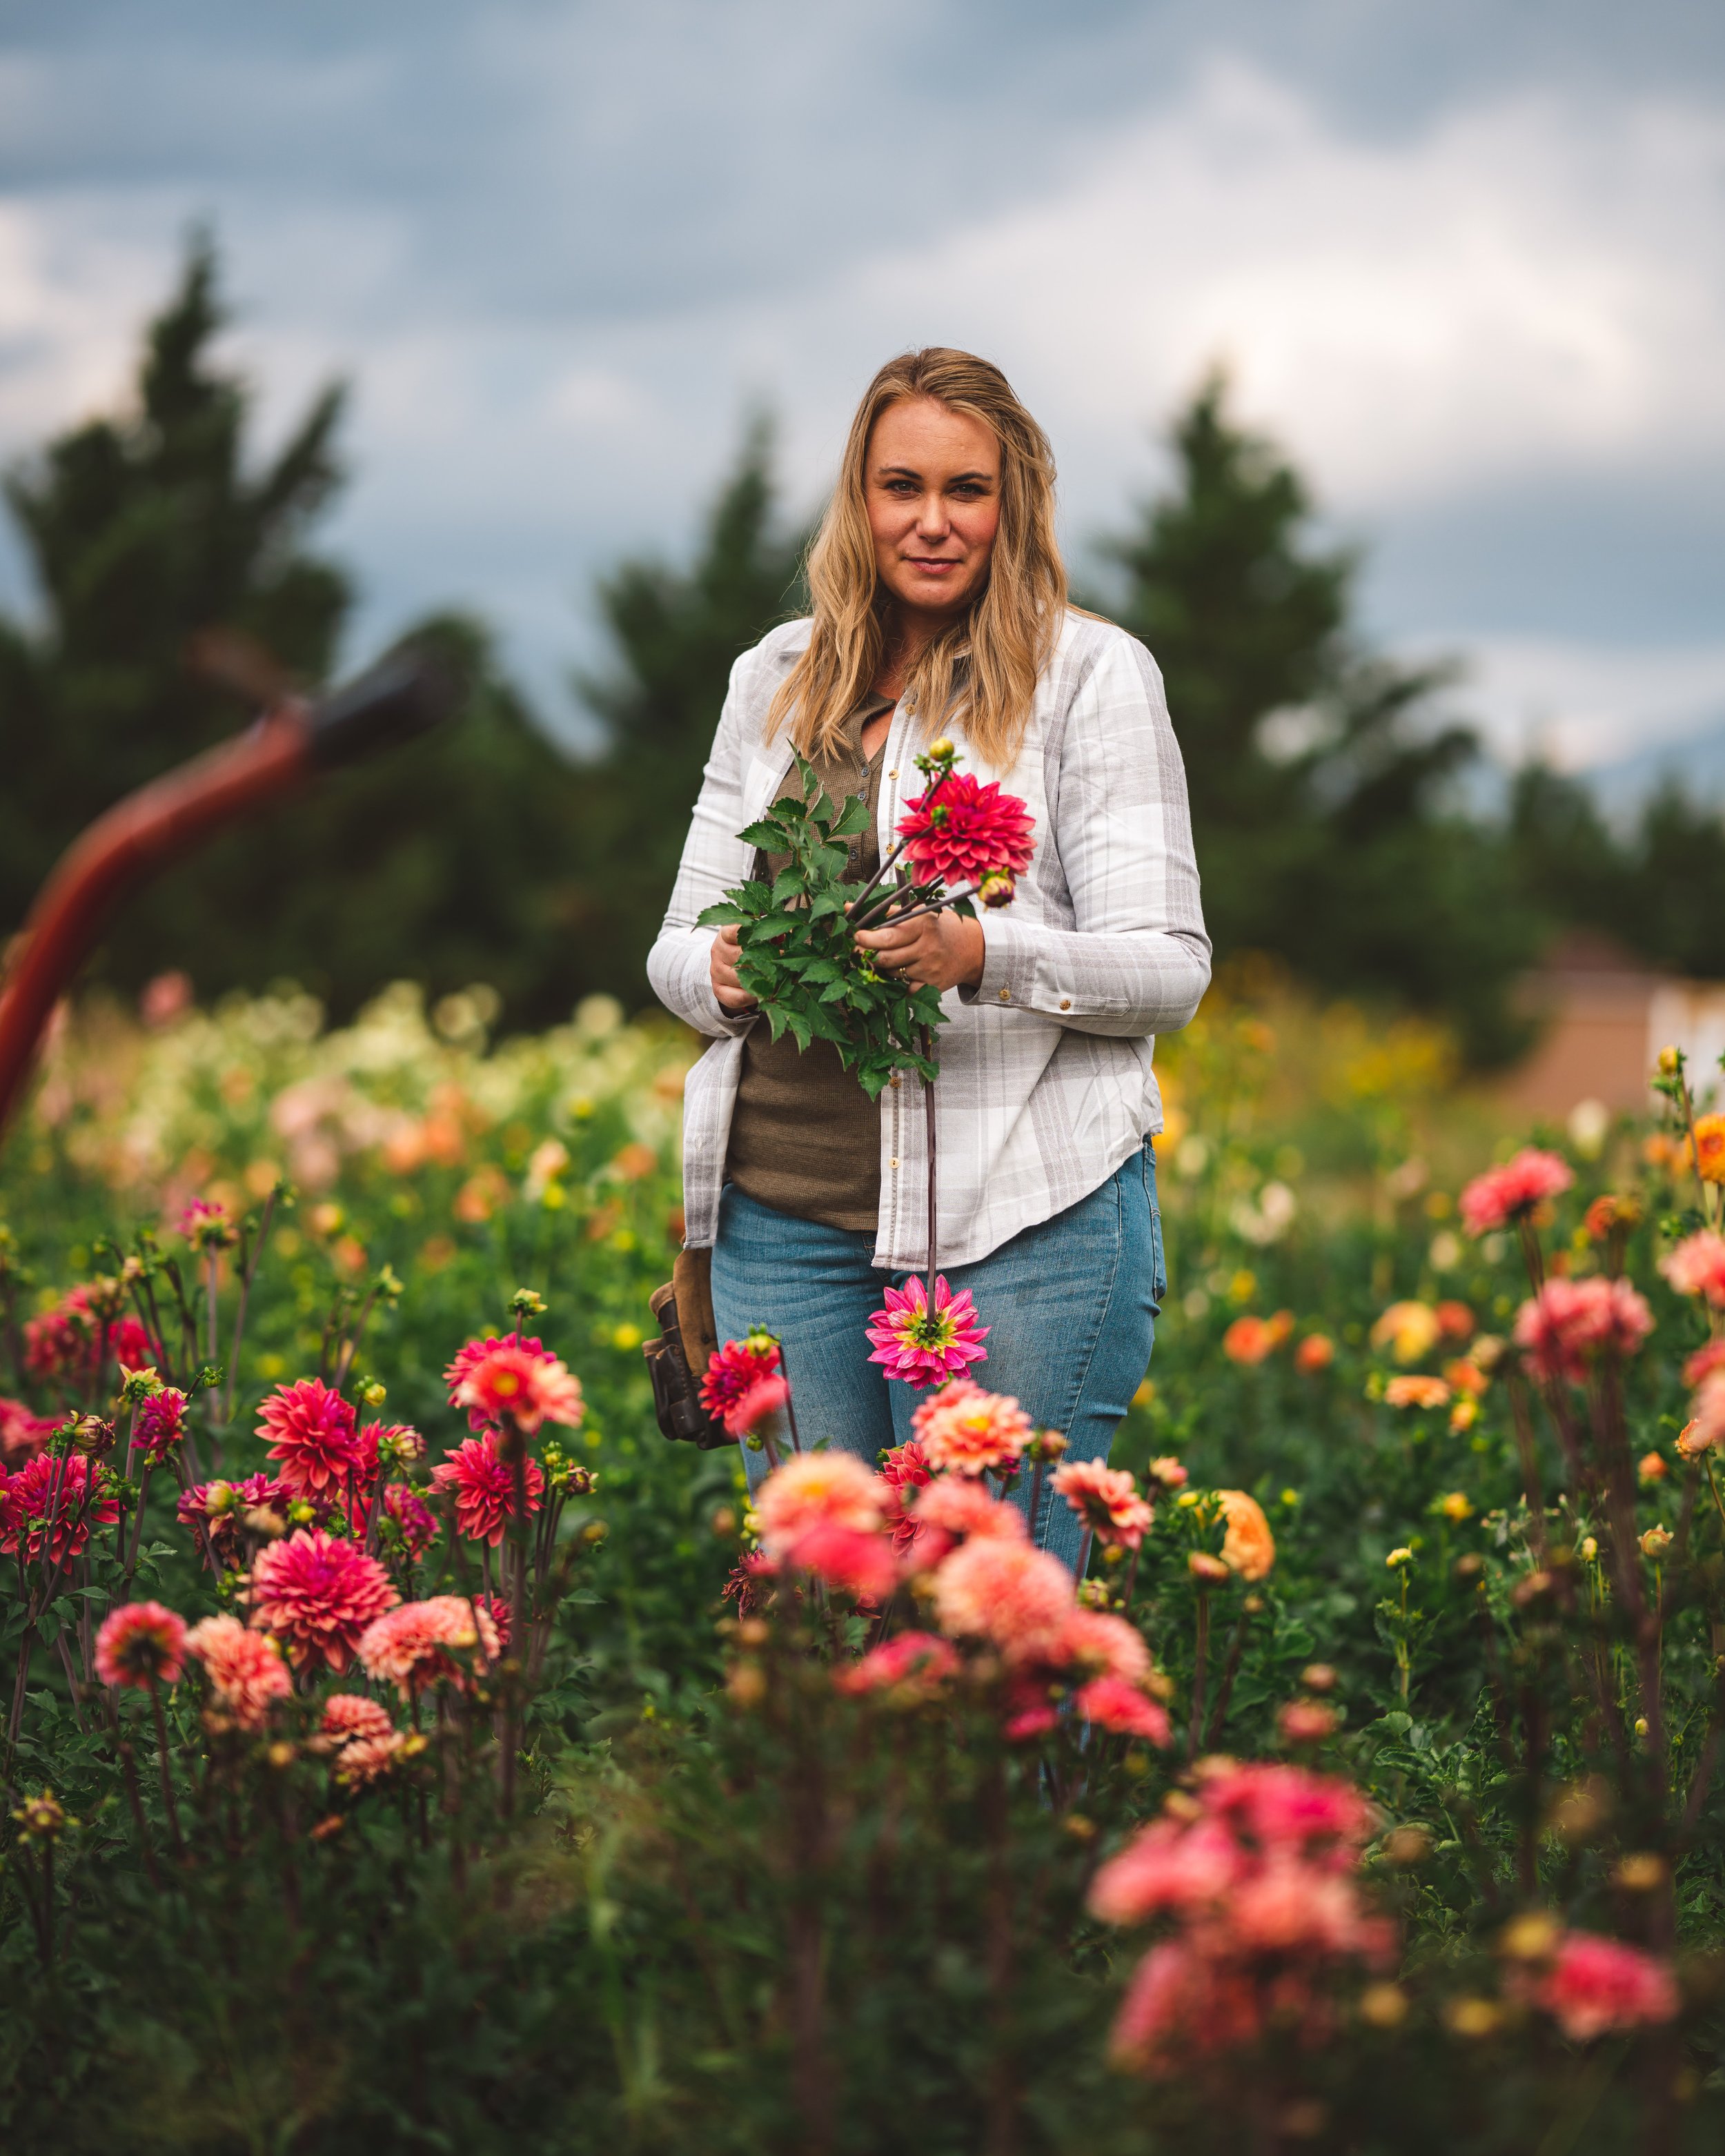
When we were flower farming with less than 2,000 square feet, we did not have much room to direct sow. Therefore, we started even bachelor buttons in the propagation house. Beds were always at full capacity, it was a matter of squeezing in plants when and where we could. Now that we have a larger property to farm, we have begun to direct sow whenever and whatever we can! It saves us time in that we are not seed sowing indoors then having to bump up the seedlings or transplanting them to the field. The trick to direct sowing is you will have to be diligent on keeping the soil moist during dry spells. It saves a few steps, materials and some room in our tiny propagation house. Plants such as: bachelor buttons, chamomile, bells of ireland, larkspur, cress, saponaria are all examples of varieties we prefer to direct sow. Graham made a fancy contraption that aids in layout and makes seed sowing, even by hand, go pretty quick! We also love the ease of using our Jang seeder as well!
Soil blocking versus propagation trays is a heart thing or perhaps you like to mix the two methods (like we do!). Soil blocking is awesome and to learn more about it you can read my blog on that topic here. We started with soil blocking. With limited funds, buying propagation trays was not in the cards for us. Overtime, we use a little bit of both. Soil blocking can be a tad more time consuming and it does take a lot of soil. Also, though many like to soil block everything I have found some varieties did better in the trays without compacted soil. It became quicker for me to put some soil in a tray and sow rather than making soil blocks. I have not completely abandoned the blocks though. If I have a variety that is sensitive having it’s root handled, needs to get started but I cannot direct sow in the field for some reason (row not ready, too saturated, etc) then I go back to the soil blocks.
Choosing soil:
First off, it’s not really soil but rather a “substrate.” Typically in the growing world when we are talking about potting soil or seed starting mix we are referring to a substrate. The growing medium. For seed starting and hydroponics soil-less substrate is used, typically having the base of peat moss or coconut coir. “Soil” is typically referring to being in the earth, planting in the ground. Confusing right? Try having this conversation with a hydroponic grower! They get really nit-picky about word choices! So, even though we refer to the starting medium as “potting soil” it is not technically soil.
When you are seed starting, you want the starting medium to be light, fluffy with lots of perlite. It will allow the seedling to establish a healthy root system. You want to purchase medium from a reputable company. We are fans of FoxFarm’s Lucky Dog K9 Kube or ProMix HP. Both are great products that in a pinch we can snag locally. As our operation grows, it will be time to haul in the giant sacks from the other side of the mountain. A common medium of many growers is also Sunshine pro-mix, which I have not used personally. It will also be mentioned to use “sterile” seed starting mix that does not have fertilizers. The sterile part is the soil-less base meaning peat moss or coconut coir. To be soil-less is to not have dirt from the garden. Personally, I don’t bother with special “seed starting mix” and have always had great results. The FoxFarm we use does have some nutrients, such as yummy bat guano plus it has mycorrhizae which is excellent for root development. I have had healthy and happy seedlings since using this medium and have not experienced any fertilizer burn or such. You can also make your own seed starting mixes but honestly, I prefer to just buy a commercial potting soil! A mentor told us in the beginning: our time is more valuable than trying to perfect a soil recipe. Just pay the upfront cost and charge accordingly. That same mentor also said “look at what the hemp growers use and follow their lead! They know their stuff!” Seemingly random advice but that advice is solid and has helped us a time or two.
Peat moss is the typical go-to medium for potting soil but more often is being seen as not environmentally friendly. The methodology and the over harvesting from the bogs is not considered sustainable and therefore, making the use of peat moss questionable. Another downside is that peat moss is naturally acidic. The upside is that it is easily attainable and is low cost (at least on the pocketbook). Coconut coir on the other hand is considered a sustainable product and also has a neutral pH which has been particularly favored by hydroponic growers. Pros and cons to both! Deciding on which base to use for your seed starting endeavors is really a heart thing and customizable to your business!
I cannot emphasize enough though, no matter which growing medium you choose it should have lots and lots of perlite. The perlite is what gives the necessary drainage. When people show me their sad seedlings and ask what is wrong: often it is their choice of substrate. Often times, it is Miracle Grow or a similar lower quality retail potting soil. Miracle Grow is actually pricey when you look at what you get for that price. You can barely see the perlite and it’s usually coated black. Good quality substrates won’t coat the perlite black, if the perlite is coated like that, guess what? The seedling’s tender roots will be too! Roots need oxygen and to be able to breathe, be careful that the substrate you choose will not suffocate them and will also provide proper drainage to avoid drowning seedlings. When you are using quality potting soil you will actually see lots of perlite on top.

Choosing propagation tray
When I first started flower farming, lingo such as, “72s” or “no bigger than 50s” or “200s” was so foreign to me.
What the heck were they talking about?!
Cell sizes. Specifically, how many cells made up a 10” X 20” sized tray. The lower the number, the larger the cells.
Choosing the correct propagation tray sizes is important. A tiny seed such as a snapdragon would do better for you in a 128 one rather than a 50 size. Why is that? A couple of reasons. Like I said… the seed is tiny. Putting it in too large of a tray may be difficult to attain the correct soil temperature for that seed. Also, it saves you room. If you can sow more seeds in less space, isn’t that more ideal? Let’s say you want to start 128 snapdragons for one succession. Doesn’t it make more sense to have all those in one tray rather than five trays? Also, if you plan out everything accordingly, you should be able to transfer those snaps from the 128 into the field. If the weather or broken equipment messes with that plan, you can always bump up if necessary. A downside to using trays with tiny cells? They dry out quicker, therefore take more diligence in watering.
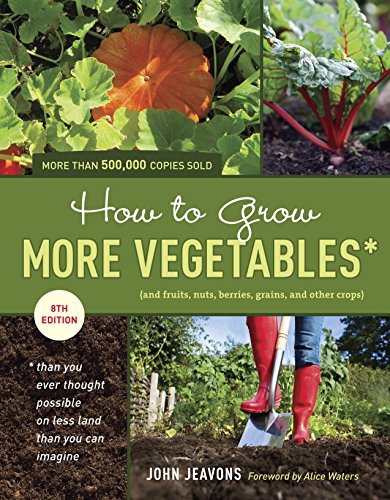
One of my favorite books from the beginning of this journey was John Jeavon’s How to Grow More Vegetables… what was an “a-ha” moment for me was the idea of feeding seedlings separate meals. You started your seeds in a small container with soil and as you bumped them up they got fresh soil and nutrients. Now, this may not be ideal for diffrent reasons but I have found this system to be of a benefit for many of the crops we grow. For example, eucalyptus and tomatoes. I germinate them in 200s or 288s and then bump them up to our deep root trays once they get their second set of true leaves. This keeps them from getting root-bound, they don’t seem to mind the transplant, it gives them fresh soil and nutrients needed to develop a healthier seedling for transplant without me having to fuss with liquid fertilizers while they are in such a young/vulnerable stage. This is not something that I prefer to do with crops such as scabiosa or calendula but some of my slower growing crops I like to offer them those separate “meals.” (Link for this book is provided at the bottom of this post.)
A good rule of thumb for deciding which tray is appropriate is to look at the seed size. If it is a larger seed, you will need to start them in larger celled trays. For example: zinnias, cosmos and calendula have large seeds and are fast growers therefore should be started in 128s at the smallest cells but 72 or 50 celled trays are more ideal. Lisianthus, poppies and eucalyptus have tiny seeds and grow slower, starting them in 128s or 200s works for them and will allow the soil to stay warmer for their needed germination.
After years of using flimsy trays that barely held up to our abuse for a season, we decided to invest in higher quality trays from Bootstrap Farmer. We are slowly building up our stock on these guys and replacing our other ones as they break down. To be honest, I wish I had invested in their trays sooner! Not having to replace trays every season (or mid season!) has actually saved us money along with saving our use in plastic. Our main size trays we start a majority of our seeds in are 128s or 200s , especially our cool-weather loving varieties. The air-pruning 72 tray is one we like especially for ranunculus and anemone corms. The 50s or 72s are needed for our faster growing flowers, rooting cuttings and corms.
Lastly, take notes of what you started in which cells along with were they able to get planted out in time or did you need to bump up or did they become too root-bound? There are some seeds that out the gate I know need deep root cells, such as sweet peas. They need that room for their taproot and they grow fast. They are also one I don’t want to mess around with having to bump up time and time again. As you seed start you will find the trays and sizes that works best for your circumstances.
Stratification
Some seeds need some special treatment. This is where “thinking like the seed” comes in handy!
Cold stratification is where the seed goes through a cold period, usually for about two to three weeks.. You can place the seeds in a cooler or an unheated garage to trick them into thinking they went through winter. Larkspur and bells of Ireland are two examples of flowers that germinate best when cold stratified. I have found that sowing them at the appropriate time of year makes cold statification not necessary in our climate. Sowing them in fall, winter or early spring gives them enough cool time naturally in our propagation house for them to germinate. Seeds that like cold stratification are varieties that I would avoid using a heating mat or grow lights for germination.
Physical stratification is where there is a knick or scratch on the seed. Personally, I have not found a seed where this has been a benefit. This is a commonly recommended for tough seeds such as cerinthe.
Soaking is a subtype of physical stratification. Pre-soaking seeds can help to break the hard shell and the idea is that it will promote a quicker germination. This is a common practice for hard seeds such as sweet peas. I have had good success doing this with sweet peas. There are two schools of thought on whether or not to pre-soak sweet peas. I have tried both and personally found more successful germination and less rot with pre-soaking. Peas are another one I like to pre-soak. Not a seed but other crops that needs pre-soaking are ranunculus and anemone corms.

Greenhouse, heating mats, lights, oh my!
Seed starting can get pretty complicated. The equipment can add up quickly. I have tried seed starting indoors with lights and heating mats and to be honest: I was not in love. I lost incredible amounts of seedlings. White fuzzy mold had the habit of growing. Seeds dampening off. Leggy seedlings. Keeping the moisture levels correct was difficult. Battling sneaky cats and clumsy children was impossible. Needless to say I’m really not a huge fan of starting seeds indoors. I respect those that have limited choices. If you must start indoors I would really figure out how to build an affordable germination chamber. Some kind of metal shelving unit with grow lights and a heat mat . Don’t forget the thermometer for the heat mat along with a timer for those grow lights! I would also have the unit covered with plastic to give that greenhouse effect or if you prefer, dome lids with fabric covering the unit instead. You will have to be vigilant in care taking for those seedlings and be incredibly patient when hardening off the transplants (which we will go over a little later). Starting indoors is completely doable if that is what is within your means. Though I am still going to gush about the upsides to building a seed propagation house in a minute…
Side note: if using grow lights, be sure to get a full spectrum growing light. The plant needs a mix of red and violet: fluorescent is not going to do the trick. Really research the product and how to use it appropriately.
Our first year flower farming Graham saw what a disaster my seed starting endeavors were. We mustered a few hundred dollars and over a weekend Graham built us our tiny propagation house. You guys, really: you really can’t afford to not build one as a professional flower grower. Simple in design and overtime we were able to make upgrades to it. It pumps out the healthiest seedlings with half the effort I was putting into pampering seedlings indoors. On warm days I open the door and on cold nights we have a little space heater connected to a thermometer that automatically turns on when the temp gets too low. It is life changing and I highly encourage figuring out how to DIY one for yourself! I have found that the seeds germinate well in there, some varieties perhaps a tiny bit slower than on a heating mat but much healthier. Damping off is a problem of the past and the children and animals have been trained to stay out (unless invited in!). It has also allowed me to transplant straight from the greenhouse if I forget to harden off the transplants. Unlike when starting indoors, if they were outside for five minutes they could end up fried! Night and day. Worth it, I promise.

Okay, now let’s get down to seed starting!
First off, you need a place to work! On nice days that we do not have wind I prefer to work in the sunshine! The hubs busted out a long table that was designed for us to wash and divide dahlia tubers but it just so happens to also be a nice height and work for outside seed sowing. Opting for galvanized cans to hold our necessary potting soil, vermiculite and perlite (for us to add to the soil when soil blocking). On cooler days, I move into the greenhouse (which can get a little more cramped at times!) but I have also spent much time seed sowing at the good ol’ kitchen table. I really try to keep the seed sowing operation outdoors because eating dinner is good and is better without trays of seeds on the table! Sowing at a proper height, whether standing up or sitting down, is essential! Bending over seedling trays can really put a cramp in your neck and give you some shoulder pains. Giving yourself a place to seed sow that is appropriate in height and has all your supplies will create for a more lean and sustainable process.
Supplies needed:
Propagation tray or other chosen container
Seeds
Pencil
Tags for labeling (plastic or sticker)
Tray or bucket for mixing soil
Watering can and mister
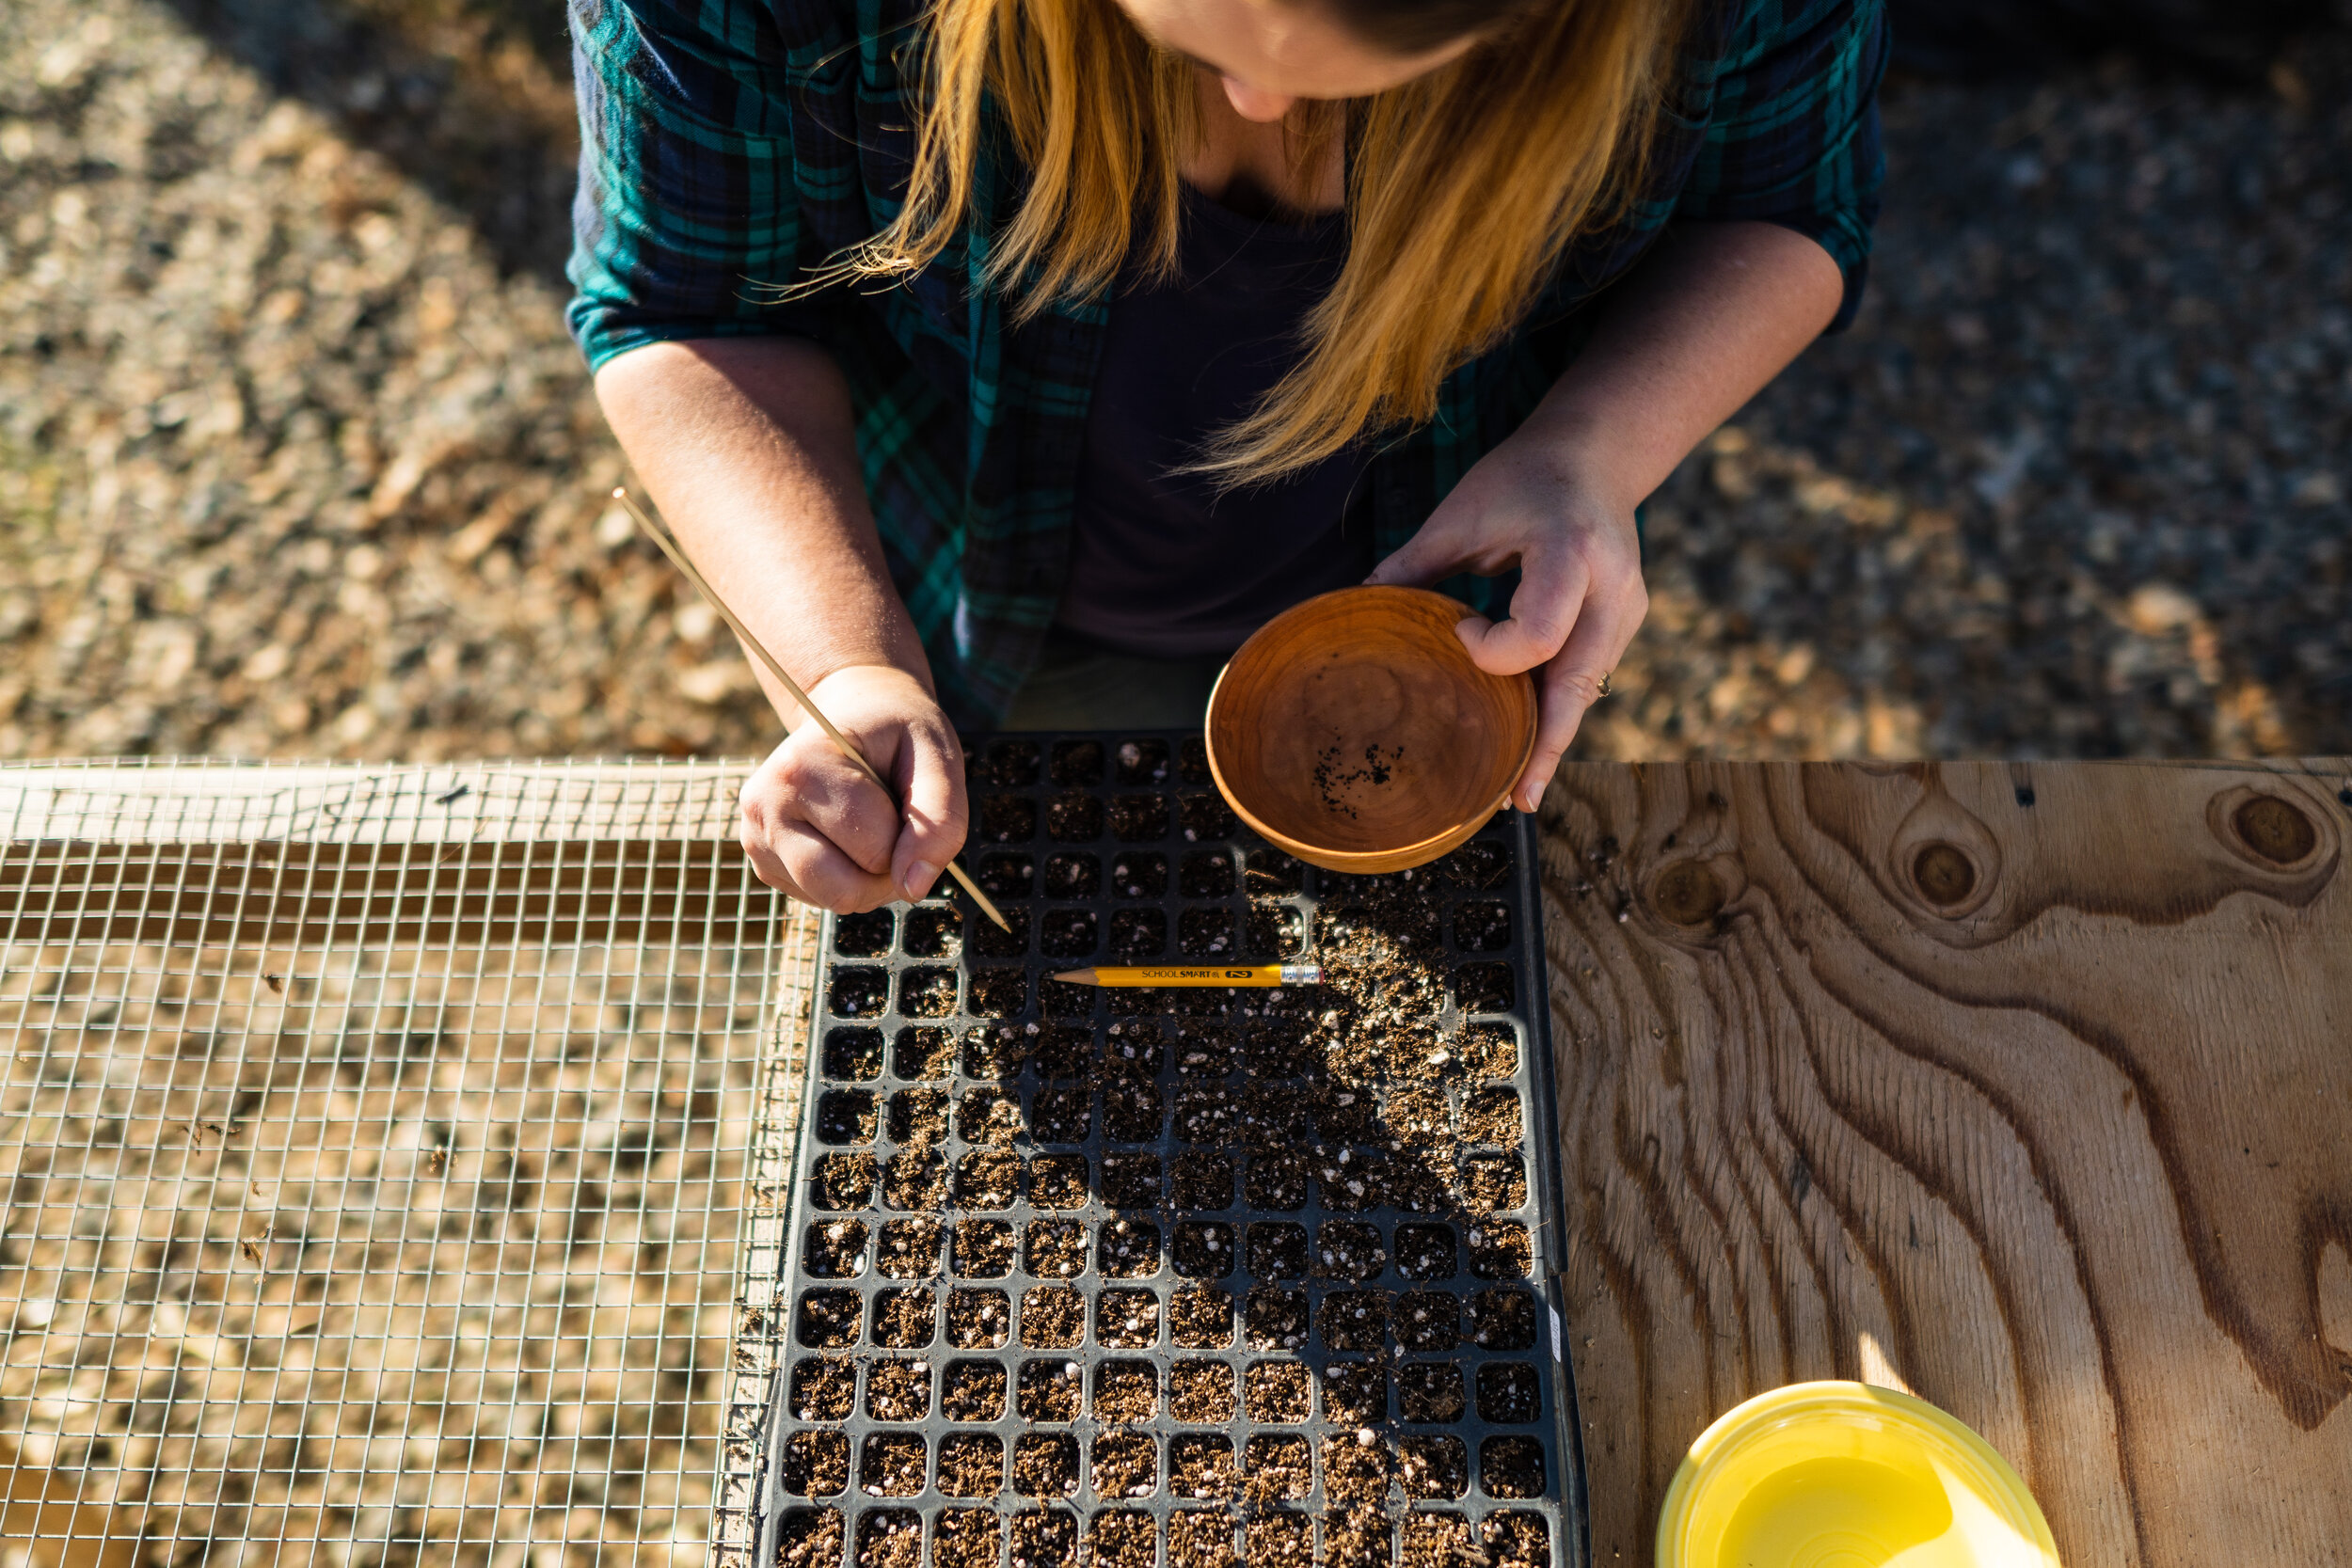
Bamboo skewer (optional for sowing small seeds)
Small dish of water (for sowing small seeds)
Awesome music playlist or podcast (because seed sowing quickly becomes tedious!)
Get Seed Sowing!
1. Sanitize trays/pots with warm water and little bit of bleach or distilled vinegar. A dash of dish soap can be used as well, if there is build up. Rinse thoroughly and air dry. I cannot emphasize the importance of this step enough! Sanitize, sanitize! This will save you heartbreak from having diseased plants in the end.

2. Moisten potting soil with warm water (warm water activates all the good stuff in the soil). The soil should be damp not soggy, think "wrung-out sponge."
3. Fill seed trays/pots to the top. Gently tap the tray onto the table. This settles the soil and removes air pockets (roots don't like air pockets...).
4. Label the tray/pot with the variety name of the seed and sowing date. I recommend using pencil, it won't fade like sharpie or pen in the sun or when getting splashed by water.
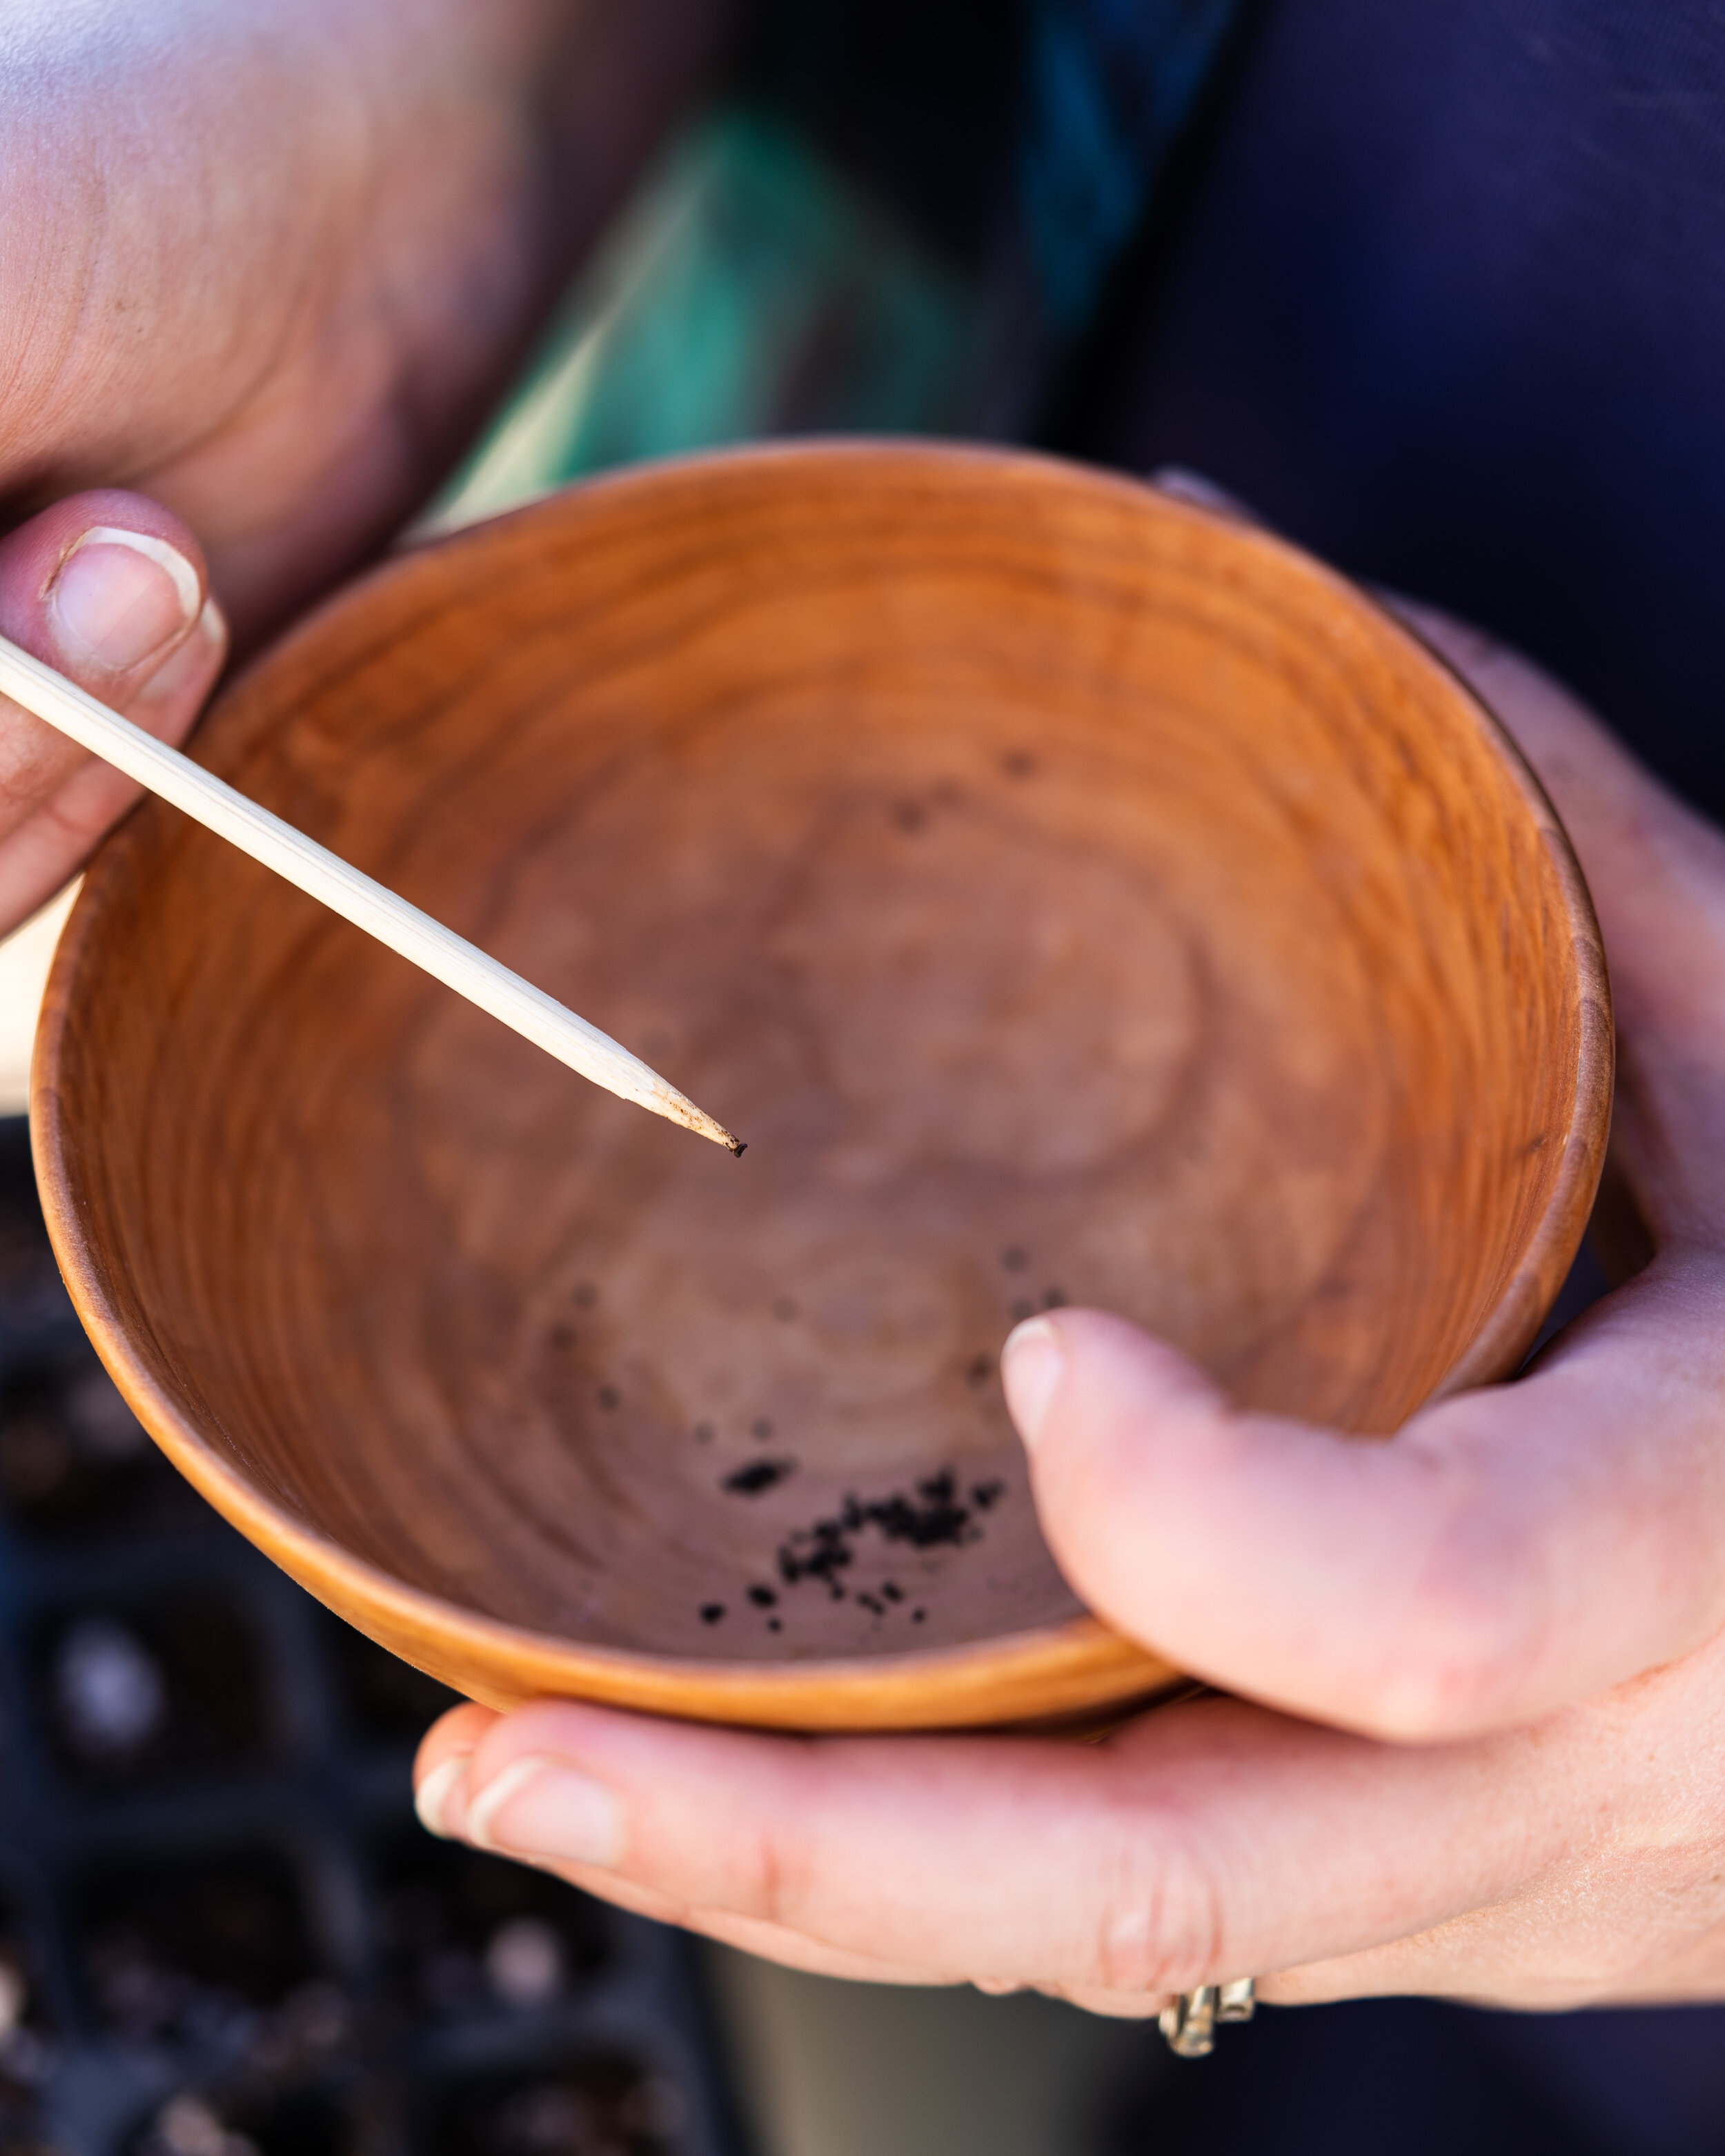

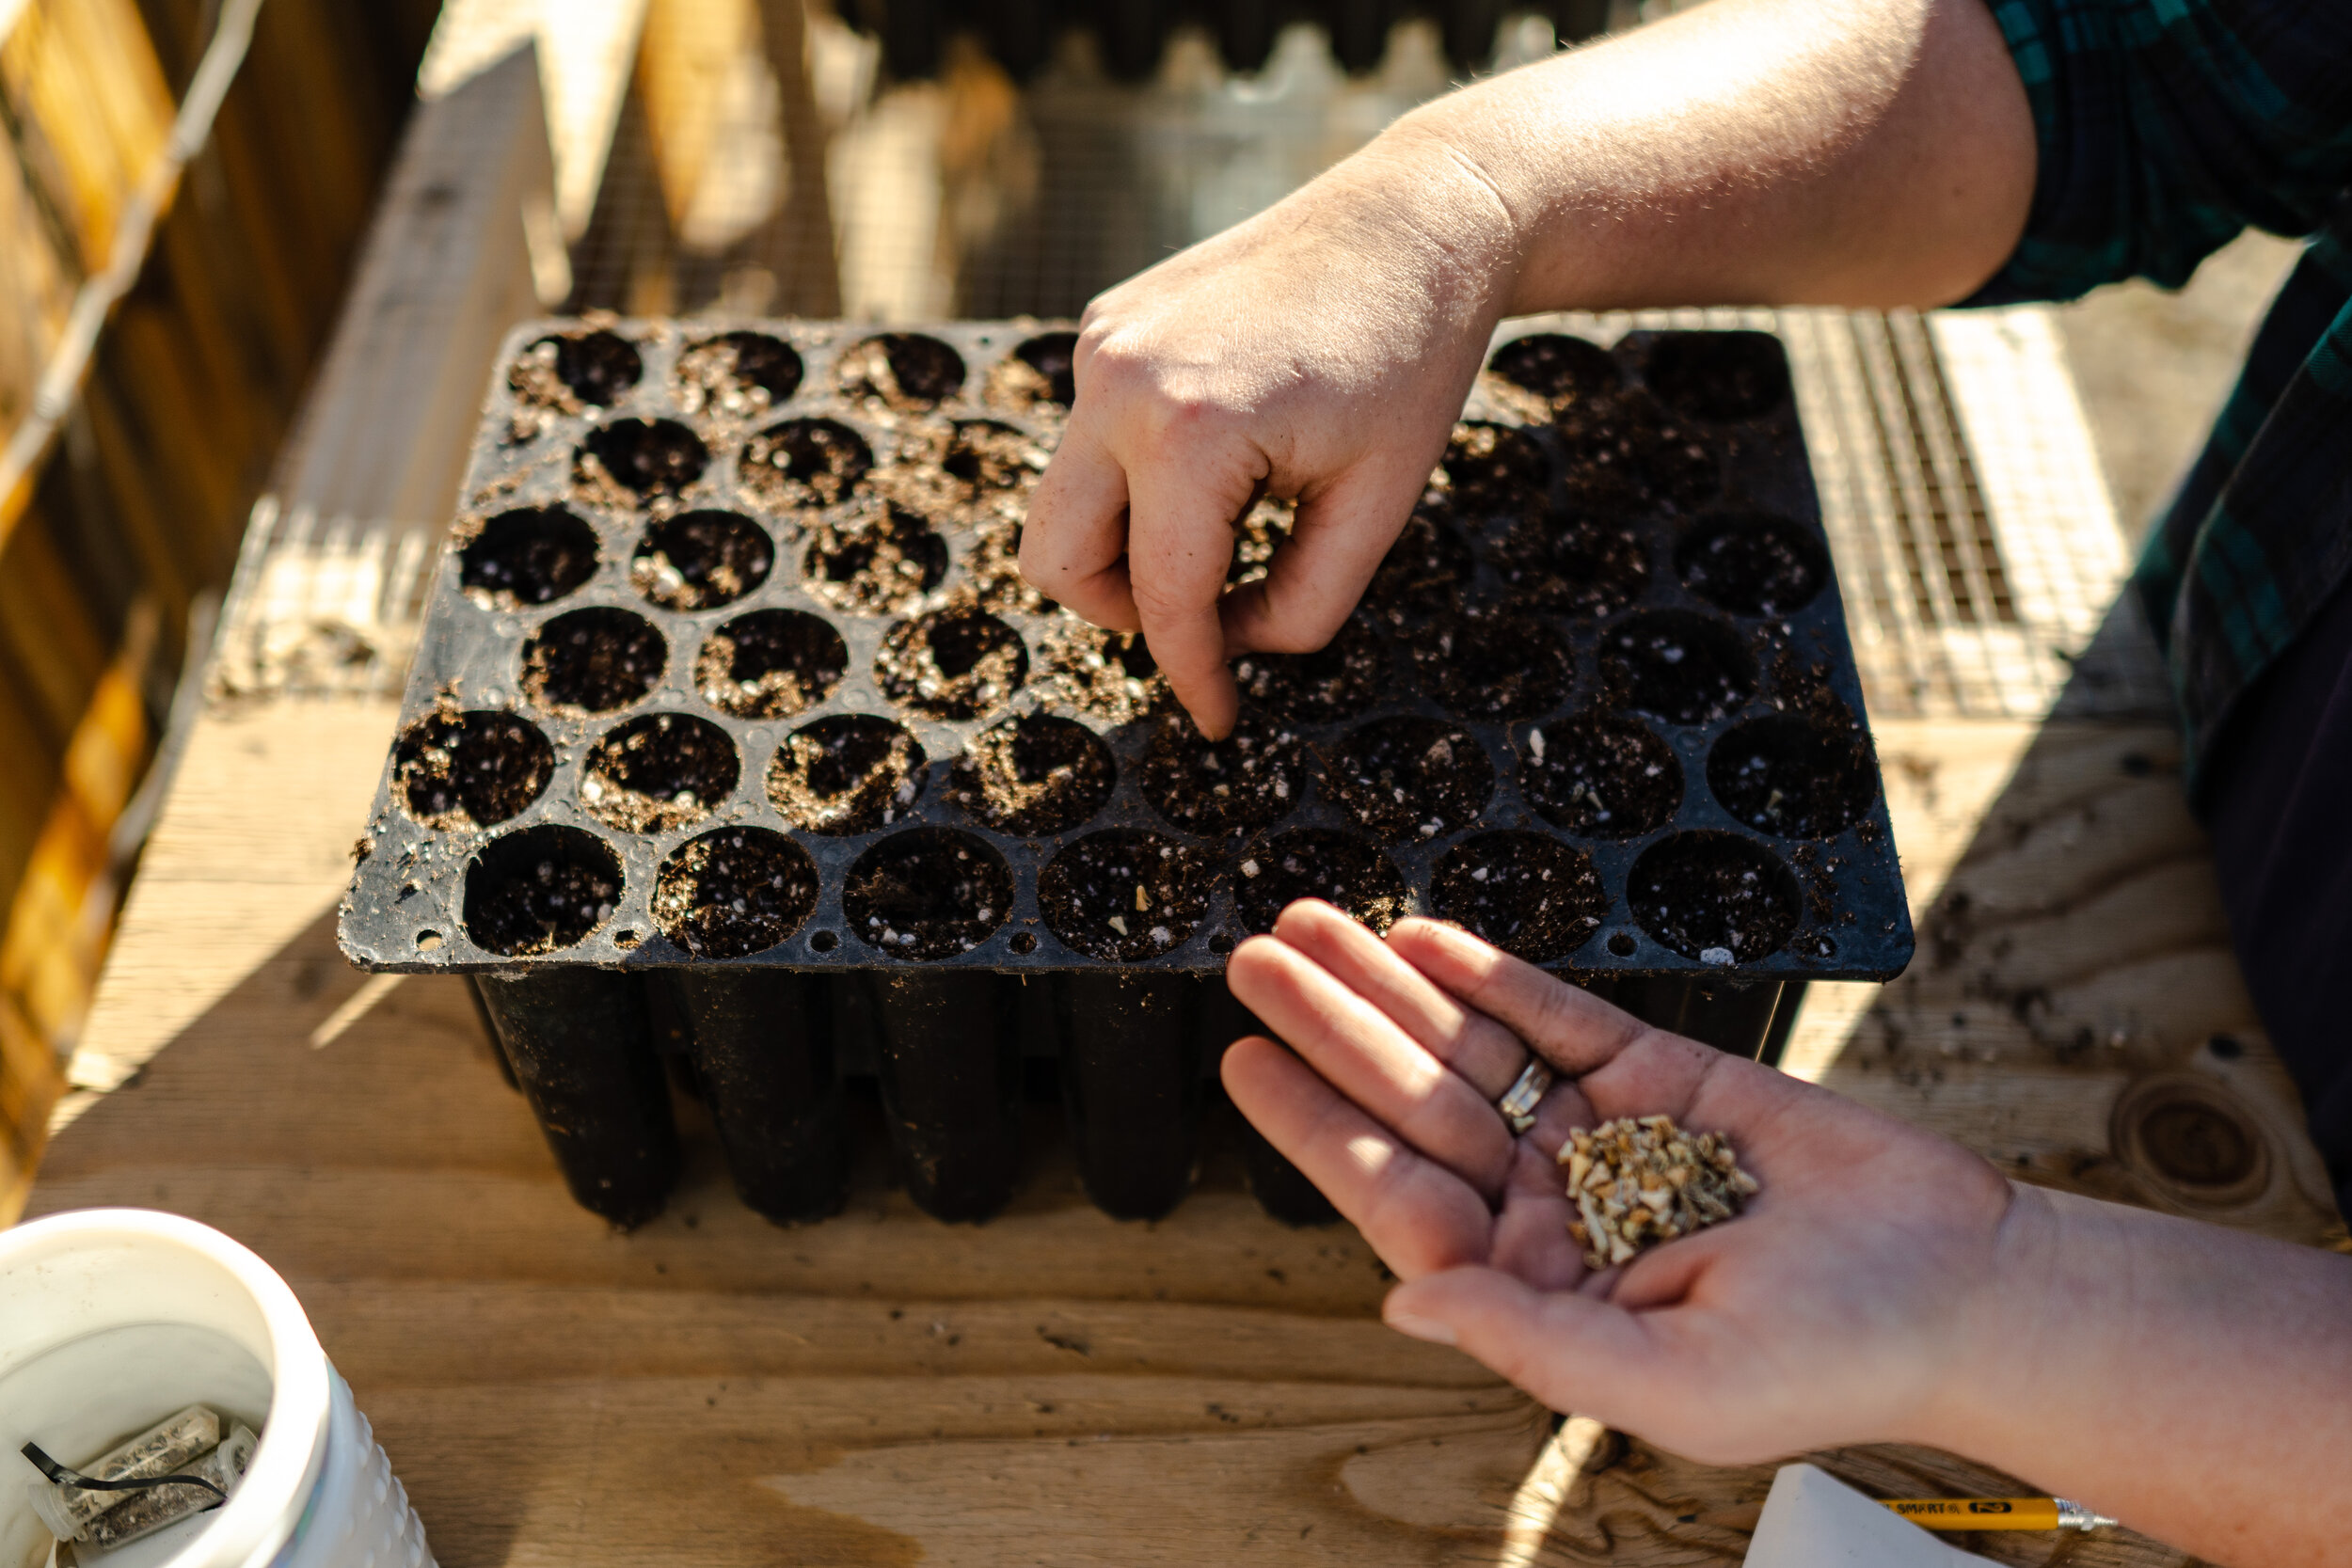
5. Place 1-2 seeds per cell/pot. A pencil comes in handy to help make a small indentation in the soil, to plant seed. A good rule of thumb to follow for planting depth is to place the seed double the seed's size under the surface. For tiny seeds I like to use a bamboo skewer and have a small dish of water on hand. I dip the tip of the skewer in water, shake off excess, then use the tip to pick up the tiny seed and place into the substrate. When I am sowing these tiny guys, I use my pencil as a marker to keep track of where I am working.
6. Cover the seeds with a little bit of potting soil or vermiculite per the seed’s requirements. Be careful not to bury small seed too much! I like to use vermiculite on top typically because it helps maintain the moisture on top of the soil better while suppressing unwanted guests such as algae (if oops, I watered too much or the sun hasn’t been out in weeks!).
7. Place propagation trays into a drip tray and cover with a plastic dome (if using). If you have access to a heating mat, placing the tray on a heat mat set to seventy-degrees Fahrenheit, this is ideal for most crops but check instructions! Otherwise, place them in a warm area in the house or in your greenhouse. We take the seedling trays and place them directly in our propagation house (it’s not fancy enough to call it a greenhouse!).
8. Check trays daily. Try not to drown the seedling with love, if the soil is drying out, give a light spritz of water or ideally, bottom water. Bottom watering not only allows you not to disrupt or displace the tiny seeds but also will begin to train the tiny seedlings that their roots need to go down in search of water. With that said, I can get kind of lazy and totally have overhead watered with little consequence but I definitely recommend not being lazy like me!

9. Once seedlings emerge, remove plastic dome (if using) and move tray to a bright area of the house, a greenhouse, or under grow lights (if it’s not already under them). If using grow lights, be sure to have the lights at the appropriate distance from the seedling. Watch for legginess, if plant is stretching, it needs additional light. If not using grow lights and the seedling is leggy, consider purchasing as a remedy. If leggy and grow lights are being used, be sure that they are close enough so seedling won’t reach but not too close to burn it. Once again, don’t drown the tender seedlings with love or water! Keep soil moist but not soggy.
10. Continue to check seedlings daily, water when soil appears dry but be sure not to over water to avoid damping off and disease. If you see some mold or green algae on the surface, cut back on water, increase air circulation and you can scrape it off or spritz with hydrogen peroxide. Once seedlings are larger and can handle overhead watering, water either in the morning or early evening. Avoid getting water on foliage in the heat of the day, it will burn.
11. Once the seedlings have been germinated for about two weeks, begin to feed a very diluted fertilizer. You can water down a mix of fish emulsion and kelp meal or you can snag a pre-made mix that is gentle enough for seedlings. I am a huge fan of FoxFarm’s Big Bloom (link at bottom of blog) for this stage of the seedlings development. Read the directions of the fertilizer carefully to avoid burning them with nitrogen. Too much of a good thing can be detrimental. Also, fertilize in the morning or early evening, out of direct sunlight to avoid burning foliage. Once the seedling is a little older, I will begin to feed it with FoxFarm’s Grow Big or a mix of fish emulsion and kelp meal. Be careful not to over fertilize, you may cause the seedling to burn. For the slow growing crops, such as lisianthus or eucalyptus I like to do a yucca flush once a month to prevent salt build up from the fertilizers.

12. When seedlings outgrow their trays, look at either bumping them up to the next size container or, if the weather permits and they are large enough, preparing the plants to be transplanted.
13. Preparing the young plants to be transplanted outside is referred to as "harden off." Without hardening off the plants, the plants will be shocked at the sudden temperature and environment change, which may result in death. To harden off plants, place the trays outside in a protected area each day (partial shade, wind protected). Watch for any wilt, if wilting occurs, bring the plants back inside immediately. Gradually add more time each day until ready to plant out. Oftentimes people think that the cold is what is rough on seedlings. For the most part, as long as the plant is being planted out at it’s ideal growing time, the cold shouldn’t be too big of an issue and low tunnels can also help with that. Heat and wind is what I find fry seedlings when not properly hardened off. Popping a low tunnel of light weight frost cloth can help ease the transplanting process, especially if planting out on warm days or if wind is in the forecast. It just gives them a little cocoon of protection. They still get sunlight and air but also protected from the extremes.


This really got into the nitty gritty on seed starting for a flower farmer! Hopefully this post cleared up a little confusion and has given you the boost of confidence you needed to conquer starting flowers from seed! There are a lot of moving pieces, at least it may seem that way, the reality is: the flowers want to grow. They are survivors and it is amazing what they can handle! Don’t be afraid to experiment and customize seed starting to fit your flower farming business. Flower farming is not one size fits all, just remember to take notes to leave yourself a breadcrumb trail for next season!
Happy Seed Sowing!
We are looking forward to helping you hand blooms soon! - Jessica & Graham
Some of our favorite resources and products:
Seed Suppliers:
I am a huge fan girl of Johnny Seeds. Their printed and online catalogs are filled with information on growing, harvesting and post-harvest treatment of the plants. With their seed trials, the seed packets even come with germination rates which is pretty sweet to input into a fancy spreadsheet to be even more lean in seed sowing! Family owned and seed production in Maine, I cannot say enough amazing things about this company. Plus, they are offering more and more organic non-GMO seeds. High quality and great service, their online shop will get ya in the winter months for sure!
You have to bust out the old school pen and paper for this one. Okay, actually, they’ve upped their game and now you can get fancy and put your order in their template using Adobe. You can always pick up a phone and call them to place an order (who even uses a phone as an actual phone anymore though?!). Seriously though, this is the go to seed supplier for professional cut flower growers. You will get good at knowing Latin names! The best bang for you buck so to speak, quality seeds and tons of varieties to choose from. Google image search will be you new BFF as you pour through this catalog that has zero photos. But hey, who needs fancy with these awesome prices? Another thing: you will need the handy dandy book mentioned below because those seed packets come with zero growing information on the packet.
If I don’t mention them, am I really a flower farmer? Let’s be honest, Floret Flower Farm is the gateway drug into the flower farming fantasy. They have unusual varieties and gorgeous colors to boot. If you are going to keep up with the trends in the flower farming world: you gotta keep up with Floret. Their seeds are a little pricier and in that sense are aimed more for hobbyists but trials and saving seed can make the prices a little easier to swallow. Another thing about Floret, be ready to click like a mad person because they sell out FAST! Like in minutes! Not seed related but I do love their cut flower planner. I have gained quite a collection of them over the years! Tons of writing space, there are some tips that may be helpful but really… I love all the writing space. Link to purchase on Amazon is provided below but it is also available to purchase on their website.
Books:
Not necessarily a book but close enough: join Growing for Market. A ton of information for such a little price! Once you join, you can go back through the archived issues as well!
Along with those, the two books below are what kickstarted our book collection and knowledge building. The third book I literally just got in the mail and already can see what a gem of a book it is to have in any flower lovers collection! Affiliate links below.