Top 5 reliable varieties to grow for the flower farmer
Disclaimer: This site contains affiliate links. Your purchases through these links help us bring you more valuable flower farming content. Thank you for your support!
Over the years I have come to find certain varieties to be absolute lifesavers in the field. These varieties may not be as flashy as dahlias or ranunculus but they have earned their keep.
Here in Northern Nevada, our weather can be… well unstable to say the least. We are located in the valley below Lake Tahoe and boy can temps change quick and winds come ripping down. In a single day, we can literally go from winter to summer. Even in summer, we can still see everyday temperature swings of forty plus degrees Fahrenheit difference between the high and low.
All these factors create challenges: from shutting cool loving crops down too soon while simultaneously delaying our warm loving crops. If I could, I’d just have my entire field under a giant dome… but I can’t. Believe it or not though, there are some cultivars that actually have handled what nature throws at them pretty well. They have saved us time and time again!
They’re reliable… I appreciate reliable.
Today, I would like to share with you my top five goldilock varieties that keep churning out the blooms all season long, along with some tips and tricks with growing and using them!


Ammi
First I need to give a shout out to to Ammi!
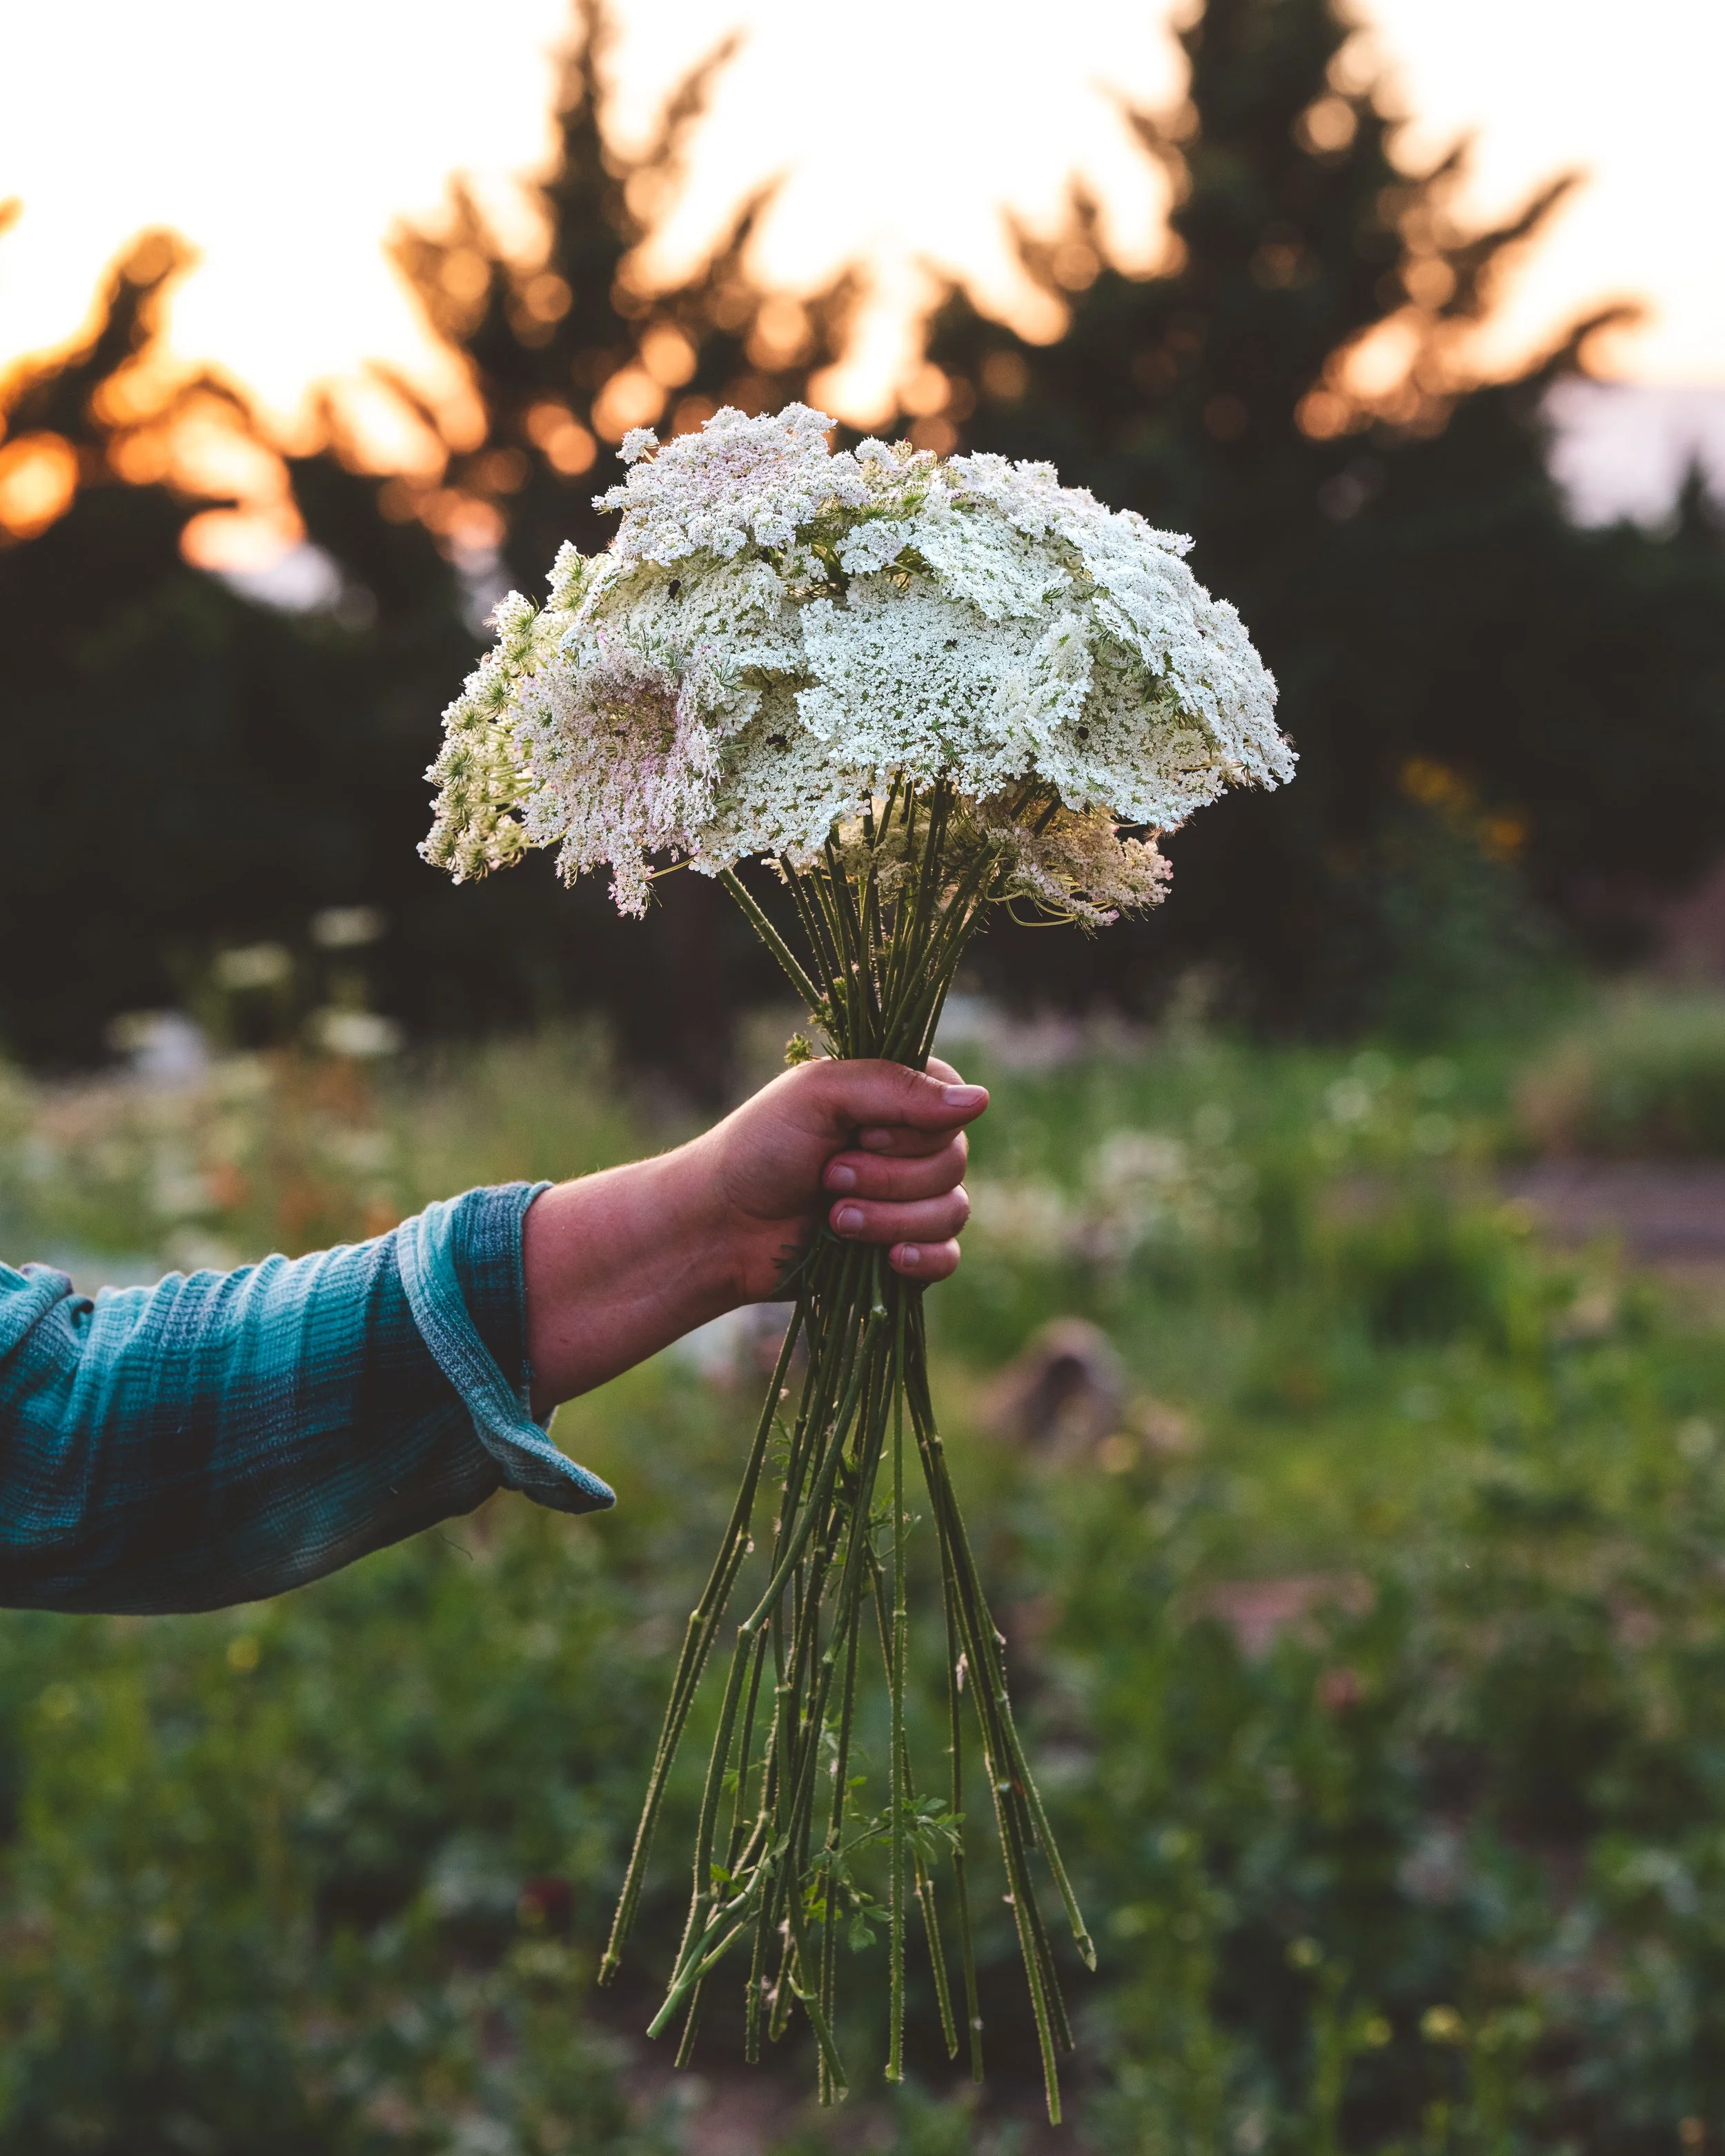
Ammi is also known as False Queen Anne’s Lace or flowering carrot. The varieties that I am going to name aren’t all technically from the same family but all have similar qualities and usefulness in bouquet making and design work. Ammi grows naturally and bountifully in our area but so does poison hemlock. It may be tempting to forage this variety rather than growing yourself but it really isn’t worth putting yourself at risk, nor your customers. It really isn’t much more effort to grow it and it is worth the growing space plus all the little native bees and ladybirds will love you forever! I credit having ammi early in the growing season in providing a thriving ecosystem for many beneficial predators all season long.
From mid to late spring until frost, we have some form of ammi growing in the field. It fills a bouquet up fast, gives that “wild flower” vibe that is highly demanded by our customers, and is relatively fuss free to grow!
How to grow
Even though the seed packet will suggest to direct sow these guys, due to the long tap root not loving to be disturbed, we start our first couple of successions in the propagation house.
We start ammi in deep cells such as ones used from propagating berries or saplings. We have also had great success starting ammi in two inch soil blocks. Choose a container or method that can accommodate the long tap root and keep the seedling from getting root bound. The ammi seeds are sown four to six weeks before we want to plant them out, in our area the soonest we want to do that is about mid to late March. Basically, around the spring solstice.
When you are sowing the seeds, don’t cover with soil since light aides germination, similar to carrots. We do cover with a sprinkling of vermiculite since that helps to keep the soil moist for better germination. We grow two seeds per cell, pinching out the weaker plant. Ammi is also a good candidate for direct winter sowing, if you don’t have the space available to start as transplants. If you decide to winter sow, you will want to make sure to keep the seeds moist. Be prepared to sow again if you get tons of rain which can wash the seeds away. Label clearly where you have sown the seeds. With winter direct sowing, the sow date won’t give you a great estimation on potential harvest date alone, you will need to check and see when they germinate to get a better idea. Keep notes for your future reference! Winter sown ammi for us usually comes to bloom in late May/ early June.
If you are wanting a head start and are starting ammi as a transplant, the trick is to not shock the transplant by letting them get root bound or by fussing with their roots too much at transplant.
With the first two successions of ammi, we do plant them out under a row cover to allow them to better establish and keep them happily growing. Our springs can be rough, this helps us to start harvesting from the plants Mid-May, weeks before our average last frost date. Usually a micro tunnel with frost cloth is enough for these guys. We grow our ammi 7”x7”. They are not hungry plants, so other than our normal bed prep, we do not give this variety any additional fertilization. We also haven’t experienced pests on ammi, most likely do to it attracting all those wonderful beneficial predators.
There are three varieties of ammi we grow:
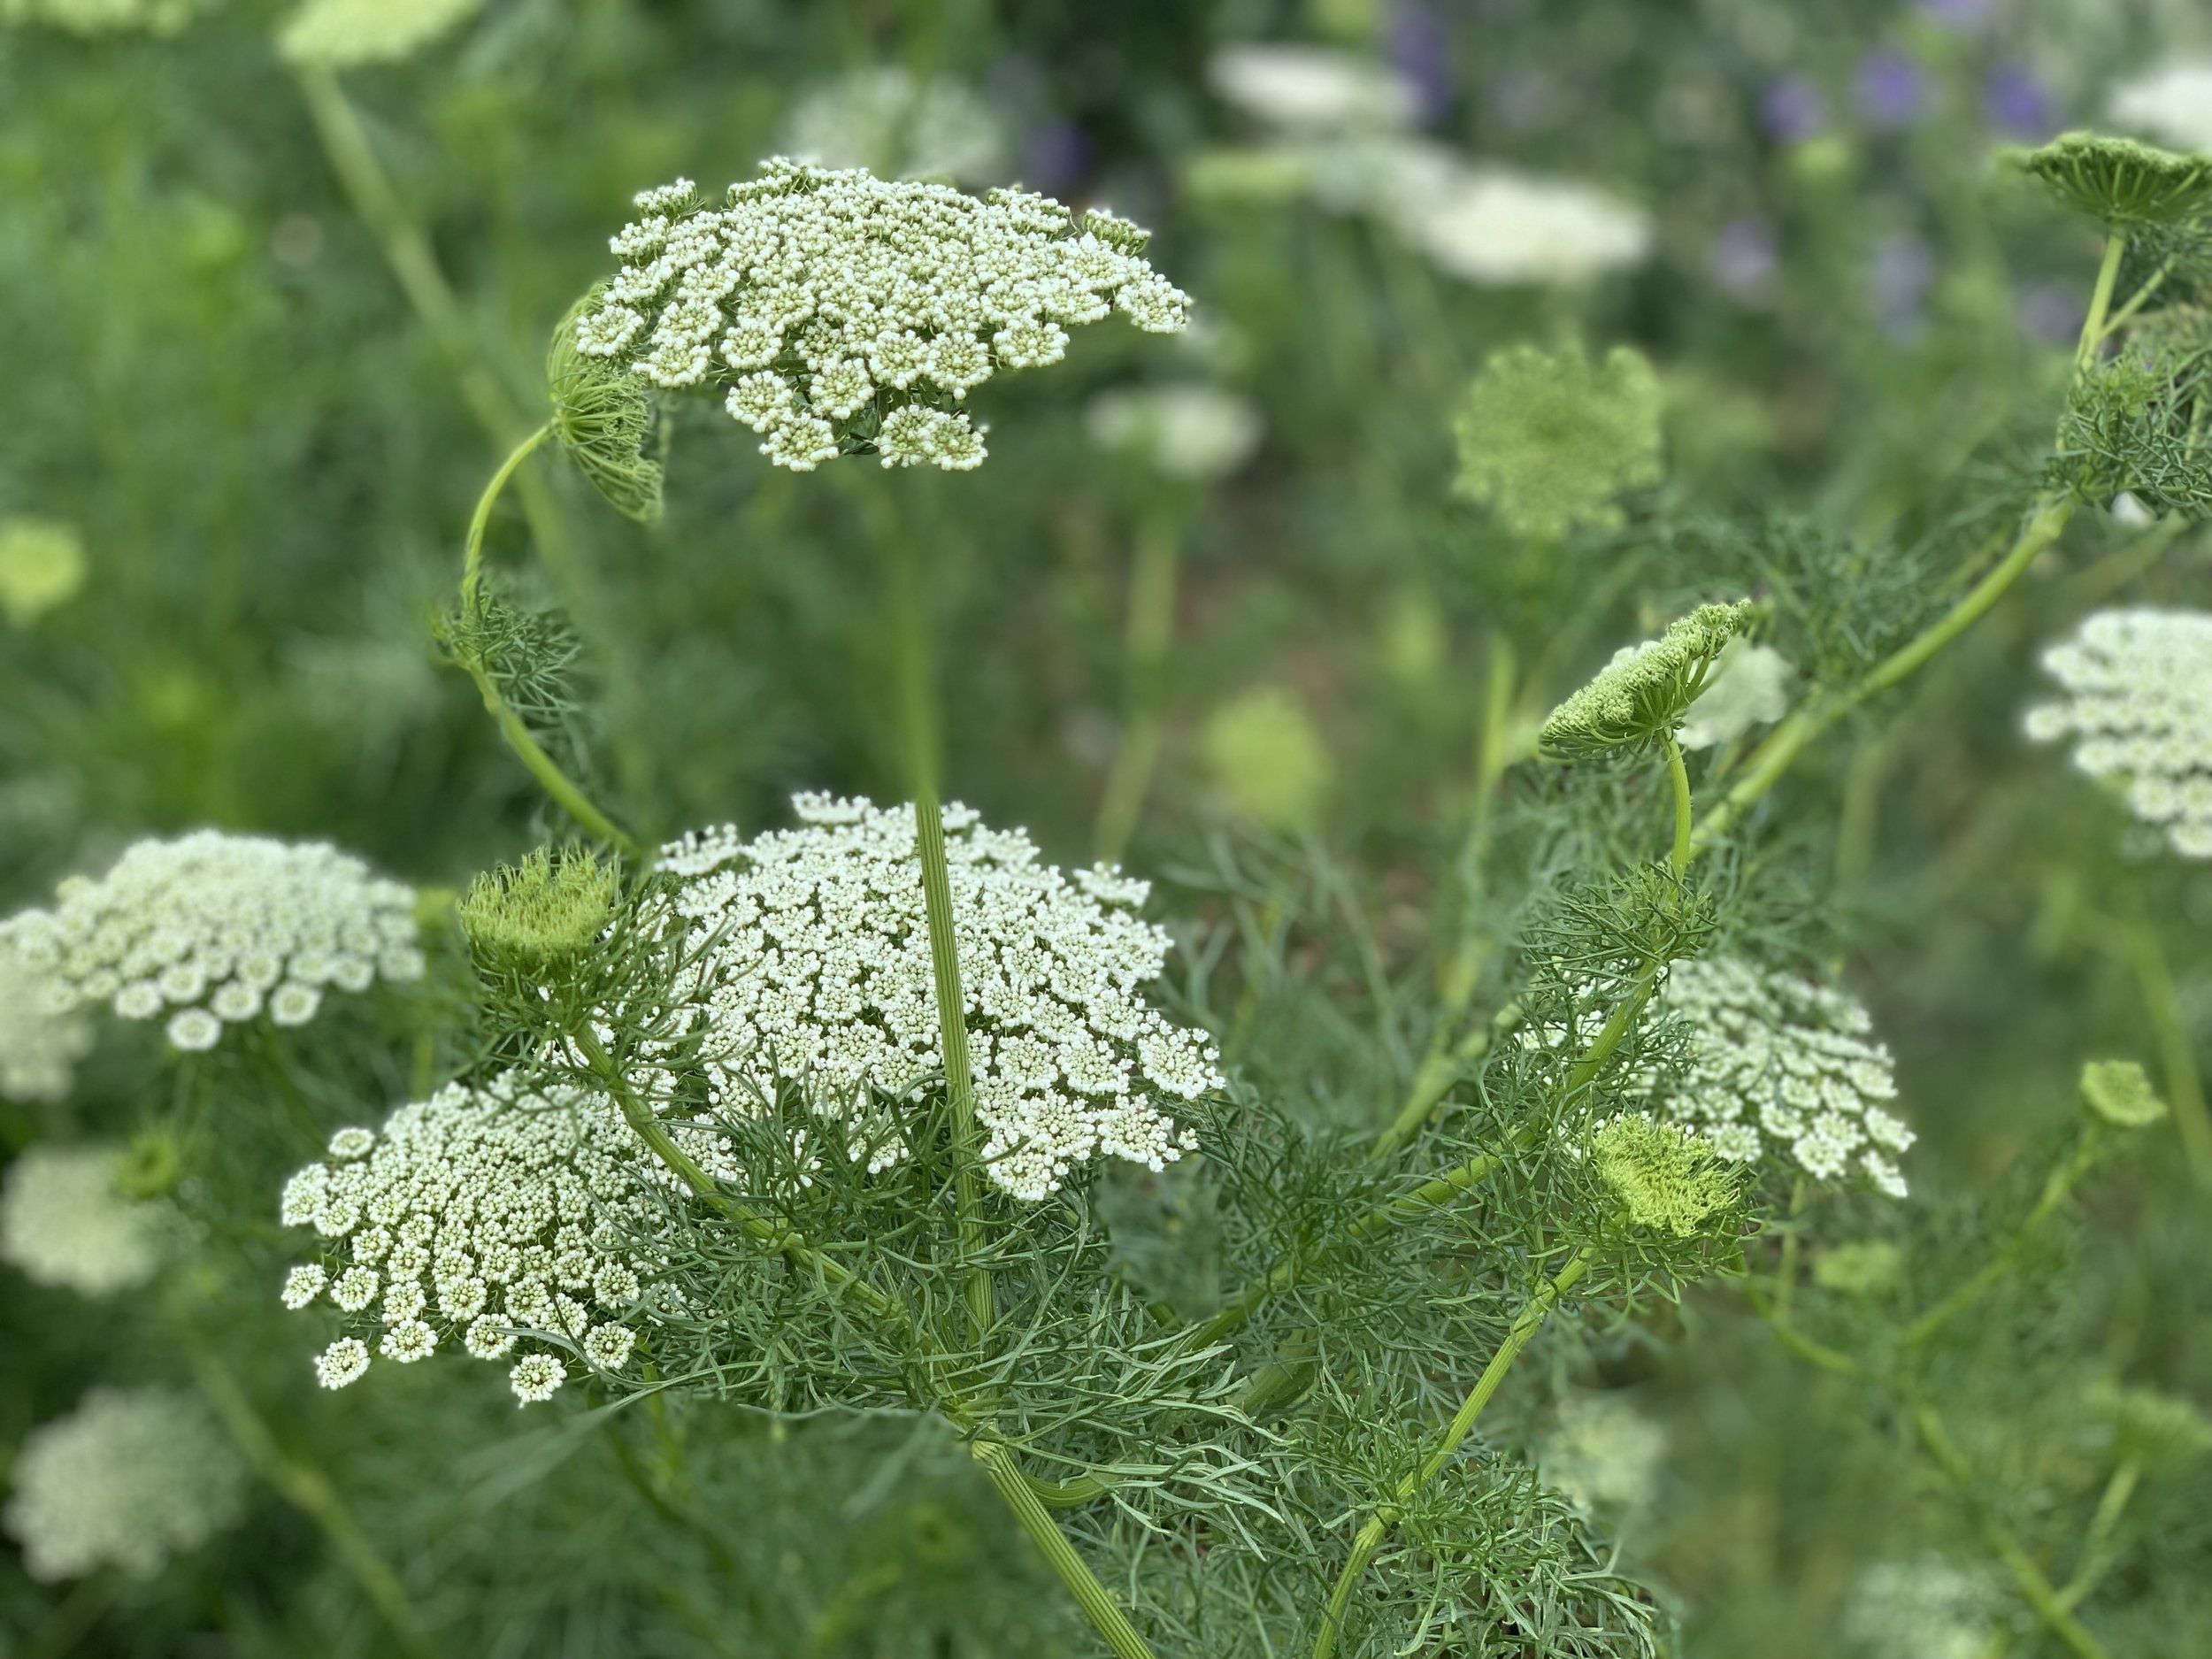
Ammi Majus “Select White”
Ammi majus select white or flowering dill is our cool crop variety for late spring into early summer. We do two successions of this variety, starting the first one the first week in February with the plan of getting them out mid to late March, the following succession is sown three to four weeks after the first one. Ammi majus prefers cooler temps, once summer hits they tend to shoot spindly flower heads on shorter stems.
Ammi Visnaga “Green Mist” & Daucus Carota “Dara”
Come late April/May we direct sow Ammi Visnaga which is known as green mist. This variety appreciates some warmer weather. Depending on palette requests, we will also start sowing Dara daucus carota, which is also known as chocolate lace flower.
We will finish off the growing season with these two varieties, continuing successions until the last week of July since we can experience kill frosts as soon as mid-September or it can get pushed out until late October depending on the weather’s temperament that season.
The Dara comes in drool-worthy colors that our brides and florists can’t get enough of! Ivory, blush and gorgeous mauves. They also produce more manageable flower heads compared to the green mist which is lovely for design work.
Anethum graveolens “Bouquet Dill”
I will do a quick mention on bouquet dill.
Incredibly easy to grow, I’d say even easier and more cold tolerant than the other varieties. Comes in a beautiful yellow. There is such a huge downside though: the smell.
Personally, I love pickles but I don’t want a bouquet smelling as such… just doesn’t do it for me. When our customers weren’t thrilled either, it got axed real quick! The smell of dill mixed with the smell of sweet peas has to be one of the worst smells in the world! You’ve been warned: beautiful, easy to grow but the smell can be too much for customers and perhaps yourself. Plus, if you let it go to seed, it becomes super invasive so make sure you plant some pickling cucumbers to go with!
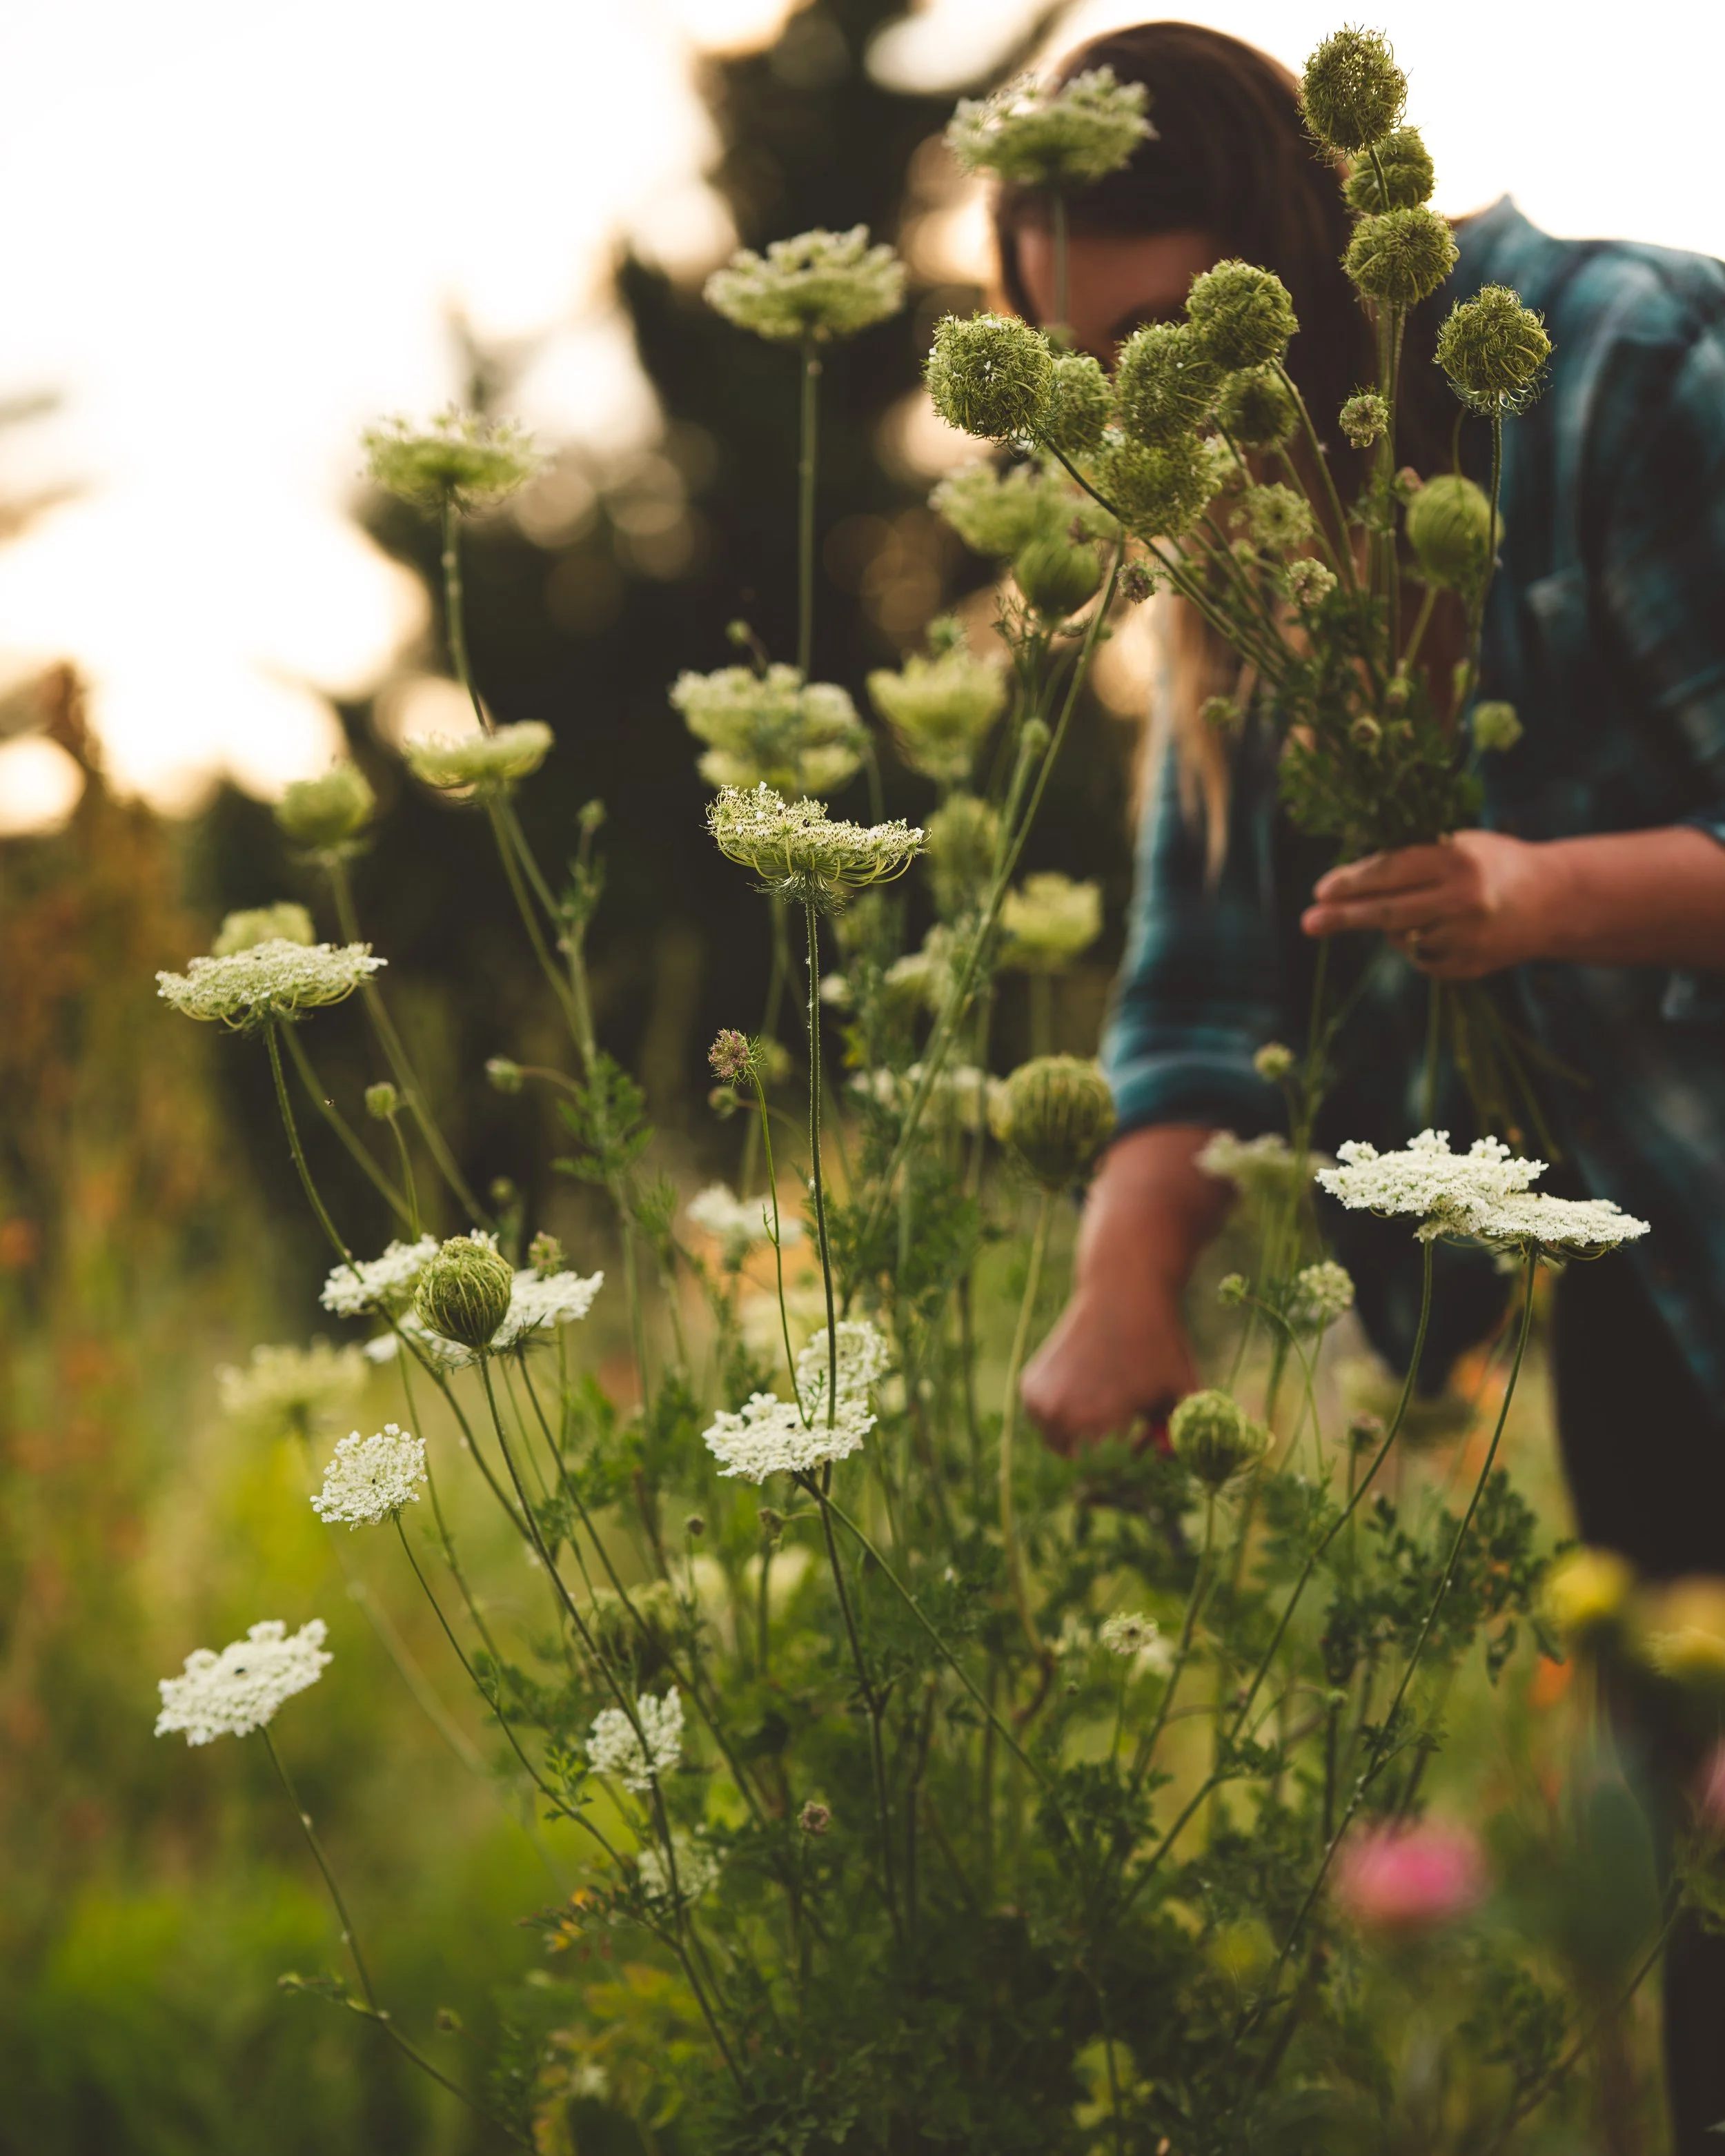
Harvesting
Ammi is best harvested early in the morning. I have experienced, once these guys wilt they become difficult to recover. The stage in which you harvest the flowers is also important: too early it will wilt, too late it will shatter. Harvest once the flowers are flat. If you miss the boat on harvesting at the appropriate stage for the fresh flower, the seed pods add a fun textural element too! Perfect for those bohemian brides! Make sure to place immediately in a sanitized bucket with fresh water and a CVBN tablet. Place in cooler or in a cool dark location. Allow to hydrate over night before using. For longer lasting bouquets, move within three days. Vase life is about seven days.
Design
Ammi is a versatile flower! Most commonly, we use it as a filler or disk component but it is large enough that it could be a focal flower for a more “natural” bouquet. In bouquets and design work, I like to use it as a “shelf” or backdrop to support my more premium flowers.


Monarda
Monarda, commonly known as Bee Balm, is another one of those unsung heroes. Come June, when we are straddling in between the spring flowers and the summer flowers, we get bee balm! It is a little slower to get going but it will give you continuous flushes throughout the season. A fun variety that looks like something out of a Dr. Seuss book, long vase life and a pleasing scent.
Growing
Bee balm can be direct sown but it is a slower germinator and grower so if you can get them going as transplants you’ll thank yourself. We sow them about ten weeks before we want to plant them out. Our approach to many of our spring crops is to start them in smaller celled propagation trays such as 200s or 128s then bump them up to usually 72s to get a nice sized plant to tuck into the field. We take this approach with bee balm as well.
Usually, I do two to three successions of bee balm three to four weeks apart each, which stay in production all season long for us. The first planting is planted under a double low tunnel in mid to late March. Since it is a crop that seems to take it’s sweet time, we prefer to get them started as earlier in the season as possible and by April, we are done seed sowing bee balm. We space bee balm 7”x7”.
Bee balm is fairly cold hardy and can also be fall planted.
There are many varieties of bee balm to choose from. We personally grow: monarda citriodora “Lemon Mint”, monarda hybrida “Lambada” and monarda bergamo “Bee Balm Bergamo”. All fairly similar with slight changes in the tone of purple and scent. Some darker some more lavender. Some more citrusy and others more musky in scent.
Harvesting
Bee balm is best harvested either early in the morning or in the evening. It may wilt if in the sun too long after harvest but if placed in a cooler, they will perk up immediately. Harvest when flowers are purple, harvested too early of a stage will result in wilting that won’t recover. Much like the ammi, harvest and place in a sanitized bucket with fresh water and CVBN tablet. Place in cooler or a cool dark location, all to harvest minimally over night. Move for longer lasting bouquets within three days after harvest. Vase life is one week up to ten days.
Design
We use bee balm mainly as a spike component, which helps the eyes move throughout the floral design and brings interest of varying levels of height. Unless we have a bride wanting lavender, we mostly use bee balm for our mixed bouquets.


Scabiosa
Scabiosa is one of the first varieties I grew when I launched into flower farming. I had seen the common lavender-blue colored ones as perennial flowers but once I saw the other colors and forms: I knew I needed to grow this flower! Lacy, delicate and airy, I was smitten from the beginning.
Growing
Scabiosa is easily direct sown once the soil is workable in spring. Let them go to seed and the next season you will see them everywhere but don’t get to excited, they typically revert back to white. As with all the other crops, I do prefer to start them as transplants. When selecting which sized cells to start a crop in, looking at the size of the seed usually helps in determine the appropriate one. Scabiosa have a decent size seed, I don’t start them in anything smaller than a 128s, but usually opting for 72s. I have also successfully grown them in the smaller soil blocks. Scabiosa are quick germinators, start them four to six weeks before wanting to plant out or plan on bumping them up.
Scabiosas can easily become tangled wrecks, horizontal trellising is recommended. With scabiosa, I prefer to play the game of multiple successions and either hacking the previous successions to the ground or taking them out completely. You will get premium flowers for about three weeks, after which the stems get more spindly, flower heads diminish in size and they go to seed a lot faster. Harvesting the spindly stems can become tedious, it’s best to have continuous successions going. I sow in three week intervals until late May/ early June. Scabiosa are fairly cold hardy and can be fall planted in most growing zones. We space all our scabiosa 7”x7”. In the early stages of active growth, they appreciate a some foliar fertilizer such as fish emulsion and kelp.
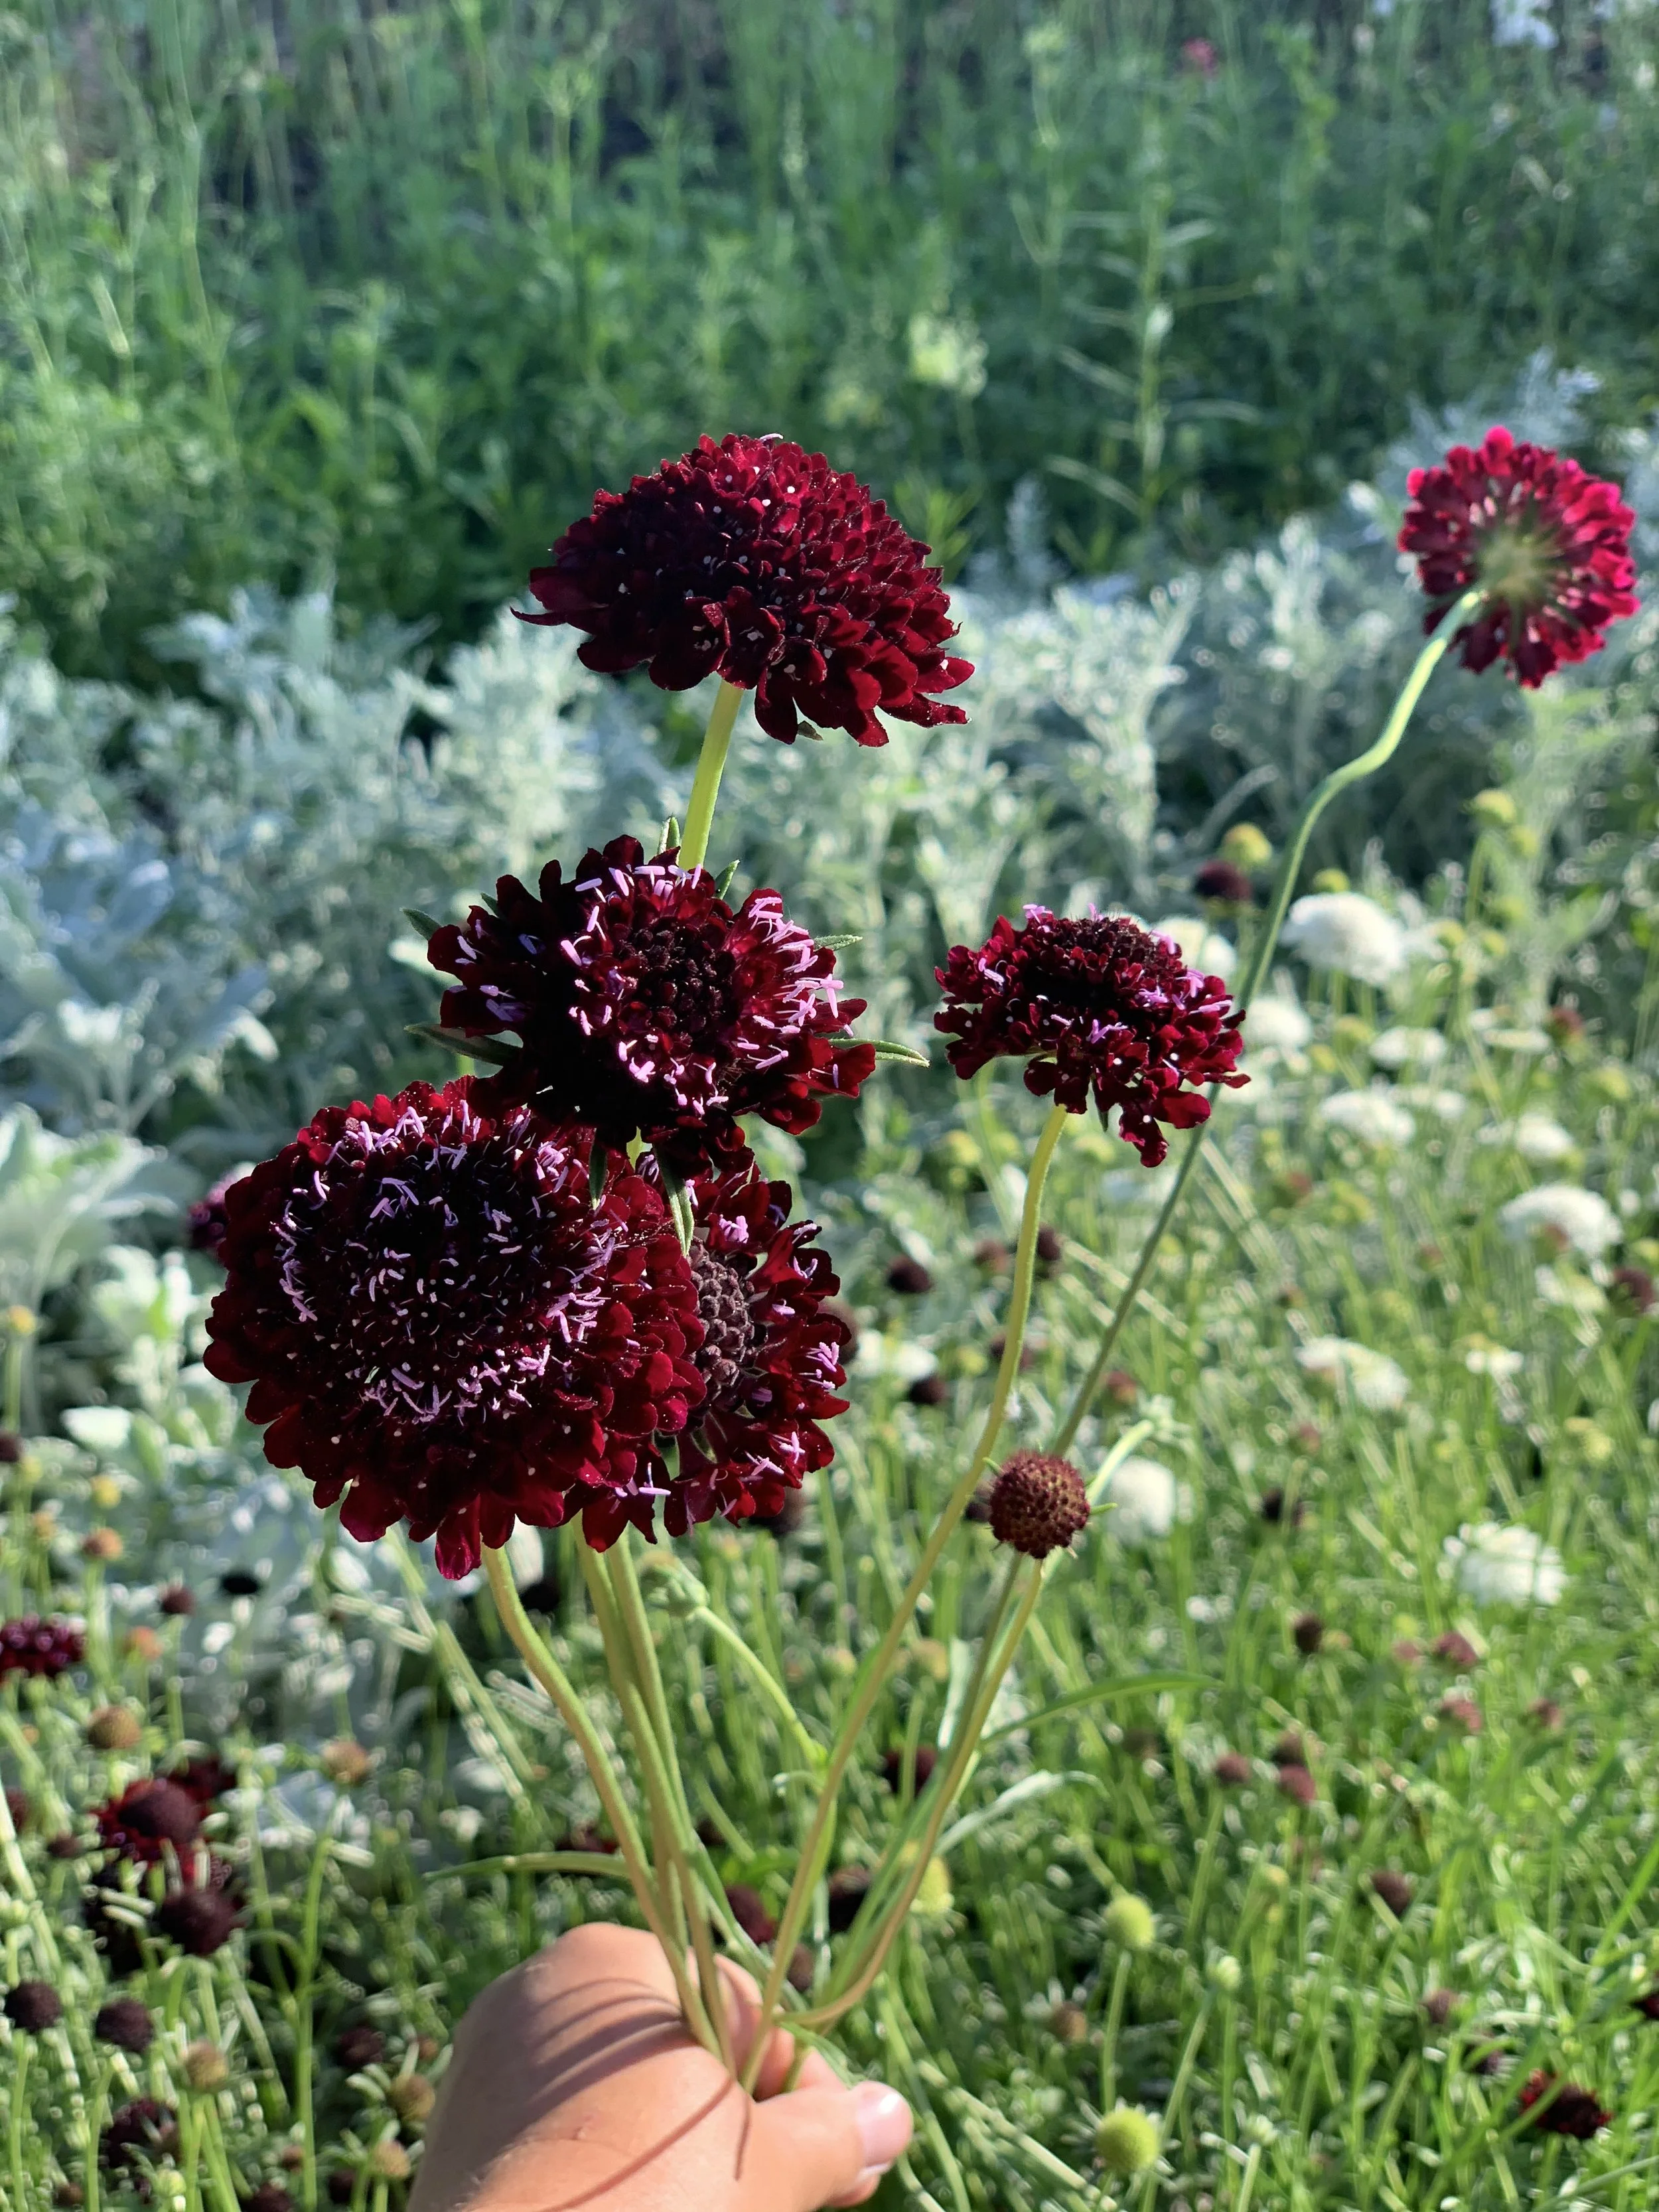
Scabiosa atropurpurea
We grow a majority Scabiosa atropurpurea which come in many wonderful colors from fiery red to moody burgundy, creamy beige and cheery salmon. We also grow a ton of white, not because the white is incredibly special but because well… weddings!
Scabiosa caucasica
Another variety I absolutely love for wedding work is scabiosa caucasica. The Fama white is a special white scabiosa! Large flower heads with a slightly more open form that I use similarly as I would Iceland poppies in design work. Bonus! scabiosa Caucasia are also perennials! The only downside is that they aren’t quite as prolific as the annual varieties but they do keep trucking on all season long as long as you harvest the plant hard. The seed heads are really fun in design work as well, I almost prefer them to our next variety.
Scabiosa stellata
This variety isn’t grown for the flower but rather it’s seed head. It’s known as “Starflower” or “Paper Moon Flower.” It sold me as a paper moon flower. The stems of this variety can be a little shorter but the seed heads are incredibly fun to use in design work such as boutonnieres or floral combs. It is also fun to incorporate into bouquets or other floral designs. With Scabiosa stellate, we change up the succession intervals compared to the previous two scabiosas. We succession sow scabies stellata about every two weeks.
Honorable mention…
There are some other varieties of scabiosa, such as the Scoop series, but are patent protected and only available as plugs. We haven’t invested in those varieties for our operation since we’re happy with the more inexpensive varieties we have been growing.
Harvesting
As mentioned, scabiosa once past it’s peak can be tedious to harvest from, and time is money. Harvest scabiosa in the cooler parts of the day once the flowers are partially to fully open. If fully closed, wilting may occur but the heads can be used in design work with cold glue at that “button” stage. For scabiosa stellate, harvest the seed heads when the inner part of the seeds are just beginning to turn black. If scabiosa stellata is harvested too late of a stage, it is prone to shatter. Harvest into a sanitized bucket with fresh water with a CVBN. Place in cooler or dark cool room. Allow to hydrate overnight and move within two days. Vase life is about seven days for fresh scabiosa flowers, for stellata can be used fresh or dried.
Design
Scabiosa can be used as a disk design component or as a airy one. Scabiosa is best used for event work since they are a little smaller making them lest impactful for mixed bouquets. Excellent in bud vases!


Dusty Miller
Dusty miller isn’t snazzy, in fact it often falls into the background but it can surely tie a design together! Foliage is always a battle for us to have enough of. We live in the high desert after all! Dusty miller comes to the rescue each June and sometimes even before that I snip leaves off a plant to use for a floral crown or boutonniere. Long after all the other crops in our field are done in by the frost, dusty miller is still looking wonderful to be used for fall weddings and holiday offerings!
Growing
Dusty miller can be grown as an annual but it can also be grown as a perennial. We grow dusty miller as a perennial, only replacing the ones our naughty dog dug up in search of mice! Information may say that dusty miller is only cold hardy down to zone eight but we have successfully overwintered it in our zone 6b without any problems (minus the dog).
Dusty miller is a slower grower, it seems like the plants aren’t doing anything until all of a sudden one day: they’re grown up! We start them in 200s or 128s, surface sow with a light dusting of vermiculite since light aides germination. Sow the seeds ten to even twelve weeks before you are planning on transplanting them out into the field. To save space in the propagation house, we usually start them in 128s or 200s if we’re really tight on space, dusty miller also does well in the mini soil blocks.
When we are growing a fresh batch of dusty miller, I like to get them going January/early February since they are so slow. Dusty miller is relatively tough and can be planted out fairly early in the season, we aim to get them out in March or if we don’t want to cover the transplants… April. You can success sow dusty miller but it really isn’t necessary. One huge batch that you can keep hacking on is all you need! Seriously, dusty miller deserves it’s own row! We grow “New Look” and “Candicans” varieties. To encourage the plants to shoot out longer stems, we plant them 7”x7”.
Harvesting
Dusty miller tends to be floppy, its the nature of the foliage! As with most crops, dusty miller is best harvested in the cooler parts of the day but it is also one of the varieties that if I have to… I’ll harvest in the heat of the day then pop them in the cooler to hydrate and perk up. Dusty miller is tough! Harvest when stem is at the length you desire. Dusty miller is also great dried. Harvest into a sanitized bucket with fresh water and a CVBN tablet, allow to hydrate overnight or minimally a few hours before using. Dusty miller has an incredible vase life, ten days plus though we have even had it root in water before! Move three to five days after harvest.
Design
Dusty miller is a great foliage/filler, providing a nice backdrop for the more premium florals. I will say, I don’t think I’ll ever get tired of dusty miller with salmon dahlias! As mentioned, dusty miller can be floppy. In a floral arrangement it is a nice base of foliage to use, to better embrace its floppy nature. In a bouquet, it may be tempting to use as a collar but dusty miller is best held up by other components, more in the center, to keep it standing straight.

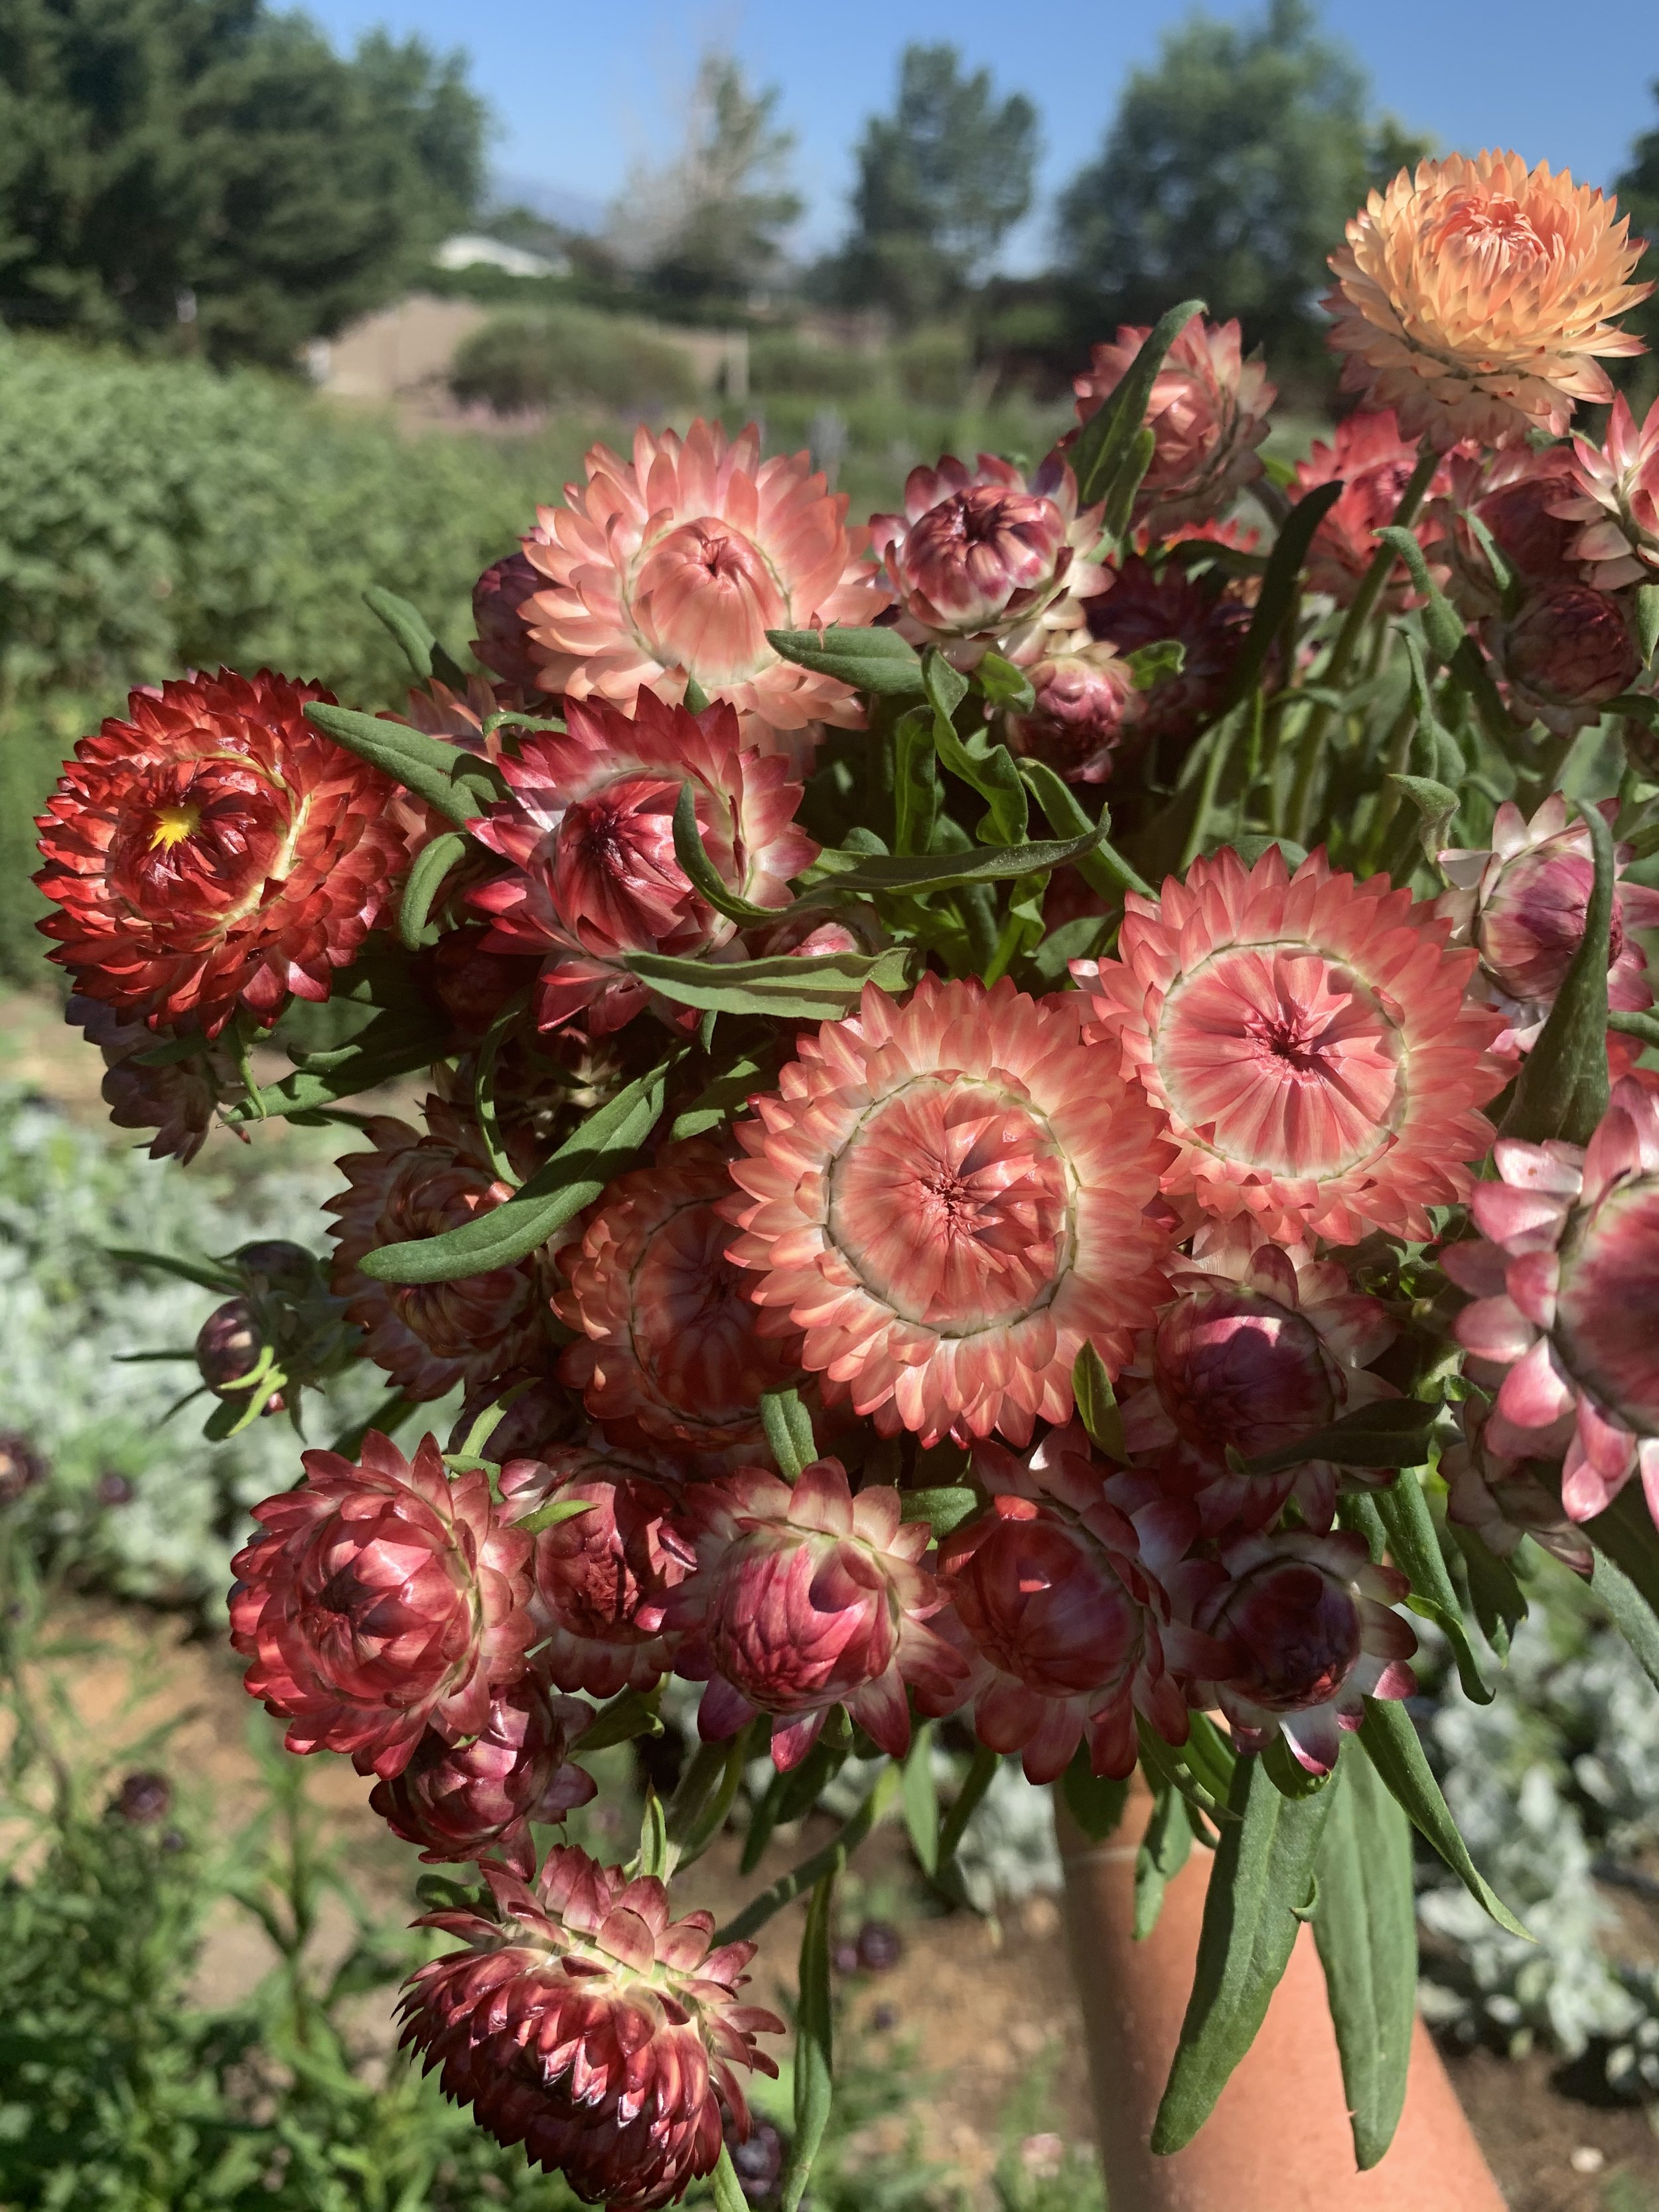

Strawflower
I love, love, love strawflower! As do our customers! If there is one flower I can find a way to use in almost any design it would be the strawflower. Locally grown strawflowers are even better, the flower heads and stems are more useable rather than from a wholesaler since they seem huge and old. Fresh or dried, it is an amazing and versatile flower. Texturally, it is a blast to touch and with its satisfying crinkle brings smiles. Customers can’t believe it’s real!
Growing
Getting strawflower growing can be tricky. As with most seeds, I’ll buy a huge amount and use for years. However, don’t do that with strawflower. Fresh seeds each year is best since the germination tends to greatly decline even after one year. Light aides germinations so surface sow the seeds with a light dusting of vermiculite. Strawflower can be slow to germinate, just be patient. I like to start strawflower in 128s or 72s in late January/early February to plant out either late March or early April. Strawflower is a little cold hardy but does best when planted under a double low tunnel if planting out before last frost. Strawflowers will produce throughout the season but having two to three successions is best, since they take a little longer to rebound after a hard harvest. Having multiple successions growing at once gives us nice flushes to harvest from weekly. We grow our strawflower 7”x7” and they do benefit from foliar fertilization throughout the growing season. Strawflower can benefit from horizontal or corral trellising.
Harvest
The nice part about strawflower is: you can harvest the flower heads at any stage you desire. To use fresh and avoid wilty stems, harvest strawflower in the cool of the day and do the wiggle test, such as you do with zinnias. Going about half way down the stem, give a light wiggle. If the flower head stays firm, it’s ready for harvest. If the flower head flops, it’s too early. The flower is also ready to harvest when you see three layers of petals unfurled. I’ve harvested them when the center is showing, just know that it can turn brown and even drop seed with dandelion-like fluff. place the harvested flowers into a sanitized bucket with fresh water and a CVBN tablet, tuck into the cooler or in a cool dark location and allow to hydrate overnight before use. Move strawflowers within three days of harvest. As a fresh flower, expect a vase life of seven to ten days. To dry strawflower, hang upside down in a cool dark location.
Design
For bouquets and floral arrangements, we use strawflower as a disk design component. For smaller personals, it can easily be the focal! If using in floral crowns or boutonnieres, wire or cold glue the flower head. A fun part about strawflowers is that the flowers open during the warmth of the day and close when it’s cold or dark. They continue this pattern long after harvesting which puts on quite a show for customers!
There’s my top five crops that save me time and time again over the season! Each season I find myself wishing I gave them more garden space! Flower farming comes with ups and downs, we are working with nature after all, having these crops help tremendously. From late spring to kill frost and even beyond, I don’t know what I would do without them! You can find all the varieties mentioned at Johnny Select Seeds, my personal go-to for these varieties, especially the strawflowers. I’m adding the new raspberry color and I can hardly wait! Tell me in the comments below, are you going to try any of these varieties or are they already keepers in your cut flower garden?
Until next time, we are looking forward to helping you hand blooms soon!
- Jessica & Graham
Join us for our free 2024 flower farming challenge!
Are you an aspiring flower farmer or you have been flower farming and just finding yourself wanting to take you flower farming business to the next level?
Join us for our FREE Flower Farming Challenge for the 2024 season! We will be covering all the nitty gritty from the farming side to designing and business. Each Tuesday we will present a new challenge along with all the tools you need via your inbox. All you need to do is join our Flower Farmer Newsletter, sign up right below!